
Viz World Classic User Guide
Version 23.0 | Published December 12, 2023 ©
Paint and Image Processing Tools
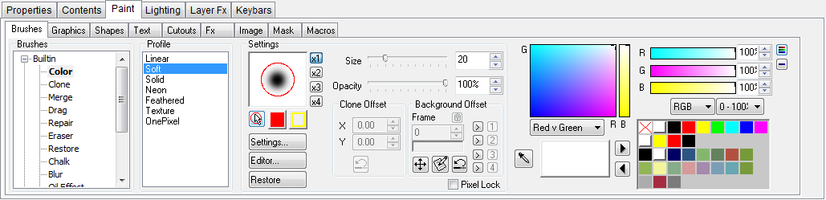
Viz World Classic provides a wide range of paint and image processing tools divided into eight categories.
The Paint panel provides a selection of options for each category of paint and image processing tools. You can select a category by clicking the icon to the left of the Viewer, or by clicking the corresponding tab on the Paint panel. The following table describes the functions available within each category of paint and image processing tools:
-
 Brushes: Provides a selection of brushes to allow you to paint directly onto an image or movie, or its mask.
 -
 Graphics: Allows you to paint geometric shapes onto an image or movie, or its mask.
 -
 Shapes: Allows you to add drawings to the project by creating editable vector shapes.
 -
 Text: Allows you to add text to an image or movie, or to the mask.
 -
 Cutouts: Allows you to cut out part of an image to create a floating image overlay called a cutout.
 -
 Fx: Provides a range of paint effects for color correction, filtering, keying, or procedural effects.
 -
 Image: Provides image transformations.
 -
 Mask: Provides a range of options for extracting a mask from an image based on the parameters of the image.
 -
 Macros: Allows you to record a series of actions, and then replay them on several frames in a movie or in different projects.
This section contains information on the following topics:
Paint Controls
The paint controls, displayed to the right of each of the Paint panels, allow you to specify how operations using the brushes, shapes, and text affect the current image and its mask:
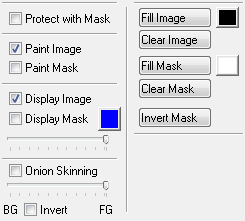
The mask can be used to protect the image from changes when painting on the image using the brushes or graphics tools, and sticking shapes or text on the image.
At any pixel where the mask is at full density, the image is not affected by any operation. At pixels where the mask is completely transparent, operations are applied in full. Intermediate values result in a blend between the original image color and the changes.
To Protect the Image with the Mask
Select Protect with mask.
To Specify What is Affected by Painting Operations
Painting operations can be applied either to the image or to the mask or to both simultaneously: Select Paint Image and/or Paint Mask to affect the image and/or mask respectively.
To Specify Whether the Image or Mask Are Displayed in the Viewer
-
Select Display Image and/or Display Mask to display the image and/or mask respectively.
-
Use the slider below the Display Mask checkbox to change the opacity of the mask displayed on the screen.
Note: This only affects the screen display, not the actual density of the stored mask.
To Use Onion Skinning
The Onion Skinning control allows you to reduce the displayed opacity of the foreground image in the Viewer to allow you to see the background while working on the foreground. A typical use is in wire removal when merging portions of a background image to replace unwanted elements in the foreground.
-
In Composite display mode, the background is the composite of the other layers.
-
In the Single Layer display mode, you can specify which layer to use as the background: Click the eye-dropper icon in the Layers list to indicate which layer you want to use as a background.
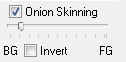
Selecting Invert allows you to invert the background, which is useful for highlighting the differences between two very similar frames.
Note: This only affects the display, not the stored image.
To Fill or Clear the Image or Mask or Invert the Mask
The Fill Image and Fill Mask buttons allow you to fill the image or mask with a solid color. You can set the fill color by selecting a color and then clicking in the square to the right of the Fill Image or Fill Mask button.
The Clear Image and Clear Mask buttons clear the image or mask to transparent, and the Invert Mask button inverts the mask level at each point.
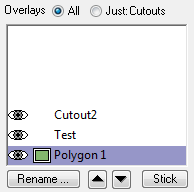
Overlays
The Shapes, Text, and Cutouts panels on the Paint panel allow you to create overlays as an intermediate step in constructing artwork. They are available to any of the image and movie layers in your project, and at any stage you can paint them onto an image or its mask; this is called sticking the overlays.
For more information about creating shape overlays see Working with Shapes.
To Show or Hide an Overlay
Click the eye icon to the left of the shape name in the Overlay list. The icon changes to show whether the shape is hidden:
-
 Shown
Shown -
 Hidden
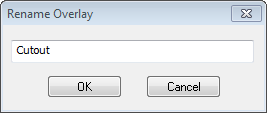
To Rename an Overlay
-
Click the Rename... button below the Overlay list.
-
Enter a name for the overlay and click the OK button:
To Change the Order of Shapes in the Overlay List
Either:
-
Select the overlay you want to move.
-
Click the up or down button below the Overlay list.
Or:
-
Click the overlay you want to move with the right mouse button and select one of the Ordering options from the appearing context menu.
Or:
-
Drag the shape to the new position in the Overlay list.
To Delete an Overlay
Either:
-
Select the overlay you want to delete and press the BACKSPACE button.
Or:
-
Click the overlay you want to delete with the right mouse button and click Remove from the appearing context menu.
To Copy an Overlay
You can cut, copy, and paste Overlays between layers or between projects. You can also export one or more shapes, and then import them into another layer or another project, using the Export... and Import... options from the Overlay list’s context menu.
Undo and Restore Options for Painting
Viz World Classic allows you to undo brush strokes while painting, and you can also restore the image or its mask to the last saved version or to the original frame.
To Restore the Image or Mask
On the Layer menu, click Restore Image or Restore Mask, then click To Last Saved or To Original Frame on the submenu.
To Select the Paint Undo Options
By default, Viz World Classic allows you to undo each brush stroke while painting, to a limited undo depth, to minimize the amount of work you need to redo in the case of a mistake. However this level of undo control is memory intensive, and may cause noticeable delays when painting complex images. Viz World Classic gives you the option of reducing the degree of undo control for greater performance.
-
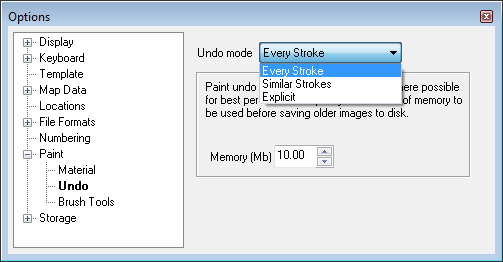
On the View menu, click Options....
-
In the Preferences dialog box select Undo in the Paint section.
The Undo drop-down menu lets you specify the degree of undo control provided. The options are explained as follows:
-
Every Stroke: Undo affects the previous painted stroke.
-
Similar Strokes: Undo affects all strokes made with the same brush and color settings.
-
Explicit: A Backup for Undo button appears in the paint controls, and Viz World Classic stores a snapshot of the painting each time you click it. Selecting Undo restores the previous snapshot.
The Memory setting allows you to allocate more memory to undo, which allows you to increase performance if you have sufficient memory available on your computer.