
Viz World Classic User Guide
Version 23.0 | Published December 12, 2023 ©
Creating Shape Overlays
This section contains information on the following products:
To Create Shape Overlays
-
Select a map layer in the Layers list.
-
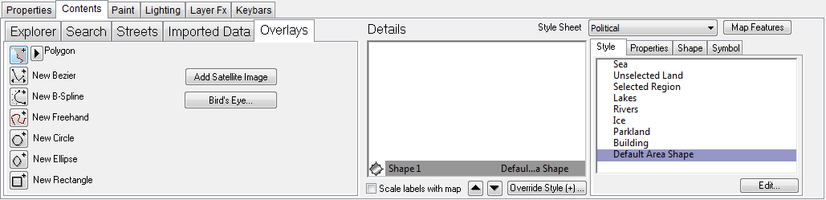
Click the Overlays tab on the Contents panel to display the shape tools. As you add shape overlays they are shown in the Details list on the Contents panel.
To Rename a Shape
-
Select a layer (not a shape layer) in the Layers list.
-
Select a shape from the Details list.
-
Click the Properties tab and edit the Label field.
To Change the Order of Shapes
Either:
-
Select the shape you want to move from the Details list.
-
Click the UP or DOWN arrow button below the Shapes list or Details list.
Or:
-
Right-click the shape you want to move and click one of the Ordering options on the pop-up menu:

Or:
-
Drag the shape to the new position in the Details list.
To Delete a Shape
Select the shape you want to delete and press the BACKSPACE key, or Right-click the shape you want to delete and click Remove from the appearing context menu.
To Copy a Shape
You can cut, copy, and paste shapes between layers or between projects using the Cut, Copy, and Paste options on the Edit menu or the Shapes list or Details list context menu. You can also export one or more shapes, and then import them into another layer or another project, using the Export... and Import... options on the Shapes list or Details list context menu.
To Edit a Shape Overlay
Select the shape you want to edit in the Details list and then use the options on the Shape panel to edit the characteristics of the shape as required.