
Viz World Classic User Guide
Version 23.0 | Published December 12, 2023 ©
Importing an Image or Movie
This section contains information on the following topic and procedures:
To Import an Image or Movie
-
On the Layer menu, point to Add Layer, and then click Image or Movie.
-
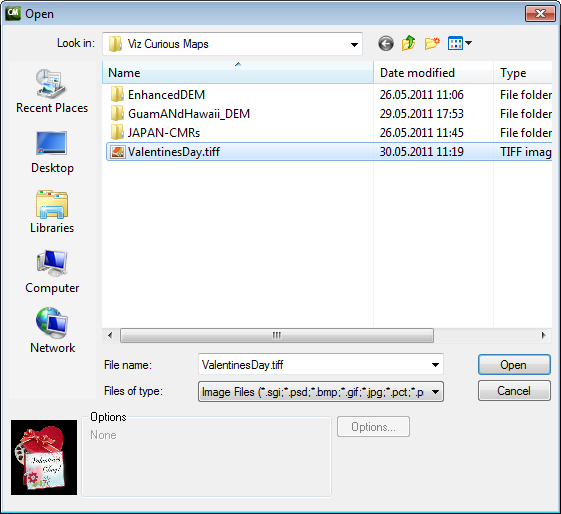
The following dialog box allows you to select an image to import, and optionally preview it.
Note: Viz World Classic 64-bit version currently do not support movies added as layers.
-
-
Select the image or movie file and click the Open button to import it.
-
A new image layer is automatically created for the imported image or movie. Note that each image or movie is contained in a separate layer.
-
If you open a project that uses images, or movies, that are no longer available they are displayed as a red cross.
-
If you import a movie the Match Time Range to Movie dialog box appears. This allows you to adjust the time slider’s range and/or the project’s frame size, rate and duration to match the clip you are importing.
-
If they have moved you can use the Change Image... button on the Contents panel to locate them.
-
To Convert an Image to a CMR Format
-
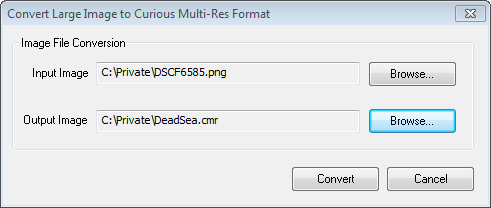
On the Tools menu, click Convert Large Images.... The following dialog box allows you to specify the image to convert, and a filename for the CMR (Curious Multi-Res) image:
-
Browse for and select the input image to be converted.
-
Browse for and select the location for the output image and specify a filename for the CMR image, which can be the same as the input image.
-
Click the Convert button to convert the image to the CMR format. You can then select the CMR image just as you would any other image in Viz World Classic. You can also make a compressed version in the following dialog box.
Note: The Convert Large Images tool makes a copy of the original image; it therefore requires at least as much available disk space as the size of the original image.
To Convert Multiple Geo-referenced Images to a Single CMR Image
The Convert Multiple Images tool allows you to convert a number of adjacent geo-referenced images into a single large image, in CMR (Curious Multi-Res) format.
-
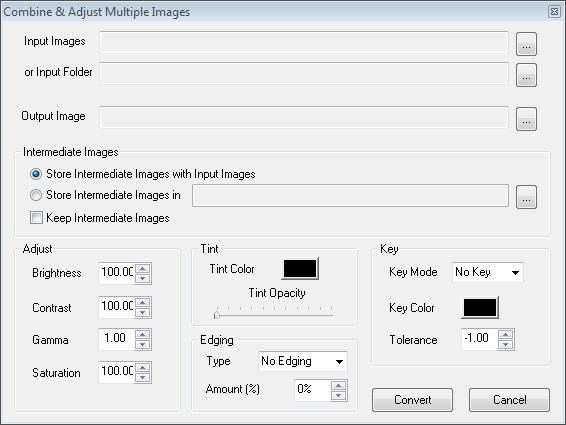
On the Tools menu, click Convert Multiple Images. The Combine & Adjust Multiple Images dialog box allows you to specify the input and output images.
-
Intermediate Images: Allows you to specify where the intermediate CMR files should be stored, and whether they should be kept after the conversion is finished.
-
Adjust, Tint: Provides color correction options to allow you to make the resulting CMR file match other images you are already using.
-
Edging: Uses a soft edge when joining the individual tiles to obscure any seams that may arise.
-
Key: Allows you to key out, or remove from the image, areas of a particular color with a specified tolerance. For example, this allows you to make the sea transparent in the finished CMR image by specifying blue as the key color.
-
Using Geo-referenced Images
Much satellite and aerial photography is now available in a geo-referenced format, which includes the precise location of the image on the Earth’s surface. Viz World Classic supports the following geo-referenced formats:
-
GeoTiff – where the data is embedded in a TIFF file.
-
Tiff World – where the data is in an accompanying text file.
-
Geo-referenced NITF
It is recommended that you convert large geo-referenced images to a CMR format before importing them.
To Add Geo-referenced Images
Either:
-
On the Layer menu, point to Add Layer, and then click Image or Movie.
-
Select the geo-referenced image file.
Note: Viz World Classic 64-bit version currently do not support movies added as layers
Or:
-
Add the image as a texture to an existing style in the Styles Editor.
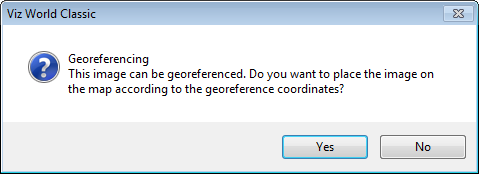
The following dialog box allows you to pin the image to the correct location on the map:
-
Click the Yes button to pin the image using the georeference information.
To Add Satellite Images
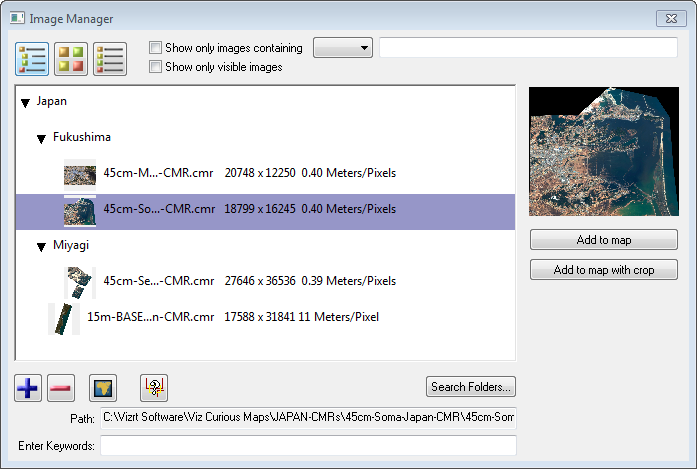
-
Select a map layer.
-
Select the Contents tab and then the Overlays tab.
-
Click the Add Satellite Image button.
-
In the Image Manager click the + button to browse for and add your image/CMR.
-
Click the Add to map button.
-
Close the Image Manager.
Note: The imagery is not a part of the base map (see Working with Maps).