
Viz World Classic User Guide
Version 23.0 | Published December 12, 2023 ©
Painting Onto an Image
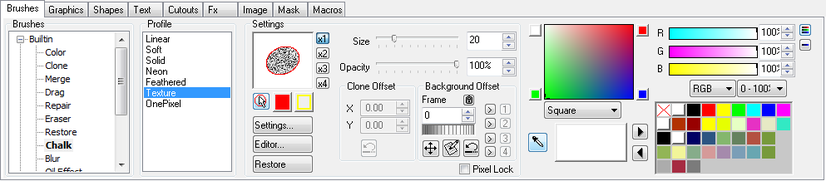
The brushes on the Brushes panel allow you to paint directly onto an image or movie layer. You can paint onto the image, mask, or simultaneously onto both. Alternatively you can protect the image with the mask while you are painting onto the image.
In the case of a movie, painting affects the current frame of the movie, and the mask associated with the current frame, only. Painting can be applied automatically to multiple frames of a movie by recording and playing back a macro; see Automating with Macros.
A brush applies color, an image, or a filter directly onto the image or movie through a profile, which defines its shape.
To Paint the Image or Mask

-
Select the Paint brushes tool. This tool is automatically selected when you display the Brushes panel.
-
Select the brush you want to use in the Brush list.
-
Select a color for painting from the palette on the right of the Brushes panel.

-
Click on the image and drag to paint.
You can adjust the opacity of the paint with the Opacity slider. If you are using a pressure-sensitive input device, such as a tablet, the brush strokes respond to the pressure of your pen.
To Choose How the Mouse Cursor Displays while Painting
You can choose to hide the mouse cursor while painting, or display a colored circle or ellipse indicating the size of the brush:
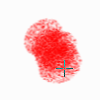
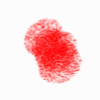
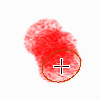
The images above depicts a normal cursor, hidden cursor and outlined cursor.
-
On the View menu, select Options...
-
In the Preferences dialog box select Brush Display in the Paint section:
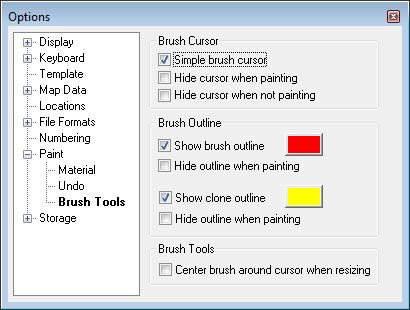
You can set separate options for the Clone brush.
You can also turn the outline on or off, and specify its color, by clicking the buttons on the Brushes panel:

This section contains information on the following topics:
Specifying the Brush Settings
The Profile, Size, Opacity, and Settings are set to default values specified for the brush, but you can adjust them in the controls to the right of the Brush list.
To Define the Brush Profile
The brush profile defines the shape of the brush stamp. It is either a circle or an ellipse, with a falloff defined by a graph, or an arbitrary shaped cutout. There are also the special options: Texture, which creates a brush with a random fill pattern, and OnePixel, a one pixel solid brush. Select a profile from the Profile list. This gives a list of profiles defined in the Brush Editor.
To Define the Brush Size
Either:
-
Drag the Size slider.
Or:
-
Enter the size in the Size box:

Or:
-
Hold down CTRL and drag in the Viewer, or in the brush preview on the Brushes panel, to draw a circle defining the brush size.
To Define an Offset
Brushes that take paint from the image or background, such as the Clone and Drag brushes, allow you to define an offset.
Either:
-
In the Clone Offset section enter appropriate values in the X and Y fields:

Or:
-
Hold down SHIFT and drag in the Viewer to draw a line from the source to the destination to define the offset interactively.
-
Click the Reset button to reset the offset to zero.
To Define the Background Transformation
Brushes that take paint from the background, such as the Merge brush, allow you to transform the background before using it for painting.
-
Set the Display option to Single Layer.
-
Select the image layer from the Layers list.
-
Click the image layer’s eye-dropper icon.

-
Click the Background Transformation Tool button in the Background Offset section to display an outline of the background image in the Viewer with handles so you can move, scale, or rotate it:
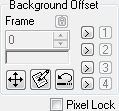
Once you have transformed the background close the Edit Merge Transformation to continue painting. You can store up to four transformations by clicking one of the > buttons and restore the transformation by clicking the 1, 2, 3, or 4 button.
To reset the transformation click the Reset button.
To Define other Brush Settings
Click the Settings... button to display more advanced settings for the brush. The brush settings are described in greater detail in the later sections of this chapter.
To Reset the Brush Settings to Default
Click the Restore Defaults button.
Built-in Brushes
The following pre-defined brushes supplied with Viz World Classic:
-
Color: Paints in a selected color.
-
Clone: Picks up paint from one area of the image and paints it to another position on the image, as defined by the offset.
-
Merge: Copies paint from a background image on to the current image.
-
Drag: Drags paint on the image, causing a smudge effect.
-
Repair: Picks up color from the image and paints with it; useful for painting over scratches and blemishes in an image.
-
Eraser: Erases pixels from the image, making them transparent. Equivalent to painting with the non-color.
-
Chalk: Paints with a textured brush.
-
Blur: Blurs the image.
-
Oil Effect: Creates the effect of layered color in an oil painting.
-
Posterise: Similar to Oil Effect, but more severe.
-
Smooth: Similar to Blur but more dramatic.
-
Marble: Mixes up the pixels giving a marbling effect.
-
Black And White: Convert pixels to monochrome.
To Use the Clone Brush
-
Hold down SHIFT and drag in the Viewer to draw a line from the source point to the destination point:
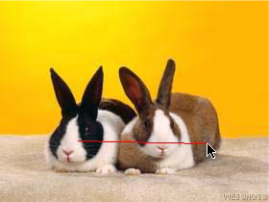
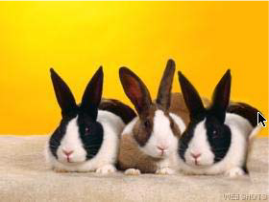
The X Offset and Y Offset fields are set to the appropriate values. -
Paint to create a clone of the image:
To Use the Merge Brush
The Merge brush allows you to copy paint from a background image onto the current image. For example, it can be used to paint out unwanted features of a scene by using a photograph of the background from the same position, called a clean plate.
-
Load the background image onto one layer:
-
Load the foreground image onto the current layer.
-
Set the Display option to Single Layer.
-
Click the eye-dropper icon in the Layers list to indicate which layer you want to merge from
-
Use the Onion Skinning control in the paint controls to reduce the opacity of the foreground, if desired:

-
Use the Merge brush to paint the background over the unwanted feature:
The Merge brush also allows you to scale or rotate the background image you are merging from.
-
Click the Background Transformation Tool button to transform the background.
-
Click the Reset button to reset the background to the original scale and position.
To Protect Artwork with a Mask
-
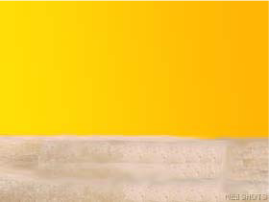
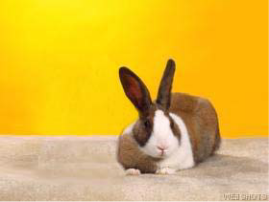
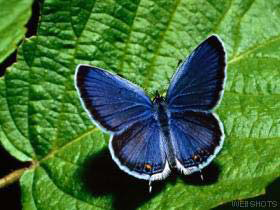
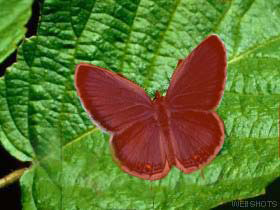
You can use a mask to protect parts of an image while painting. For example, you could use a mask to protect the butterfly in the following image while painting over its shadow:
-
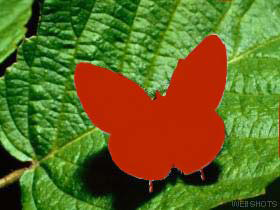
Create the mask by using a brush tool. Alternatively, you could mask the butterfly by drawing shape overlays and then sticking them onto the mask; for more information about creating shape overlays see Working with Shapes:
-
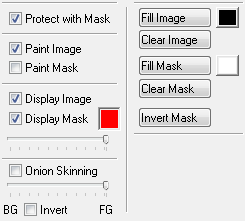
Set the paint controls to Protect with mask, Paint Image, and Display Image:
-
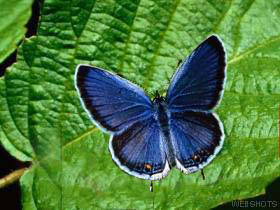
Paint the image as required; for example, use the Clone brush to paint over the shadow on the leaf by copying texture from the other side of the leaf:
-
Deselect Display Mask to show the final result:
Creating and Editing Brushes

Viz World Classic is supplied with a range of pre-defined brushes. You can edit some aspects of these brushes, or you can create your own completely editable brushes using the Brush Editor.
A Brush Test window allows you to try out the effect of the brush you are designing as you edit its parameters.
How Brushes Work
Brushes work by performing the sequence of operations: Pickup > Filter > Stamp. These steps can be customized to determine the precise behavior of the brush, and are explained in greater detail in the following sections:
Pickup
The brush picks up paint from the specified source, which can be the current color defined in the Color Chooser, the image or background, or an image cutout. When picking up paint from the image or background, an offset can be added to the current brush position to clone one part of the image to another part. The paint is picked up through the selected profile, which determines the size of the brush, and the softness of its edges.
Filter
The paint is optionally filtered by a specified filter, such as to add noise or soften the image.
Stamp
The paint is stamped onto the image according to the decay and spacing parameters. If Protect with mask is selected, painting takes into account the density of the mask.
To Display the Brush Editor
Either:
-
On the Tools menu, click Brush Editor.
Or:
-
Click the Editor... button on the Brushes panel.
The Brushes list shows a list of the currently loaded brushes. Selecting any brush in the list shows its definition on the Source, Profiles, and Filters panels and allows you to edit it.
To Create a New Brush
-
Select the brush in the Brushes list that you want to base the new brush on.
-
Click the + button.
The new brush appears under the User heading and by default has Copy appended to its name, but you can rename it using the Rename... button below the Brushes list.
To Assign a Keyboard Shortcut to a Brush
You can assign up to ten keyboard shortcuts to the brushes you use most frequently so that you can select them with a single keypress.
-
On the View menu, click Options....
-
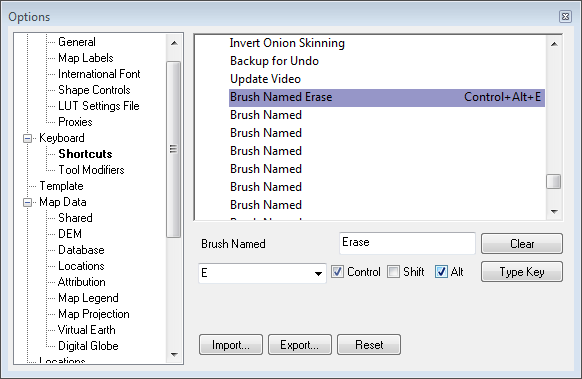
In the Options dialog box select Shortcuts in the Keyboard section.
-
In the Paint section of the Keyboard Shortcuts list select one of the entries labelled Brush Named, enter the name of the brush in the Brush field, and enter the keyboard shortcut you want to use or click the Type Key... button and press the key combination on the keyboard:
If you assigned a keyboard shortcut to a brush it is displayed on the bottom line of the Brush Editor window.
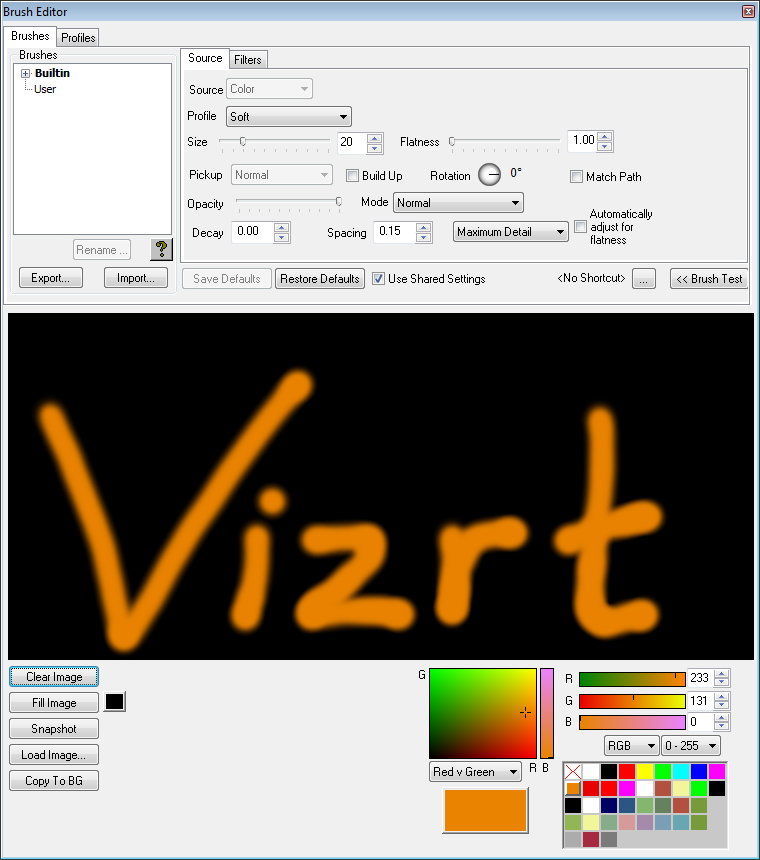
To Test a Brush
While you are editing a brush in the Brush Editor you can test it in the Viewer, or in the Brush Test window. To display the Brush Test window, click the Brush Test button in the bottom right corner of the Brush Editor.
The Brush Test window displays. This includes a palette editor, to allow you to change the color of the brush, and controls to clear or change the image displayed in the brush test window:
To hide the brush test window: Click the Brush Test button again.
To Save a Brush
-
Click the Export... button below the Brushes list. The following dialog box allows you to browse a place to export the brush file to and name the brush file:
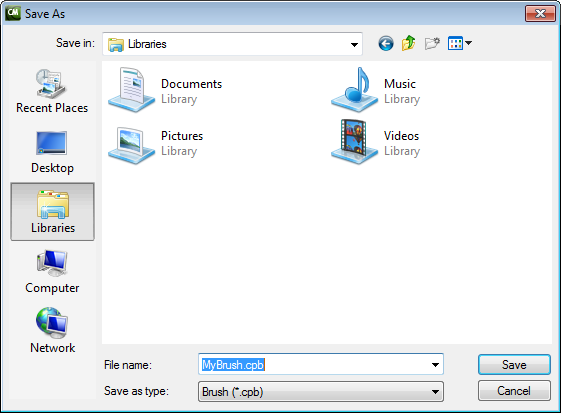
-
Enter a suitable name for it and click the Save button.
To Load a Brush
-
Click the Import... button below the Brushes list. The following dialog box allows you to select the brush file to import:
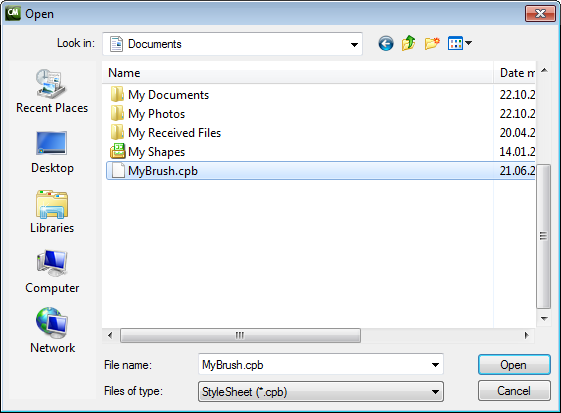
-
Select the brush file and click the Open button. The brush is added to the list of brushes in the Brushes list.
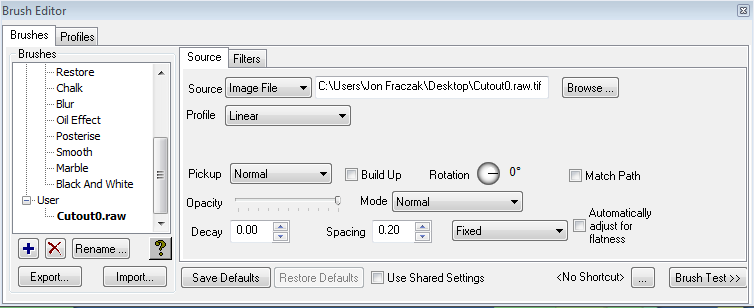
Defining the Brush Source
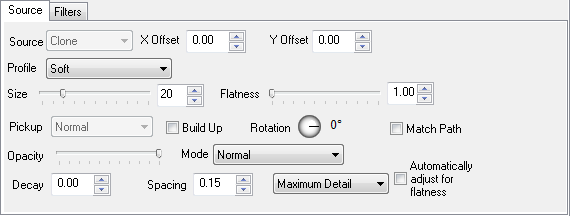
The options on the Source panel in the Brush Editor allow you to define the source of color for the brush, and associated options.
To Define the Paint Source
Specify the source for the paint by choosing an option from the Source pop-up menu. The options are explained in the following table:
-
Color: The brush paints in the currently selected color.
-
Clone: The brush takes the color from the image being painted. Useful in conjunction with an offset for cloning one part of the image to another part.
-
Background: The brush takes color from the composite background (Composite mode), or specified background layer (Single layer mode). Useful for copying from one image onto another image.
-
Image File: The brush paints with an image loaded from disk. Useful for painting with copies of a small image (for example, leaves).
-
Image Center: Colors the whole brush with the color at the center of the stamp.
-
Eraser: Makes pixels transparent by painting on the alpha channel.
-
Image: Takes color from the image.
The Image and Background Source options allow you to define an offset in the X Offset and Y Offset fields. This allows you to pick paint up from one position on the image or background and paint it in another position.
To Define the Brush Profile
Choose an option from the Profile pop-up menu. The profile determines how the paint fades away from the center of the brush to the edge of the brush, as defined by the Size parameter. You can define new profiles using the Profiles tab of the Brush Editor.
To Specify the Image Pickup
You can specify how the image is picked up by the brush using the Pickup options:
-
Normal: The image is picked up before each stamp.
-
Once: The brush is loaded once on the first stamp.
-
After Stamp: The image is picked up after the previous stamp.
To Define the Opacity and Decay
The Opacity and Decay define the density of the paint stamped by the brush, and the rate at which it decays as you drag. A Decay of 0 gives a brush that never dries out; larger values dry out faster.
To Define the Mode
The Mode pop-up menu allows you to specify how the paint is combined with the image; it provides the same options as the Blend Mode compositing option for layers.
To Define the Spacing
The Spacing determines the spacing between brush stamps as a percentage of stamp size. A large Spacing gives visible gaps between stamps. A small Spacing gives a smooth stroke.
Choose Fixed from the pop-up menu to make the spacing independent of your stroke speed, Constant Density to increase the spacing as you drag faster, and Maximum Detail to ignore the spacing and paint with full detail.
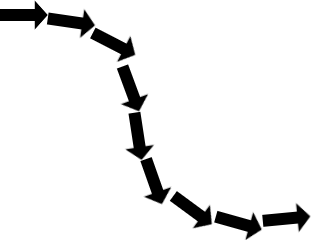
To Paint with an Image
Any image file, preferably with an alpha channel, can be used as a brush; for example:

-
Choose Image File from the Source context menu.
-
Click the Browse... button and select the image file you want to use.
-
Select Match Path to automatically rotate the image to match the angle of your stroke.
-
Set the Spacing to an appropriate value to determine the distance between stamps. Choose Fixed for a fixed spacing irrespective of your speed of stroke:
-
Drag the brush to paint with the image you have loaded:
-
Use the Jitter filter to add variations to each stamp.
To Load a Cutout for Use as a Brush or Profile
You can use a cutout as a brush; this works in exactly the same way as painting with an image.
Alternatively you can use a cutout as the profile for painting; the cutout defines the outline of the brush.
-
On the Cutouts panel click the Layout tab to display the Layout panel.
-
Select the cutout you want to use in the Overlay list. For more information about creating a cutout see Working with Cutouts.
-
Click the Use for Brush or Use for Profile button:
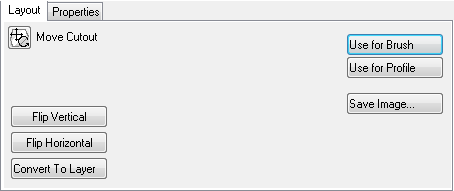
Use for Brush saves the cutout as a TIFF image which you can load in using the Image File option in the Brush Editor.
Use for Profile saves the alpha channel of the cutout as an image file which you can load in using the Create from Image button in the Profiles panel of the Brush Editor.
Defining Brush Filter Effects
The options on the Filters panel allow you to create brushes that selectively color correct, filter, or add an effect to the image as you paint:
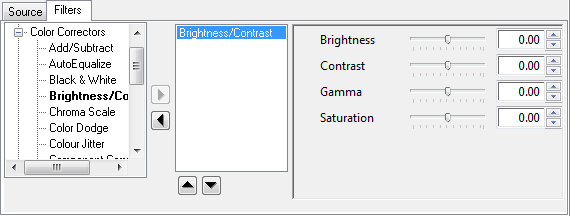
The filters are divided into the following categories:
-
Blurs: Soften or blur the image.
-
Color Correctors: Allow you to do local color correction to parts of an image.
-
Distort: Apply marble, jitter, or turbulence effects to the image.
-
Effects: Provide image effects, including noise and emboss.
-
Filters: Process the image according to the values of the pixels.
-
Multiple: effects are applied in the order they are specified in the list. To change the order:
-
Select an effect, and click the Up or Down arrow buttons to change its position in the list.
To Create a Brush That Applies a Filter
-
On the Source panel, set the Source to Image, the X Offset and Y Offset to 0 and the Pickup to Normal.
-
On the Filters panel, add the effects you want to include in the brush, and for each effect set the parameters.
Defining Brush Profiles
The Brush Editor Profiles panel allows you to define a number of preset profiles, and then select these when you are using or defining a brush:
The profile determines how the paint dies away from the center of the brush to the edge of the brush, as defined by the brush size parameter.
The horizontal axis defines the radius of the brush (center on the right), and the vertical axis is the opacity of the brush stamp.
The following table shows some sample profiles together with the corresponding spread of paint they create:
|
Description |
Profile |
Effect |
|
Linear |
|
|
|
Soft |
|
|
|
Solid |
|
|
|
Neon |
|
|


The Create from Image... button allows you to load in an image and use its alpha channel as the profile.
You can also create a profile from a cutout; for more information see Moving and Transforming Cutouts.
To Create a New Profile
-
Click the + button below the Profiles list.
-
Edit the profile curve as required.
The profile you have defined is displayed in the Profile list on the Brushes panel, and the Profile pop-up menu on the Brush Editor Source panel.
To Adjust the Profile Graph
-
Drag the point from the profile curve.
-
Click on the curve to add a new point to the curve.
-
Hold down CTRL and drag to extend tangent handles from a point on the curve.
-
Hold down CTRL to adjust one tangent handle independently of the other one.
To Rename a Profile
-
Select the profile in the Profiles list.
-
Click the Rename... button.
Managing Painted Materials
Working on a project often involves importing a number of images or movies and then making changes to the images, or to one or more frames in the movies, before rendering out a composite of the resulting project.
Changes you make to images or movies never affect the original source materials. Instead, a copy of every image is saved, and every modified movie frame, in a painted materials folder on your hard disk. Actions that cause painted materials to be saved include: painting on an image or its mask using the tools on the Brushes panel, drawing shapes using the tools on the Graphics panel, sticking shapes, text, or cutouts from the Overlay list, and applying image effects from the Image panel.
You can conform an image or movie layer, or its mask, to incorporate all the changes painted onto that layer and create a new image or movie that reflects those changes. You can then incorporate the conformed image or movie, or the mask, into another project without requiring the saved painted materials.
You can also export, as an image sequence, just those frames of a layer that have been painted on. By default painted materials are stored in a PaintedMaterial folder, but you can change this to any desired location.
To Conform an Image or Movie Layer
Viz World Classic never changes original files on disk as they are painted. You can conform a layer to produce a new complete movie or sequence incorporating all the painted frames. The layer is then updated to use the conformed material.
-
Select the layer you want to conform.
-
On the Layer menu, click Conform Layer.... A warning confirms the Conform Layer... action.
-
Click the OK button to continue. The Conform Layer dialog box then allows you to give a name to the movie and specify the format:
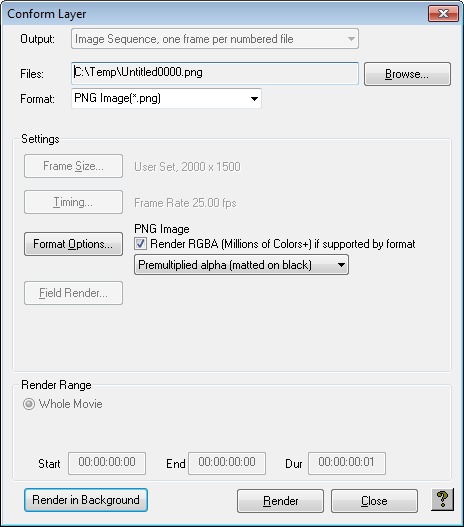
-
Check Render RGBA (Millions of Colors+) if supported by format to include the alpha channel in the conformed layer.
-
Click the Render button to render the layer.
The movie layer is updated to use the new conformed movie, eliminating the need for the painted materials.
To Conform a Mask
You can also conform the paint mask of an image or movie layer to create a movie or sequence on disk containing the paint masks for the layer. The mask is output at the size of the original material for the layer, without transformations or filters applied to the layer.
-
Select the layer whose paint mask you want to conform.
-
On the Layer menu, click Conform Mask....
A warning confirms the Conform Mask... action.
-
Click the OK button to continue.
-
Proceed as described for conforming a layer.
To Export the Painted Frames from a Layer or Mask
-
On the Layer menu, click Export Painted Frames... or Export Painted Masks....
The Export Painted Frames dialog box then allows you to specify the filename for the image sequence, and the file format:

-
In the Render Range section specify the range of the project that you want to render.
-
Click the Render button to continue.
An image is created for each of the painted frames, numbered with the frame number.
To Specify the Location of the Painted Material
-
On the View menu, click Options....
-
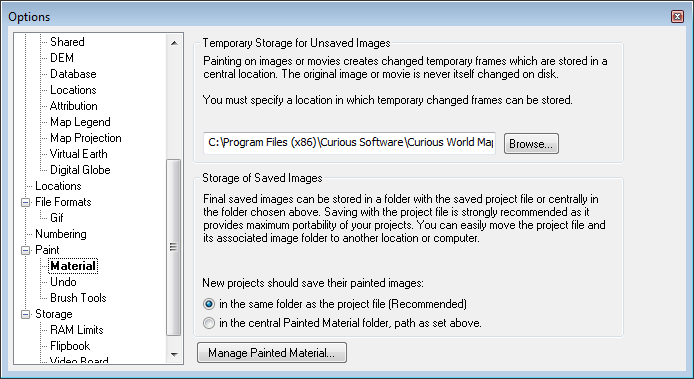
In the Preferences dialog box select Material in the Paint section.
This allows you to change the location of the PaintedMaterial folder, and allows you to display the Painted Material Manager by clicking the Manage painted Material... button:
To Display the Painted Materials
The Painted Material Manager displays all the material saved for the different projects you have worked on, and allows you to delete material you no longer need. It also allows you to rescue material, in the event that the original project has been accidentally deleted. On the View menu, click Paint Material Management.... The Projects list displays a list of the projects with saved painted material.
To Display the Materials for a Project
Select the project name in the Projects list. The Painted Material Manager shows the full path name of the project file, together with a list of the painted materials used by the project. Material that is no longer referenced by a layer in the project is drawn in red to indicate that it is in the trash.
To Delete Specific Material
Select the material in the Painted material list and click the Delete Selected button.
To Rescue Material from a Lost Project
If a project file is lost, the material it referenced is not available until it has been copied into a new project. Select the material in the Painted material list and click the Rescue Selected button. The original source material and any painted frames are copied into the current project.
To Remove Material from a Project That Is No Longer Referenced by a Layer
Click the Empty Trash button.
To Delete All the Material in a Project
Click the Delete All button. You are not allowed to delete material in use by the current project.
Warning: Do not delete materials in any project you still need, or you are not able to load the project in its last saved version.