Viz World Classic User Guide
Version 23.0 | Published December 12, 2023 ©
Using the Keyer
The Keyer creates a matte which is used to cut out the foreground from the background. Mattes created with the Keyer can be saved and reused in other projects or applications.
To Key an Image or Movie
-
Click the Contents tab, to display the Contents panel for the image or movie.
-
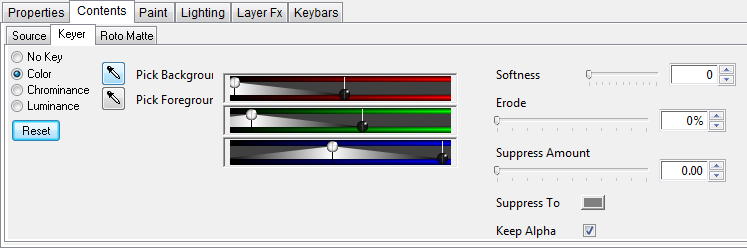
Click the Keyer tab, to display the Keyer.
-
Select Color, Chrominance, or Luminance to determine how keying is performed.
-
Select the Pick Background or Pick Foreground tool, and click appropriate parts on the image to add the corresponding colors to the range defined as background or foreground.
You can drag to define a rectangle to average the colors in the rectangle.
The sliders provide an alternative way of adjusting the components you have selected.
Each slider has four handles:

The white handles specify the range of colors treated as background, and the black handles specify the range of colors treated as foreground. Between each black handle and the corresponding white handle there is a smooth transition between foreground and background.
-
Drag the Erode slider to reduce the size of the masked area, to hide edge effects, and add a softness to blur the edge of the image.
-
Use the Suppress Amount and Suppress To controls to reduce the amount of the keyed color from the image.
This is useful for hiding reflections from the blue or green screen.
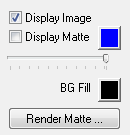
To View the Effect of the Keyer
The paint controls to the right of the Keyer allow you to choose whether the Viewer shows the keyed image, Keyer matte, or both:
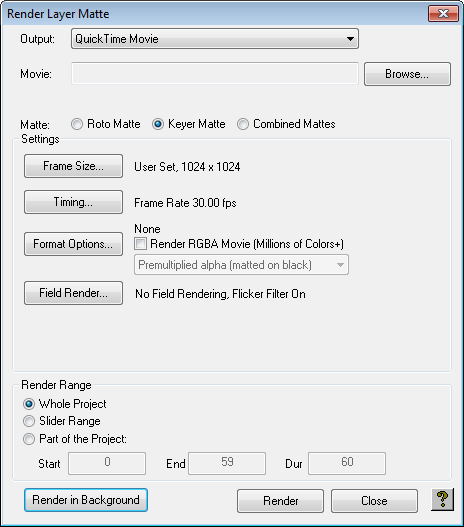
To Render the Keyer Matte
-
Click the Render Matte... button in the paint controls.
This is equivalent to the Render Matte... command on the Layer menu, and displays the Render Layer Matte dialog box to allow you to render the Keyer matte and/or the roto matte as a separate movie.
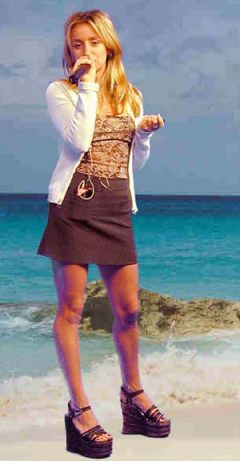
To Cut an Image from a Blue Screen
The following example illustrates a typical application of the Keyer, to cut out a subject filmed against a blue-screen or green-screen background, so it can be superimposed on another background.
-
Load the image or movie into a new image or movie layer.
-
Click the Keyer tab to display the Keyer.
-
Click the Contents tab, to display the Contents panel for the image or movie.
-
Select Color to key on a specified color range.
-
Select the Pick Background tool and drag to define a rectangle enclosing the blue-screen background:
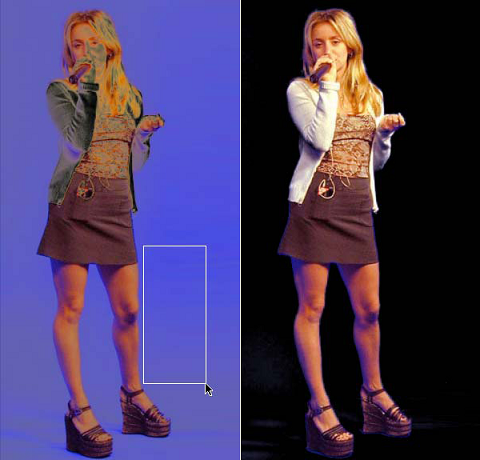
When you release the mouse button the keyed image is displayed.
You can refine the keyed area by clicking or dragging with the Pick Background tool to increase the areas of background removed, or by clicking or dragging with the Pick Foreground tool to reduce the areas of background removed.
Alternatively you can adjust the key using the color, chrominance, or luminance sliders.
To Remove the Color Cast
Subjects filmed against a blue-screen or green-screen typically have a blue or green cast. The Suppress option enables you to remove this.

-
Drag the Suppress Amount slider until the cast is removed. Too high a value introduces a contrasting cast.
-
Optionally change the Suppress To color to suit the replacement background.
You can then superimpose the subject onto an alternative background: