
Viz World Classic User Guide
Version 23.0 | Published December 12, 2023 ©
Topography
The Topography panel allows you to add relief shading to give a three-dimensional appearance to the map, and color the land and/or sea using natural colors.
To Specify the Topography
-
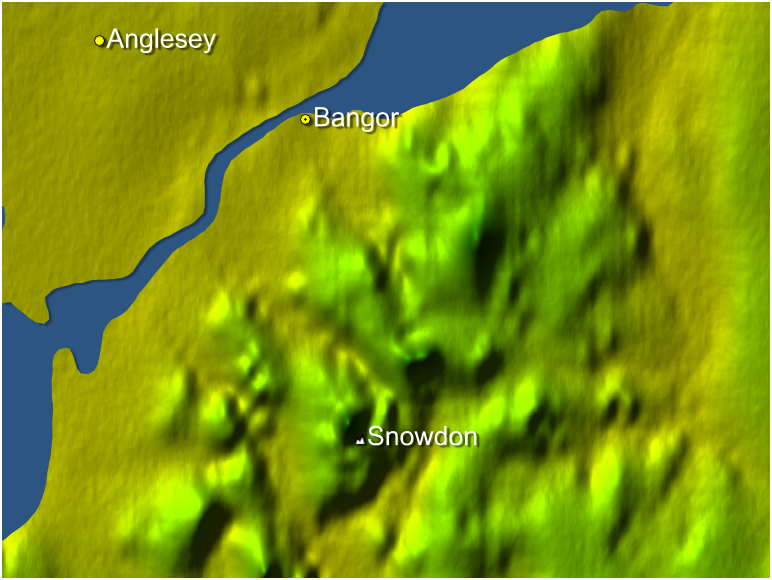
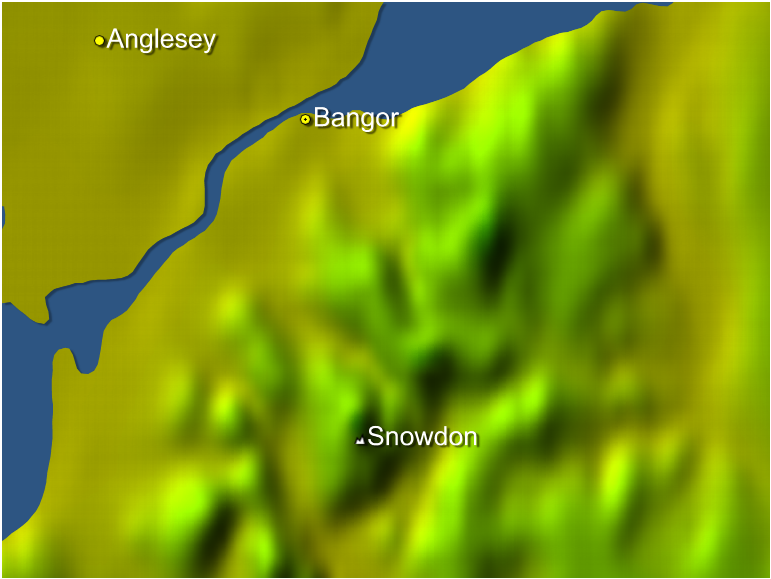
Select Relief Shading to apply relief shading to the land.
-
In the Land section select Land Styles, Relief Color, or Natural Earth to specify how the land should be colored. If Relief Color or Natural Earth is selected, you can blend in a proportion of the land style color using the Mix with Topography slider on the Styles Color panel.
-
In the Oceans section select Natural Sea and/or Contours to specify how the sea should be colored.
The options are illustrated in the following examples:
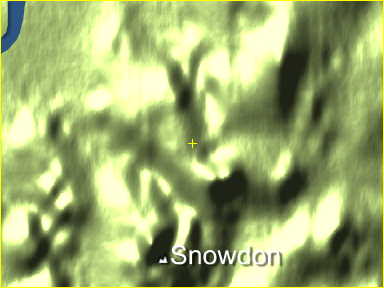
Land Styles, no Relief Shading and Relief Shading:


Relief Color and Ocean Contours, and Natural Earth and Natural Sea:
The following sections give more information about each of these options:
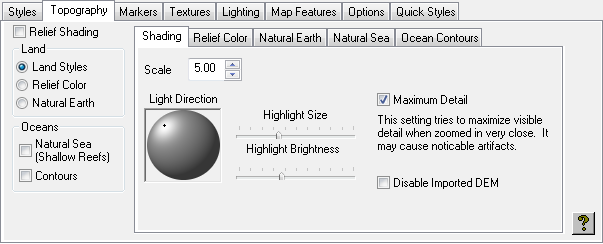
Shading Panel
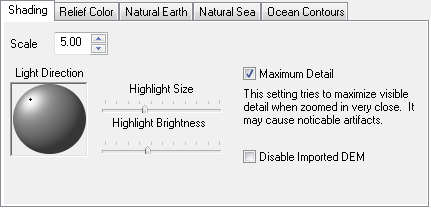
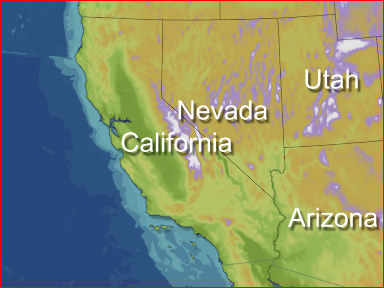
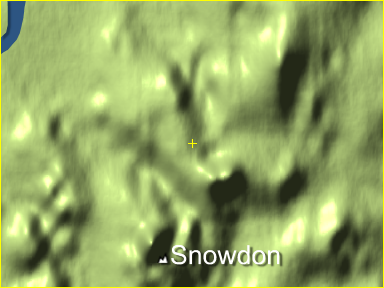
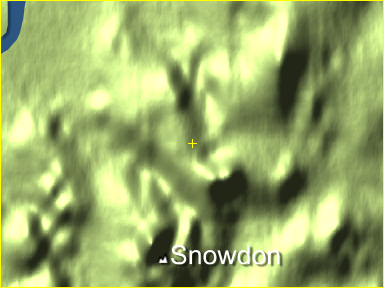
The Shading panel allows you to define the scale of the relief effect and the light direction for the relief. The following image shows the map with and without maximum detail:
Maximum Detail relief rendering is selected by default, and gives improved sharpness and detail, especially when zoomed in very close. However, in some situations the Maximum Detail option can produce images with a noticeable grid pattern, in which case you may prefer to deselect it.
The Highlight Size and Highlight Brightness settings allow you to control the appearance of the relief texturing on your maps.
The following illustrations give examples of the effect of each setting. Minimum highlight size, normal settings, and maximum highlight brightness:
The Disable Imported DEM checkbox allows you to choose whether to use any DEM Relief data you have loaded in place of the built-in relief data.
Relief Color Panel
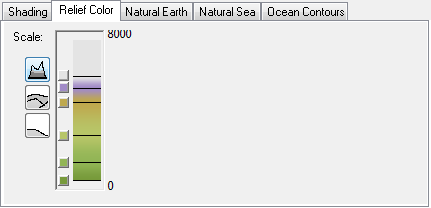
The Relief Color panel allows you to define the colors used for different terrain heights. Click the appropriate Scale button to change the color gradient scale to show heights from 0 to 8000m, 0 to 800m, or 0 to 80m. To adjust the terrain height corresponding to a color, drag the dividing line next to the color square. To change a color, click on the corresponding color square and a color chooser is displayed. To add or remove colors, click on the color gradient with the right mouse button and click Add Point or Delete Point on the context menu:
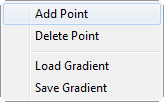
You can save a gradient, or load a gradient saved on a previous occasion, using the Save Gradient and Load Gradient options on the color gradient context menu.
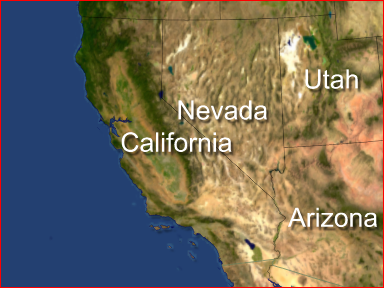
Natural Earth Panel
The Natural Earth panel allows you to control natural earth land coloring, which shows the Earth with natural coloring determined from high resolution satellite imagery; for example, deserts are colored yellow, forests green, and ice caps white:
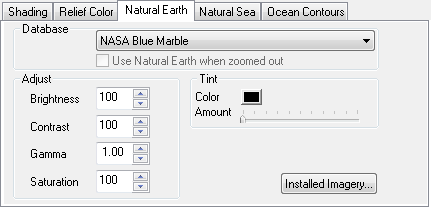
The Database option allows you to select different types of natural earth databases. The Brightness, Contrast, Gamma, and Saturation controls allow you to adjust the appearance of the natural earth coloring. Tint Color and Tint Opacity allow you to add a tint, such as to simulate sunset coloring. A Natural Earth stylesheet is provided with natural earth and natural sea styles already set up.
Note: Natural Earth is an optional feature that requires a separate license; ask your local Vizrt representative for more details.
Natural Sea Panel
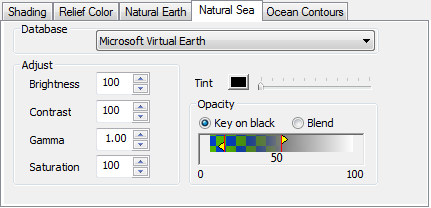
The Database option allows you to select different types of natural sea databases (for example, Digital Globe).
The Natural Sea panel allows you to control the appearance of the sea when colored with the Natural Sea option, which uses satellite imagery of shallow seas and reefs.
Ocean Contours Panel
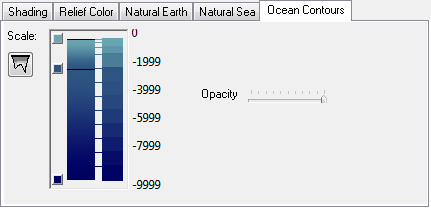
The Ocean Contours panel allows you to define the ocean depths corresponding to each color.
The left ramp works in exactly the same way as the ReliefColor ramp. The right scale shows how the color ramp is applied to the ocean depth steps.
See Also