
Viz World Classic User Guide
Version 23.0 | Published December 12, 2023 ©
Setting the Map Properties
The options in the Properties panel allow you to specify the position and scale of the map, choose the map projection, and specify the style sheet.
This section contains information on the following topics:
Compositing Options

Blend Mode specifies how the layer is combined with the other layers, and can be one of:
Normal, Add, Subtract, Difference, Multiply, Darken Only, Burn, Color Burn, Screen, Lighten Only, Dodge, Color Dodge, Hue, Saturation, Value, Color, Overlay, Soft Light, Hard Light, Pin Light, Exclusion, or Negation.
The Opacity determines the layer opacity, and can be animated.
Transform Options
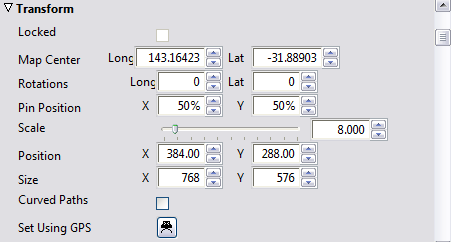
Allows you to specify the position, scale, rotation, and origin numerically. The following fields are provided:
|
Option |
Description |
|
Locked |
When selected, this map layer is locked to the position and zoom setting of the map layer below it; see To lock the map layer to the map layer below it. |
|
Map Center |
The longitude and latitude at the pin position, in degrees. |
|
Revolutions |
The number of globe revolutions in each direction, to create an animation that spins the globe. |
|
Pin Position |
The point, relative to the map rectangle, about which the map is centered, where X=0%, Y=0% corresponds to the bottom left-hand corner of the map rectangle. |
|
Scale |
The zoom ratio, where 1.00 corresponds to showing the entire globe. |
|
Position |
The position of the center of the map rectangle, where X=0, Y=0 corresponds to the bottom left-hand corner of the project area. |
|
Size |
The size of the map rectangle in pixels. |
|
Curved Paths |
When selected, moves the camera in a smooth curve between keys when panning the map. |
|
Set Using GPS |
Displays the GPS Position dialog box to allow you to center the map at a specific longitude and latitude; see To enter a GPS location. |
Longitude and latitude values can either be entered in decimal degrees, such as 20.175, or in degrees, minutes and seconds, such as 20d10m30s.
To Lock the Map Layer to the Map Layer below
-
Select Locked in the Transform options.
Locking a map layer fixes it at the same size, scale, and projection as the base map. This is useful for drawing selected regions of a map using a different style from the main map.
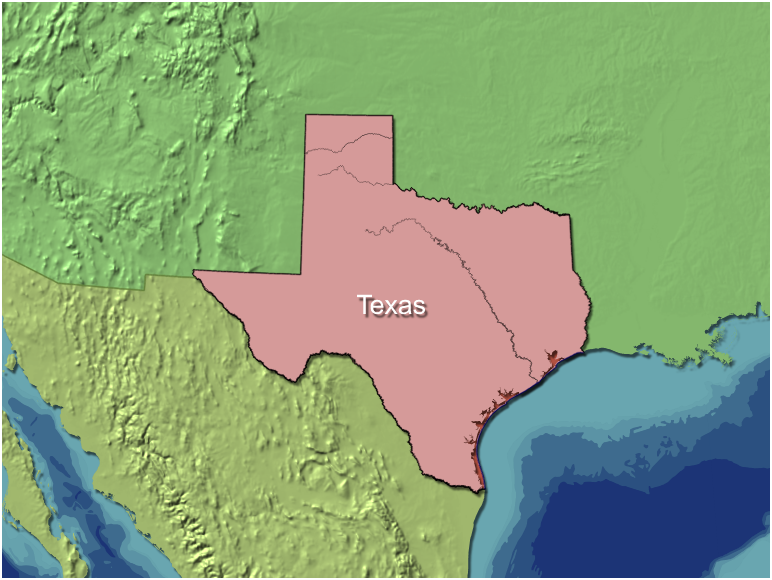
In the above example the upper map layer has all styles other than Selected Region set to a Fill color of None, and no relief. The lower map layer has Relief and Ocean Contours selected.
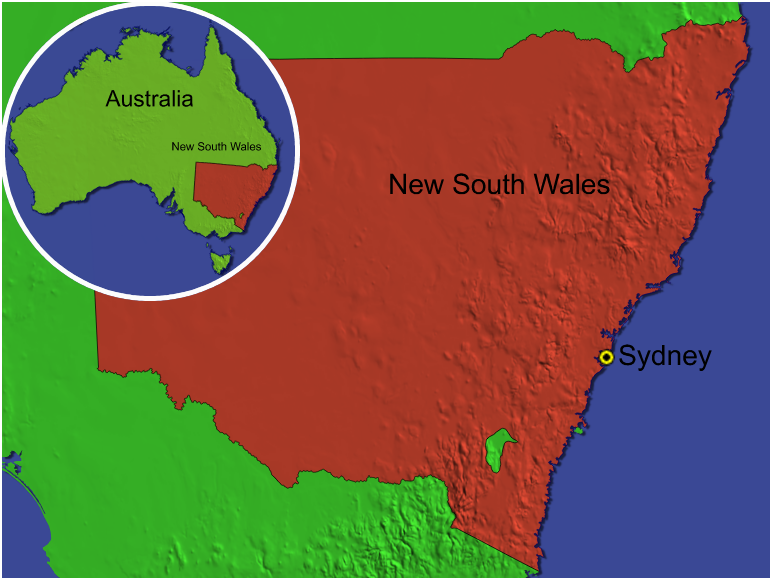
To Change the Pin Position
The map is centered on the pin position, which is drawn as a + symbol on the map when you select one of the map manipulation tools. Initially, the pin position is centered in the map rectangle, but you can change it to create an off-center globe in the map rectangle.
Either:
-
Select the Move/Pan or Zoom tool.
-
Hold down Sc and drag in the Viewer.
Or:
-
Edit the Pin Position values in the Transform options.
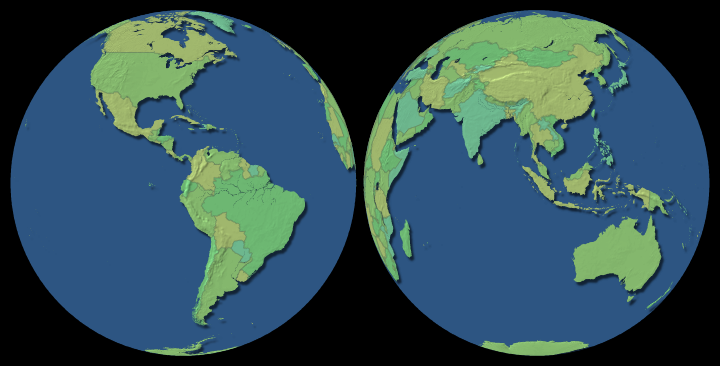
The above example was created using two map layers, each with a different pin position.
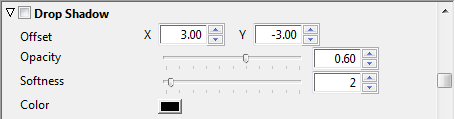
Drop Shadow Options
Allows you to add a drop shadow which is cast by the map layer onto other layers.
The following parameters are provided:
|
Parameter |
Description |
|
Offset |
The offset of the drop shadow, in pixels. |
|
Opacity |
The opacity of the shadow. 0% gives no drop shadow. |
|
Softness |
Blurs the drop shadow to smooth the edges. Values in the range 0-5 are recommended. |
|
Color |
The color of the drop shadow. |
Frame Options
The following options allow you to define the frame:
|
Parameter |
Description |
|
Fill Color |
The fill color, for areas outside the globe if the edges of the globe are visible. |
|
Border and Border Color |
The frame border color, and its shape: Rectangle or Circle. |
|
Border Width |
The width of the frame border in pixels. |
For example, the above inset map uses a circular frame with a white 5-pixel border.
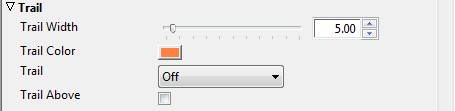
Trail Options
-
Use Trail Width and Trail Color to define the width and color of the trail.
-
Choose Behind, Ahead, or Full from the Trail drop-down menu to leave a trail behind, ahead of, or on both sides of the path.
-
Select Trail Above to display the trail above the layer.
Locator
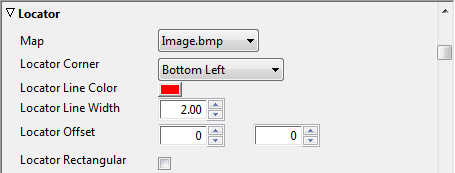
The map locator enables you to create a map that can be used to highlight the location of your main map.
To Create a Locator Map
-
From the main menu click Layer, and select Create Pre-rendered Map and then Locator...
-
From the Export Locator Map dialog box you can name the file, set format, image format/quality options, frame size and alpha options
-
Click Render to render the locator image to disk
-
In the Locator options select the locator image from the Map drop-list
-
Set the parameters for the locator and save the map project
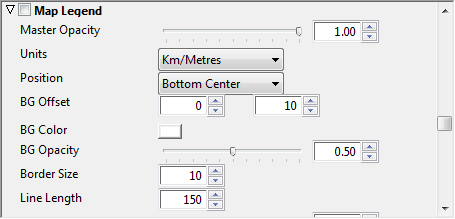
Map Legend
Map legend allows you to add a legend to the map, position and customize its design.
-
Master Opacity: Sets the opacity of the legend.
-
Units: Defines the legend’s units in kilometers/meters, miles/yards and miles/feet.
-
Position: Defines the position of the legend. Available options are bottom and top left, right and center.
-
BG Offset: Defines the offset of the legend’s background.
-
BG Color: Defines the legend’s background color.
-
BG Opacity: Defines the opacity of the legend’s background.
-
Border Size: Defines the legend‘s border size (in pixels).
-
Line Length: Defines the legend’s length (in pixels).
-
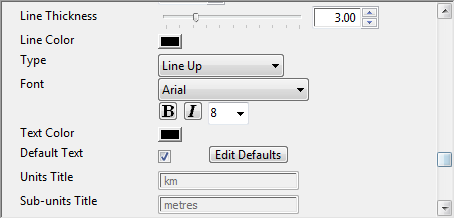
Line Thickness: Defines the thickness of the legend’s line (in pixels).
-
Line Color: Defines the legend’s line color.
-
Type: Defines the type of line. Alternatives are line up/down, alternate filled and open and staggered open/filled.
-
Font: Defines the font and the font parameters.
-
Text Color: Defines the color of the text.
-
Default text: Allows you to enable and define the default unit text (for example, setting Km to km, kilometers, kilometros etc.).
-
Units Title: Allows you to manually enter the units title text instead of using the default text.
-
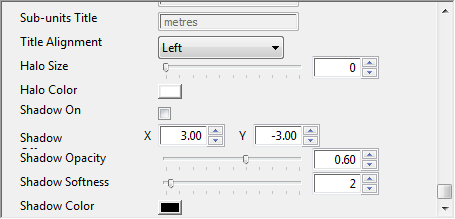
Sub-units Title: Same as for Units Title.
-
Title Alignment: Aligns the unit titles. Available options are Left, Center and Right.
-
Halo Size: Defines the size of the legend’s halo. Note that the halo only has an affect on the legend itself and not the legend’s background (use shadow).
-
Halo Color: Defines the color of the legend’s halo.
-
Shadow On: Enables the legend’s shadow.
-
Shadow Position: Defines the (X and Y) position of the legend’s shadow.
-
Shadow Opacity: Defines the opacity of the legend’s shadow.
-
Shadow Softness: Defines the softness of the legend’s shadow. The higher the softness, the wider the shadow spreads.
-
Shadow Color: Defines the color of the legend’s shadow.
To Create a Map Legend
-
Open the Properties panel.
-
Enable the Map Legend and set the parameters.
-
Save the map project.
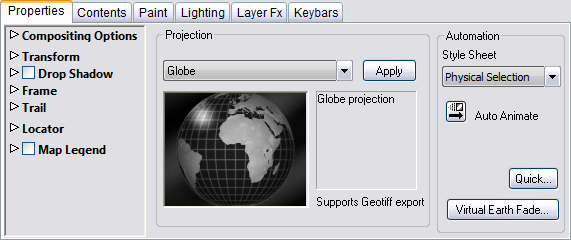
Projection
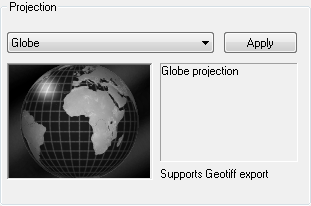
To Choose the Projection
-
Choose the projection from the drop-down menu. Selecting a projection previews it in the window below the drop-down menu.
-
Click the Apply button to apply the projection to the map layer. Which map projection you choose depends on what you are using the map for, the part of the globe displayed, and the type of animation.
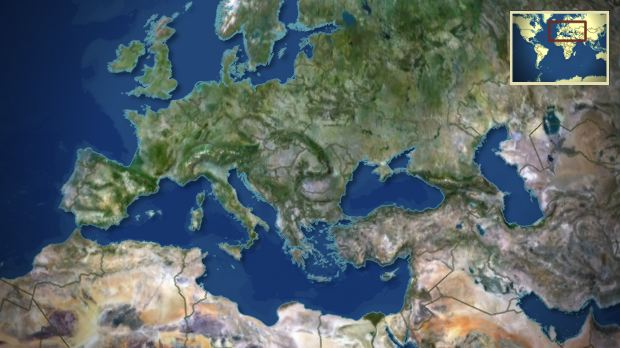
In the majority of cases the Globe projection is most suitable as it is ideal for zooming in animations, and land shapes look familiar when in the middle of the picture. Its chief disadvantages are that shapes get distorted near the horizon, and only half the world can be seen at any one time.
The other projections are divided into four main groups:
-
Cylindrical projections: Have shapes that look familiar for certain latitudes, but is more distorted at other parts.
-
Equal Area projections: Show the relative size of countries more accurately but the shapes can look unusual.
-
Conical projection: Is really only useful for maps of the Continental USA.
-
Stereographic projections: Have familiar shapes at the center of the image, but is very distorted at the edges. They can be useful for combining with satellite images.
Automation
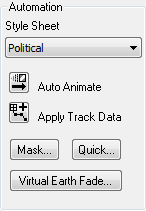
To Change the Stylesheet
Choose a style sheet from the Style sheet drop-down menu.
To Auto-animate the Map Layer
 Click the Auto Animate button:
See Also