
Viz Artist User Guide
Version 5.0 | Published December 20, 2022 ©
Classic Text Editor
Use the Text Editor to make changes to a text in a scene.
This section contains information on the following procedures and topics:
Note: In the Viz Engine Render Pipeline, text rendering is implemented completely differently than in the Classic Render Pipeline. Some features are not yet implemented. Only Geometry and Razor type text are supported by the Viz Engine Render Pipeline.
To Open the Classic Text Editor
There are two ways to open the text editor.
-
Click the icon
 on the container of the text you want to edit.
 -
Double click on the text in the scene editor. This also activates the inline text editor inside the scene editor.
To Create a Classic Text Object
There are two ways to create a new classic text object.
-
Drag a font from the Server tab into the scene tree. A new classic text object is created in or under the container where the font is dropped on.
-
Drag a font into the scene editor. A new classic text object is created at the dropped location.
By default, the content of the new classic text is set to the name of the font. You can modify the text by opening the classic text editor.
Note: Classic Fonts in the Viz Engine Render Pipeline are blocked. Please be sure to use the Classic Render Pipeline.
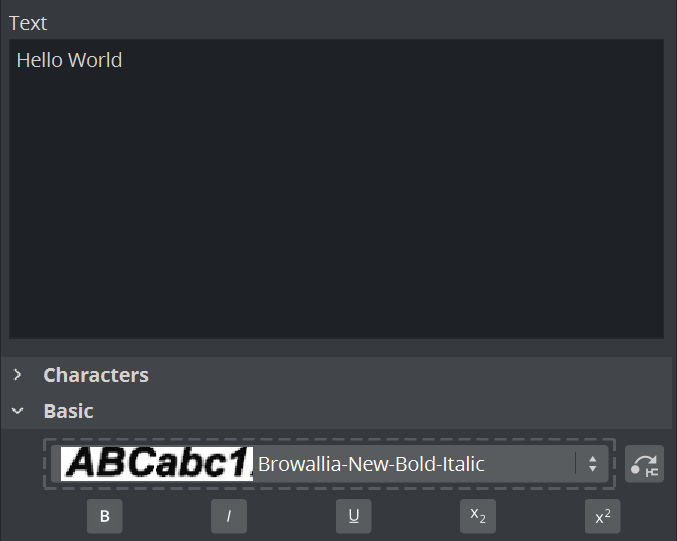
Classic Text Editor
At the top of the Classic Text Editor is an input box. Characters in this input box are rendered in the Scene Editor. The Classic Text Editor contains six tabs allowing detailed modification. More advanced modifications can be done in the Fontstyle Editor. Modifications made with the Fontstyle Editor apply to all instances of the font, not just the one used in this Scene.
Characters Tab
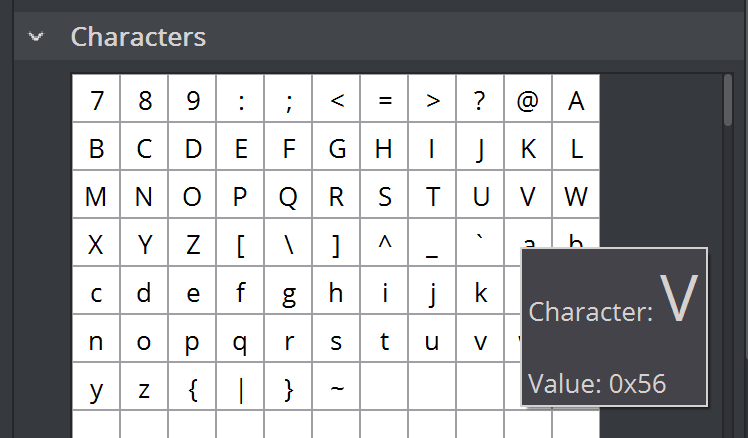
The Characters tab shows the character table in the fonts library. As an alternative to the keyboard, the symbols from the table can be dragged onto the input box at the top of the Classic Text Editor. This is a helpful tool when using special characters that do not exist on the keyboard, or is hard to find/use.
Basic Tab
Font and Effects

-
Font: Lists all available fonts created from the same base font. To use another font, select it from the list. To use a totally different font in the scene, drag the new font from the Asset View panel onto the Font Areas of the text.
To locate the font in Asset view, click on the button.
 -
Bold: Toggles bold effect.
-
Italic: Toggles italic effect.
-
Underline: Toggles underline effect. Additional options can be found in the following section.
-
Subscript: Toggles subscript effect.
-
Superscript: Toggles superscript effect.
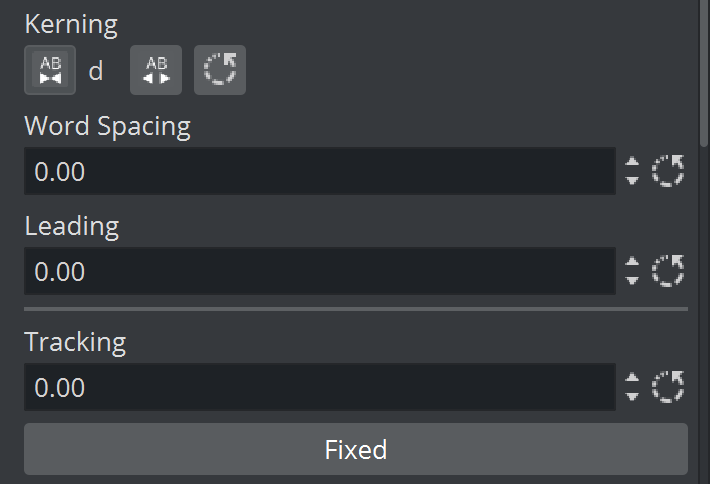
Spacing
-
Kerning: Set custom kerning between the characters at the current cursor position.
-
Word Spacing: Changes the size of the spaces between the words in the text.
-
Leading: Modifies the distance between the text lines.
-
Tracking: Changes the tracking between all characters by the same amount. Clicking the Fixed button changes the text from true type to one where each character uses the same space.
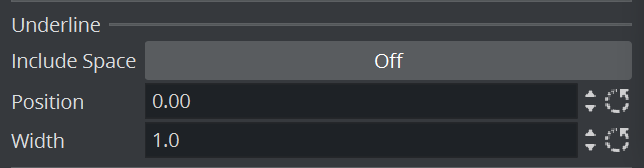
Underline Options
-
Include Space: Sets whether to underline the whitespace characters.
-
Position: Sets the underline offset.
-
Width: Sets the thickness of the underline.
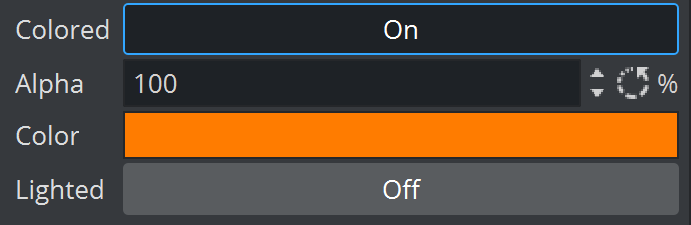
Coloring Options
-
Colored: Activates the selected color for the text as a solid color, overriding the color of any material on the text container in the scene tree.
-
Lighted: Applies the selected color to the text, adjusted for the scene lighting. Transforming the object creates the visual impression of changes to the color. When inactive, the selected color is applied to the text as a solid color.
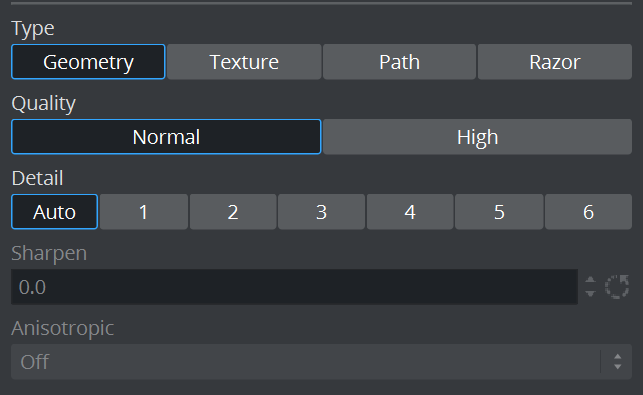
Rendering Options
-
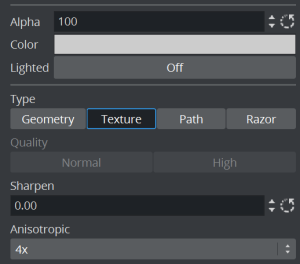
Type: Sets the rendering method for the text.
-
Geometry: Renders geometry type fonts as polygons.
-
Texture: Renders the font as texture instead of polygons. This can, to some degree, create a poorer look, but it reduces the number of polygons in the Scene. The texture resources get an increased demand, so to render a font as texture is a trade-off between polygon and texture performance. For half height mode rendering, texture fonts are normally the better choice. When selected, the anisotropic value is set to 4X by default.
-
Path: Renders the font as vector graphics.
Note: To use the Path type, the machine must be equipped with NVIDIA GPU and have a driver version 275.33 or higher installed.
-
-
Razor: Renders the font as texture using graphics shader. This method of rendering produce higher quality of anti-aliasing. To use the Razor type, the font must have been imported with Viz Artist version 3.11.0 or higher.
Note: A Razor type text may produce distorted result when rendering glyphs with high-complexity. Artifacts may appear when two glyphs overlap each other. Lighting is currently not support when using this type.
Note: Some effects, like Extrusion, are not supported by Texture, Path, and Razor rendering.
-
Quality: Sets the quality of the font to either Normal or High. The quality of a texture font can be changed in the Fontstyle Editor. This option only applicable if the font type is set to Geometry.
-
Detail: Sets the level of detail, or tessellation of the font, to either automatic level or one out of six fixed settings. The fonts are rendered as polygons, so by switching to wireframe mode, the difference becomes obvious as the detail level changes. One is the highest level of detail, six is the lowest. If setting a fixed level of detail, the automatic level is overwritten and rendered with the same level of detail independent of the font size. This option is only applicable if the font type is set to Geometry.
-
Sharpen: Makes it possible to sharpen the font. This option is only available if font type is set to Texture.
-
Anisotropic: Improves the texture sampling for anisotropic (in this case non-square) pixel filter areas in mipmapping mode, for example a rotated text texture. Choose either to use the standard mipmap level selection, or select the anisotropic filter rate from a number of available settings. Higher values give better image quality at the expense of some performance. The default value for anisotropic filtering is 4X. This option is only available if font type is set to Texture.
Orientation Tab
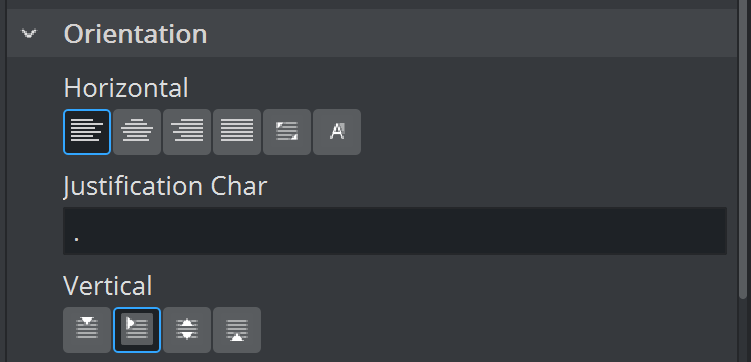
Alignment
-
Horizontal: Sets the text alignment or justification in horizontal axis.
-
Left, Right or Center.
-
Justify to fill the text box (must be enabled).
-
Scaled to fill the text box (must be enabled).
-
Justify to Character.
-
-
Justification Char: Sets character to use for Justify to Character option.
Note: Justify to Character is not supported in the Viz Engine Render Pipeline.
-
Vertical: Sets the text alignment in vertical axis.
-
Top: Align text to the top of the container position.
-
First line: Align the first baseline of the text to the container position.
-
Middle: Align text to the middle of the container position.
-
Center: Align text to the bottom of the container position.
-
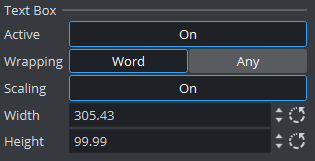
Text Box
-
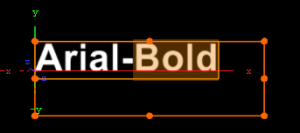
Active: Wraps the text within a specified area of the text box when enabled. The text box is shown as an orange outline in the Scene Editor when the text editor is active (if Bounding Box is enabled in the Scene Editor).
-
Word: Each line of text contains whole words.
-
Any: Each line of text contains all possible letters. Words are split at the Text Box right border.
-
Scaling: Sets the scale the size of the Text Box as scale of the text is changed when enabled.
-
Width: Sets the width of the Text Box.
-
Height: Sets the height of the Text Box.
Shadow Tab
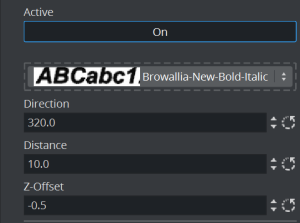
From the Shadow panel, shadow can be added to the text. Click the small switch left of the font visualization to enable text shadowing.
Note: Shadow is currently not supported in the Viz Engine Render Pipeline.
Note: All the modifiers that are applied to the text in the Fontstyle Editor are applied to the shadow too.
-
Font: Lists all available fonts created from the same base font as selected. To use another font, click the arrow and select it from the list. To use a different font in the scene, drag a new font from the Server Panel onto the visualization of the text.
-
Direction: Sets the direction of the shadow from 0 to 360°.
-
Distance: Sets the distance between text and shadow.
-
Z-Offset: Sets the displacement of the shadow on the Z axis.
-
Alpha: Changes the alpha value of the shadow.
-
Color: Sets the color of the shadow.
-
Lighted: Lights the font with the current light settings (see Light Editor).
Note: The Color option is only applicable if the color modifier has not been applied to the font.
Clock Tab
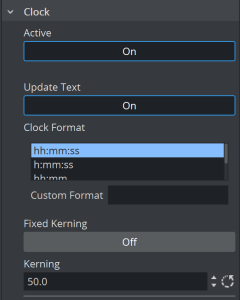
Click the Clock tab in the Text Editor to open the Clock panel. In the Clock panel, the display of a clock can be inserted and edited. Click the small switch in the upper left corner of the panel to enable the clock. The clock is added to the text string, if any, at the cursor position.
Note: Clock is currently not supported in the Viz Engine Render Pipeline.
-
Update Text: When enabled, any running clock in the scene is updated in real time in the Scene Editor and On Air outputs. If disabled, the output to the Scene Editor and On Air outputs are not updated, even if the clock is running. An external control application, such as for instance Viz Trio, could be used to enable or disable Update Text when running in On Air mode, as required.
-
Clock Format: Sets the format of the clock display.
-
H: Hours.
-
M: Minutes.
-
S: Seconds.
-
D: Digits of a second. The first digit shows a tenth of a second, the second digit shows a hundredth of a second, the third digit shows a millisecond, and so on.
-
-
Custom Format: Uses a user defined (non-standardized) clock format in the box below. Make sure to add correct separation characters.
Note: Viz Engine distinguishes between uppercase and lowercase clock formats, allowing the designer even more customization options. When defining the clock format by lowercase letters, for instance hh:mm, the digit is shown even if the value is 0. However, if the clock format is defined by uppercase letters, Viz Engine does not display the value if it is zero. This allows the designer to omit unused digits while still planning for their use when designing the scene.
-
Fixed Kerning: Sets a fixed width for each letter. The kerning of non-proportional fonts vary for the various letters. For example, 1 has less kerning than 6. To avoid the letters from “jumping” around while counting, the Fixed option can be enabled. The Fixed value refers to the size of the text box around each letter.
Note: The problem with changeable kerning can be avoided by using a proportional font.
Clock Format Examples
|
Clock Format |
Displayed Result |
|
HH:mm:ss |
03:05 |
|
Hh:mm:ss |
0:03:05 |
|
HH:Mm:ss |
3:05 |
|
HH:Mm:s |
3:5 |
|
hh:mm:ss |
00:03:05 |
|
hh:M:ss |
00:3:05 |
Tip: Up to 20 clock formats can be defined in Clock Formats (see the Configuring Viz section of the Viz Engine Administrator Guide).
-
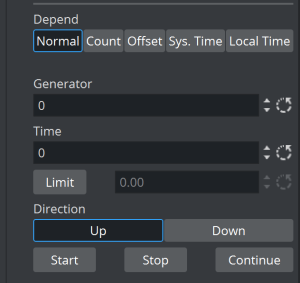
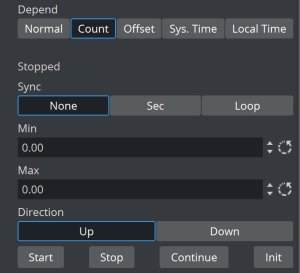
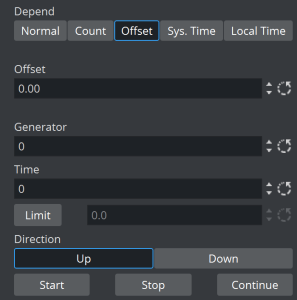
Depend: Selects the type of clock to use.
-
Normal: Shows the normal main clock view.
-
Count: Creates a counter, which counts a defined time lap in relation to one of the running clocks. For example, if a clock is running, another Container with the same clock can be created. The state of the second clock should be set to Count, and a time range defined. When clicking the Start button under the Count section, the count clock starts counting for the defined time. It is related to the main clock, so if stopping the main clock, the count clock also stops. A typical use for this function is for counting penalty times in sport graphics. In a sport game running on efficient time, a penalty count down should stop when the main game time stops.
-
Offset: Displays an input box where an offset value in seconds can be entered. For example, if the value is set to 20, the clock starts running after 20 seconds.
-
Sys. Time: Sets the clock to the system time.
-
Local Time: Sets the clock to the local time. This is useful if running on a system which automatically adjusts to daylight savings time.
-
-
Remember time properties: Saves the state of the clock (time, limit and direction) in the scenedata.
Each kind of clock comes with different additional options.
-
Generator: (Normal/Offset) Sets the ID of the clock. Up to ten different clock IDs (0-9) can be used in a Scene. Clocks with the same ID are linked together, which means they are synchronized and all start when one clock is started. This can be used to show different time zones, for example
-
Time: (Normal/Offset) Defines the start time in seconds. For example, if the clock should start to count at two minutes, set Time to 120.
-
Limit: (Normal/Offset) Defines the count limit in seconds. For example, if the clock should stop counting after two minutes, set Limit to 120.
Note: If counting down to 0, Limit must be set to 0 seconds, or the clock continues to count below 0. If counting upwards starting at 0, make sure that Limit is not 0, as the clock does not count at all.
-
Sync: (Count)
-
None: Does not synchronize the count clock to the main clock when enabled. It is almost impossible to start the count clock exactly at a whole second, so the count clock most likely runs unevenly compared to the main clock. In many cases, this does not create the desired output, but may be useful if an offset output is desired.
-
Sec: Synchronizes the count clock with the main clock.
-
Loop: Loops the count clock within the defined count range.
-
-
Min and Max: (Count) Sets the count clock minimum and maximum parameters.
-
Direction: (Normal/Count/Offset) Specifies if the clock should count up or count down.
-
Up and Down:(Normal/Count/Offset) Specifies if the clock should count upwards or perform a countdown.
-
Start, Stop and Continue: (Normal/Count/Offset) Makes the clock start, stop and continue counting.
-
Init: (Count) Resets the clock’s counter.
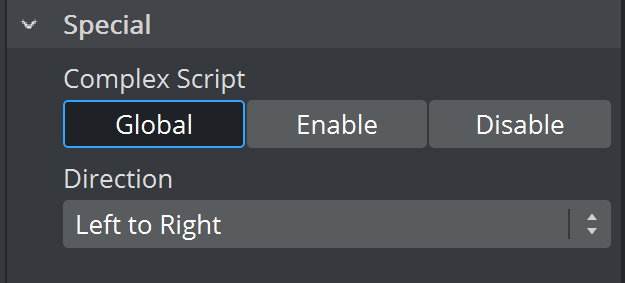
Special Tab
-
Complex Script: Enabling Complex Script allows usage of advanced typographical features including, but not limited to, font ligature (important for many Asian scripts and handwriting fonts), right to left and bi-directional writing, special symbols and Unicode emojis. You can Enable or Disable this feature on a per-text basis using this option, or select Global to use the globally set configuration. Global is selected by default.
Note: In the Viz Engine Render Pipeline, text is rendered with these advanced features enabled by default.
-
Direction: Switches the text direction from left to right, right to left, downwards, and upwards.
Note: When complex script is disabled, all characters are rendered directly to glyphs according to the Direction option. For example, the text ABC is rendered as CBA when the direction is right to left. When complex script is enabled, ligature and bi-directional text algorithms are also performed, and the Direction option dictates the primary writing direction. Thus, the rendered glyphs are ordered in the direction of its native writing system.
Inline Text Editor
Inline text editor allows you to perform simple editing to the text directly inside the Scene Editor. It can be activated by double clicking on the rendered text inside the preview window. While the inline editor is active, the text’s bounding box turns brown.
To exit from the inline text editor, click outside the text, or press ESC key.
Special Fonts
-
Geometry: When adding a geometry font, the text is treated like a compound object created from characters. The text can be split to become a group of single character objects (not text!). Splitting of text makes it possible to edit the properties of single character objects.
If a Drop shadow had been assigned ot the text, it will be put into a separate container.
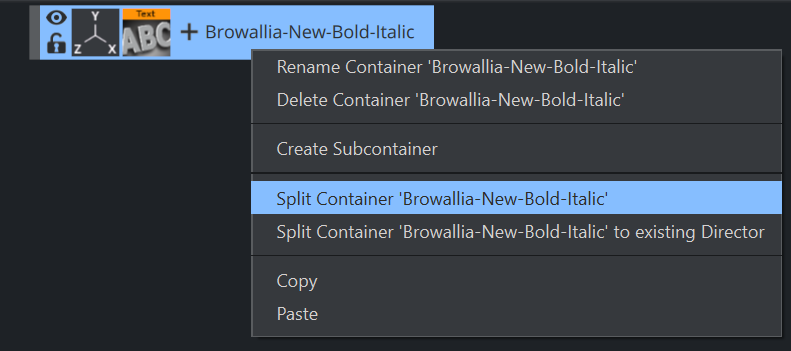
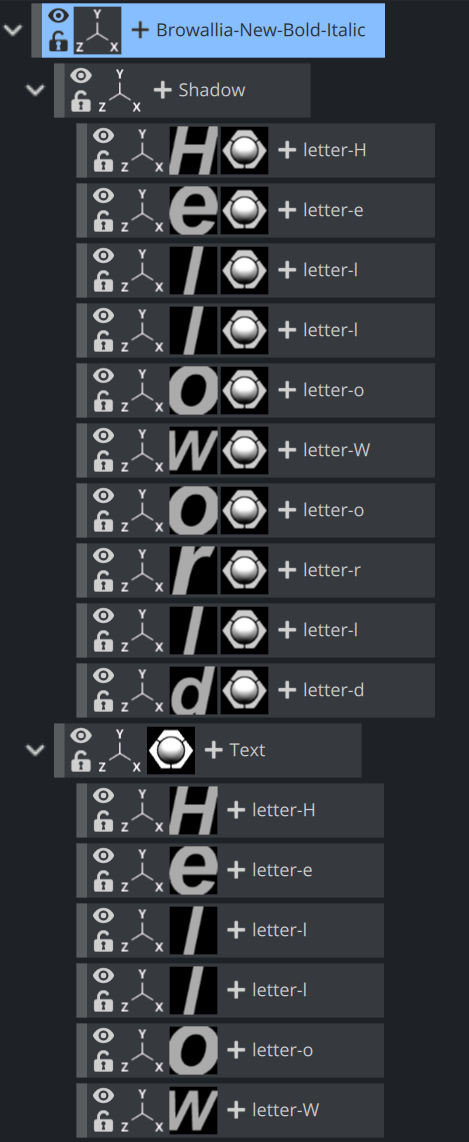
Note: Be aware that it is a one way operation. It is not possible to merge characters into text again, so by performing the splitting operation, the text cannot be edited anymore.
See Also