
Viz Artist User Guide
Version 5.0 | Published December 20, 2022 ©
Control Objects on Unreal Engine
This feature allows exporting several parameters (float, textures, string, etc.) on Unreal Engine through specialized Actors. These parameters can then be accessible through Viz Engine and updated using the ordinary Control Objects functionality. Currently, we support ControlAnimation, ControlImage, ControlText and ControlMaterial.
A sample Unreal Engine level is provided with the Vizrt Media plug-in. You can find it at /Plugins/VizrtMedia/Content/SampleScenes/ControlObjects.
The following instructions use the Viz Artist user interface, but control objects can also be used by Viz Trio using Tab Fields.
Setup Control Objects in Viz Engine
-
Create a scene with a single container.
-
Add a ControlObject plug-in.
-
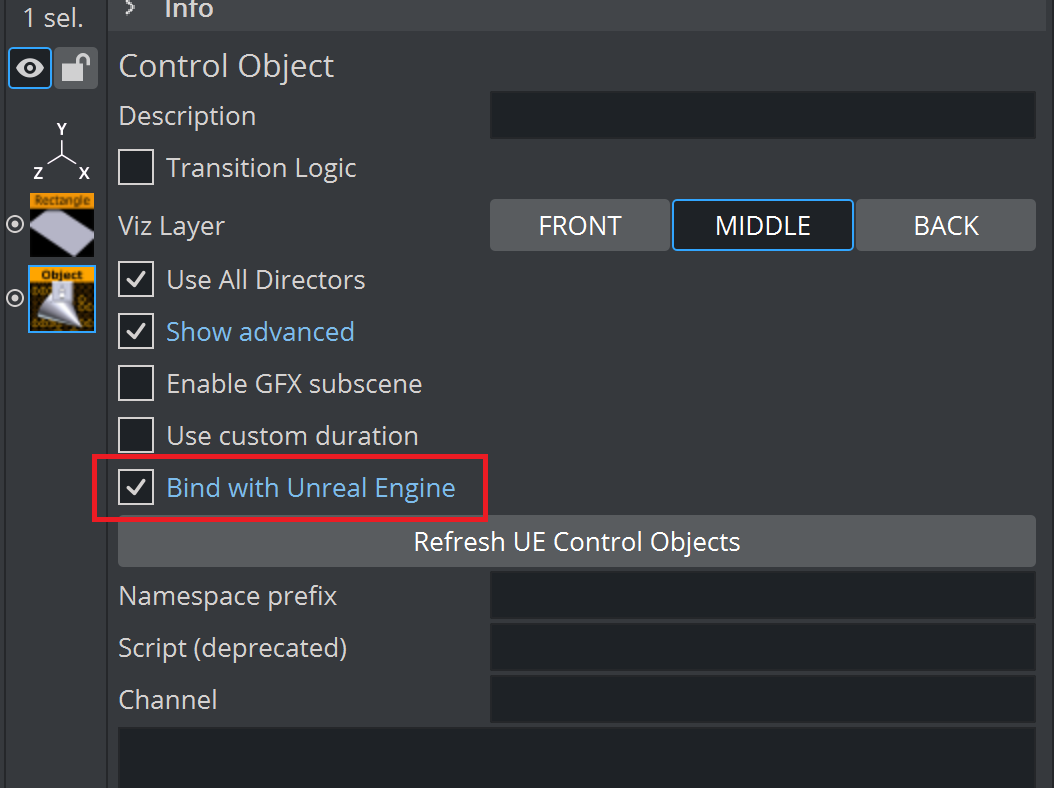
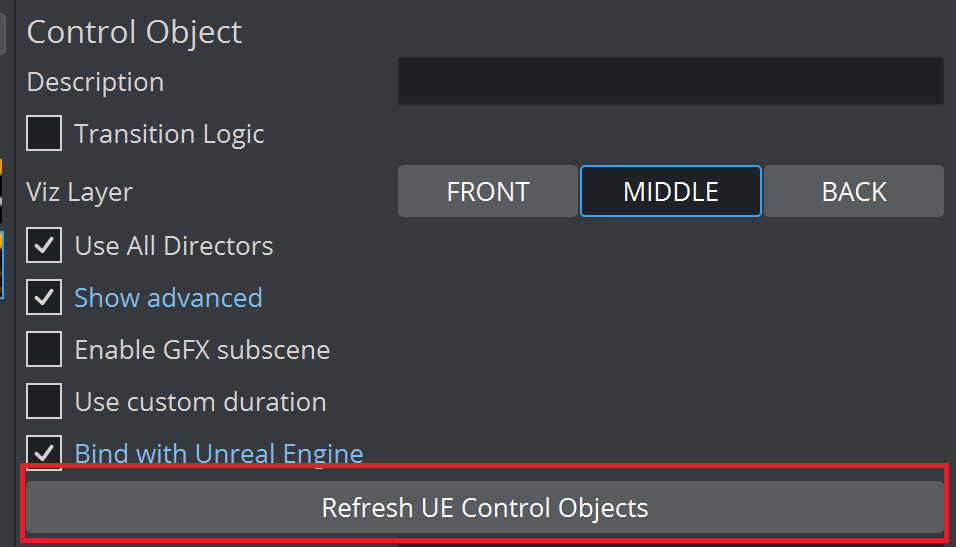
Enable Show Advanced > Bind with Unreal Engine.
Control Image
-
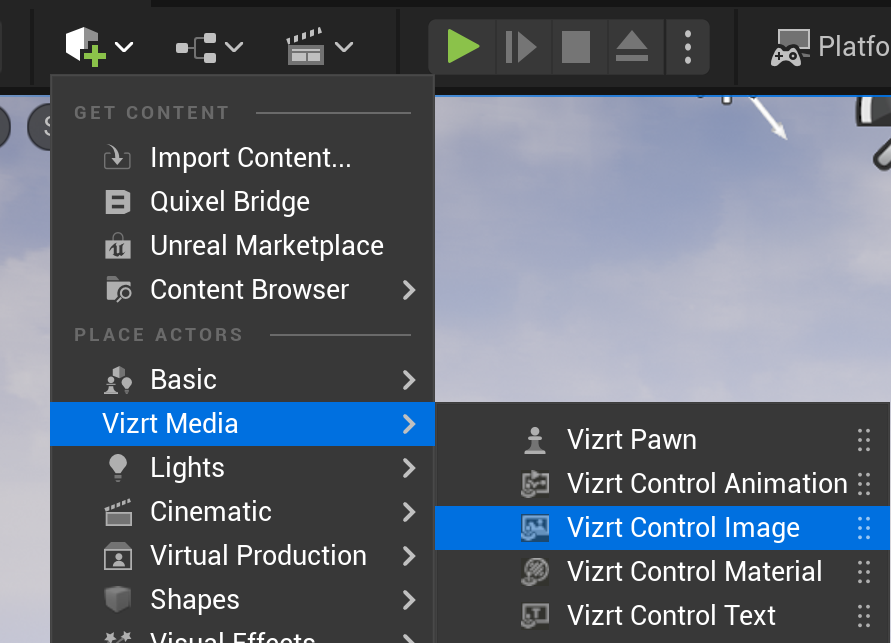
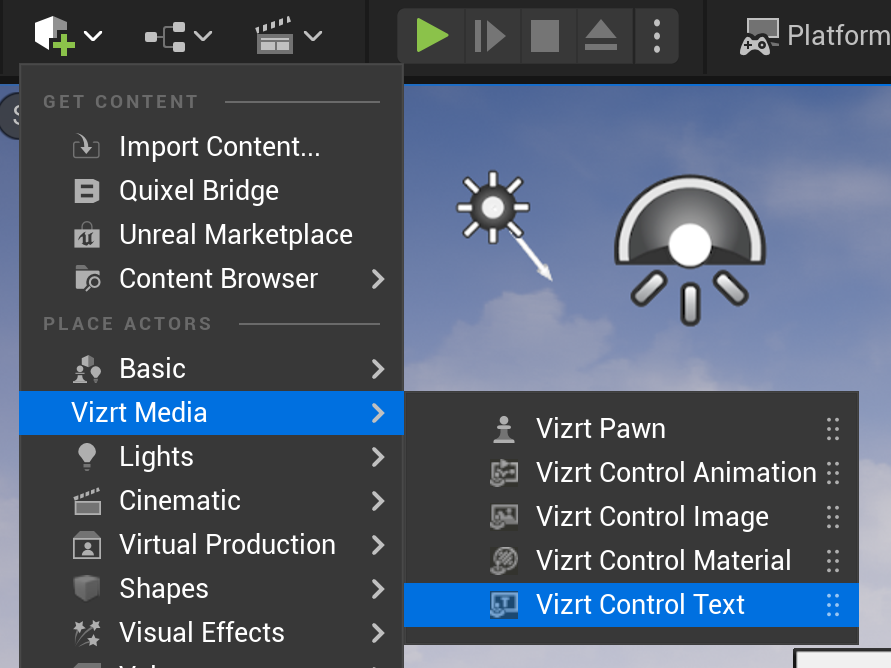
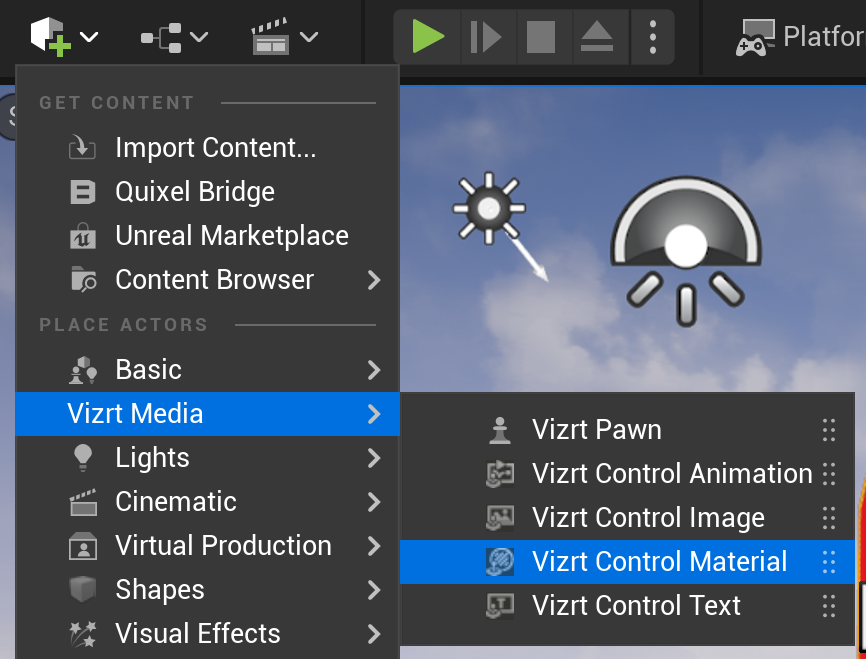
In Unreal, add a Vizrt Control Image actor to the world.
-
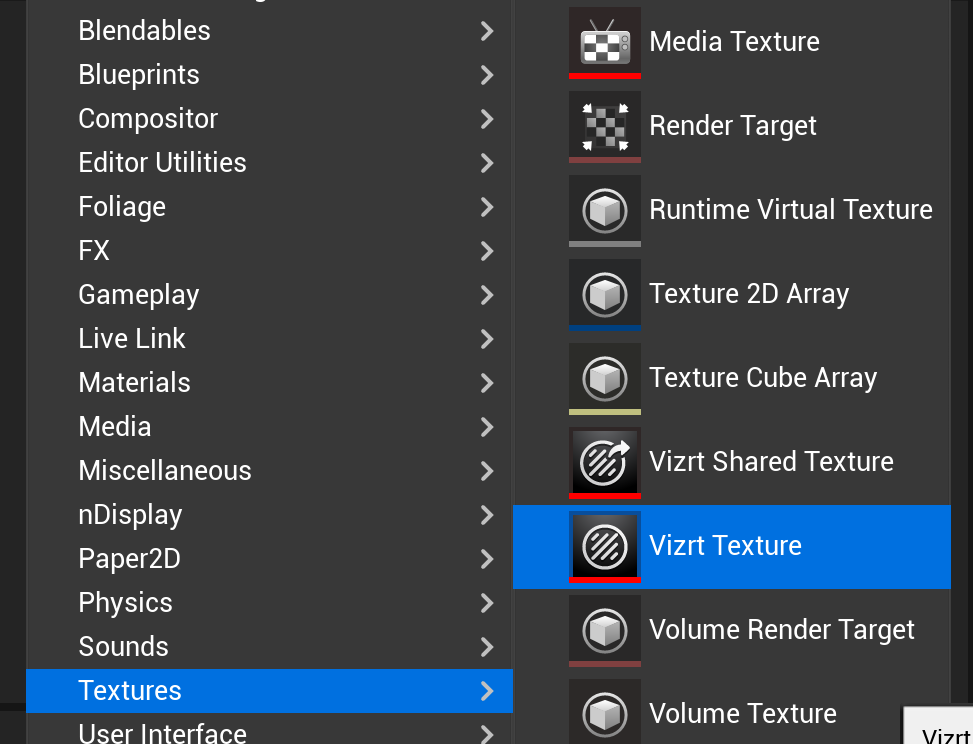
In the Content Browser, right click and create a Vizrt Texture. You can rename it to SampleTexture.
-
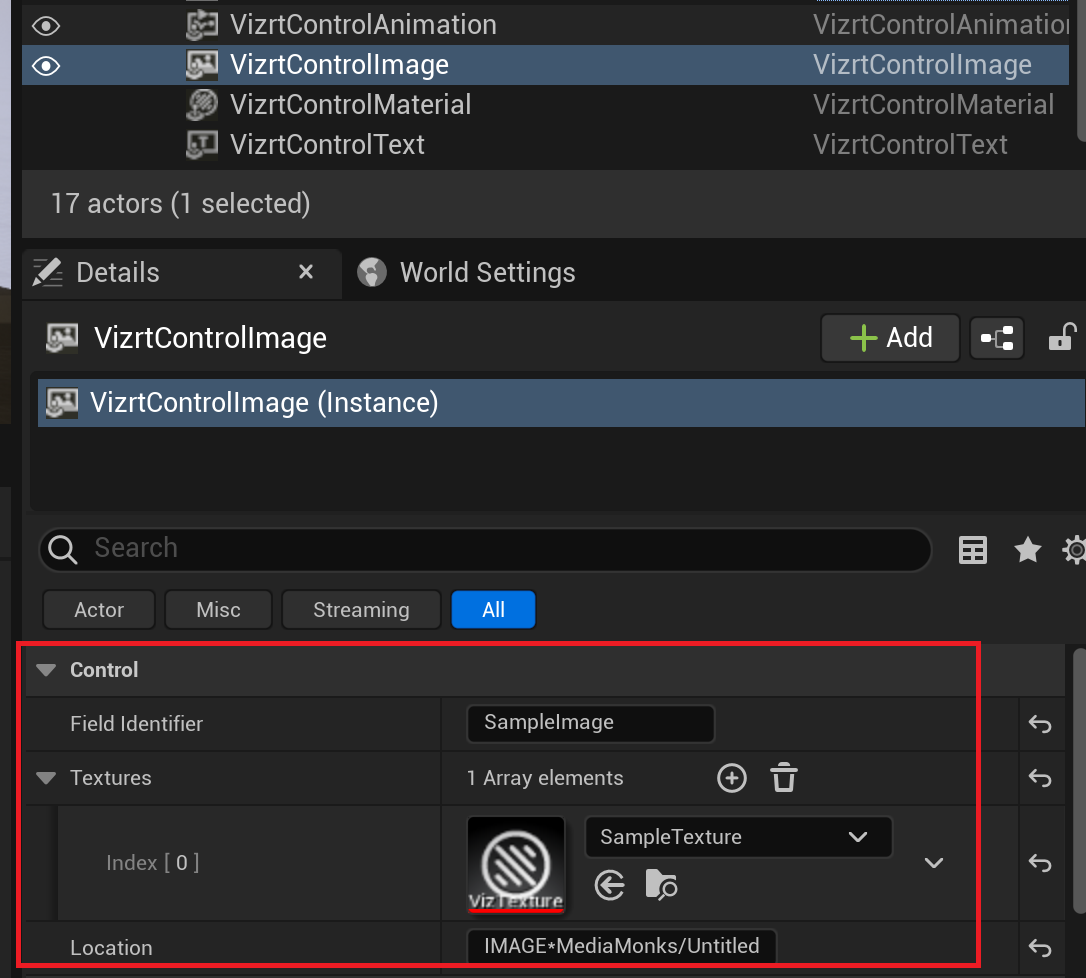
Select the VizrtControlImage actor and go to Details.
-
In Control > Field Identifier set a name. This identifies the control object Field name in Viz Engine. In Control > Textures add the VizrtTexture created before. Its Control > Location property receives the image location from the Viz Engine Control object.
-
In Viz Engine go to the Control tab. Select Control Objects.
-
The control object for the Unreal ControlImage is shown. If not. click the Refresh UE Control Objects button in the Control Object plug-in.
-
Set the Value of the Location field of the control object to an image UUID or Graphic Hub path.

If the control objects are not visible click on the main button.

-
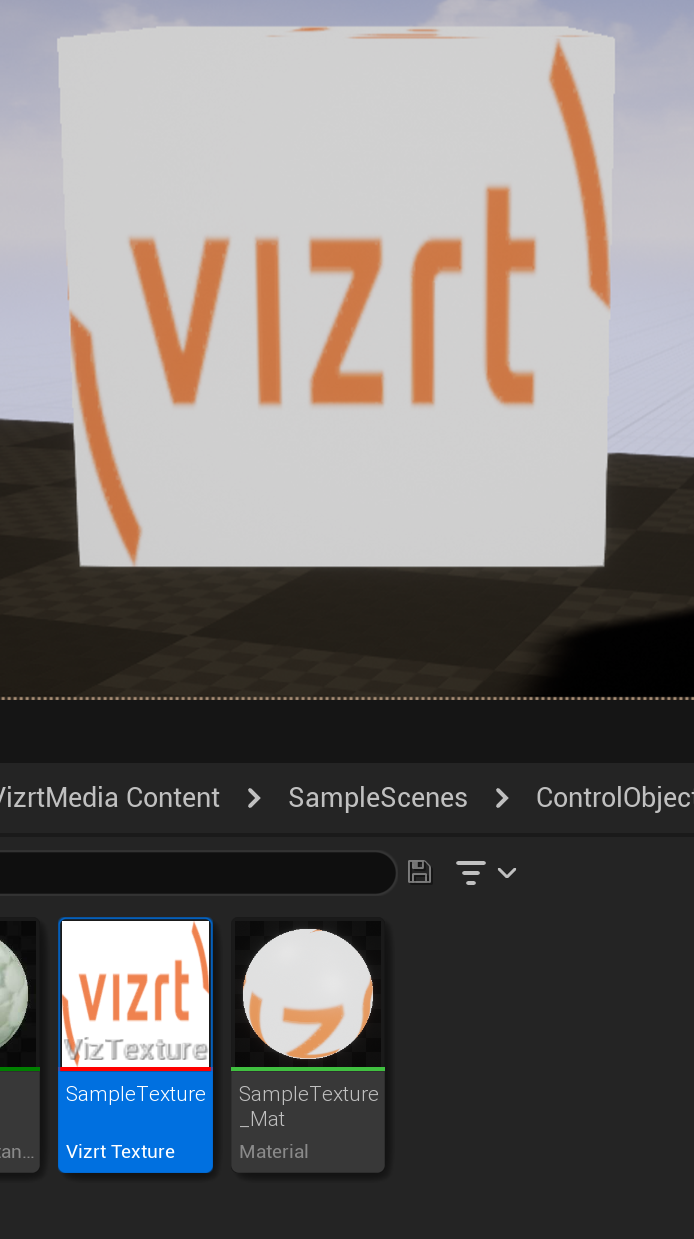
In Unreal, drag the VizrtTexture to an actor. For example, a cube.
Control Text
-
In Unreal, add a Vizrt Control Text actor to the world.
-
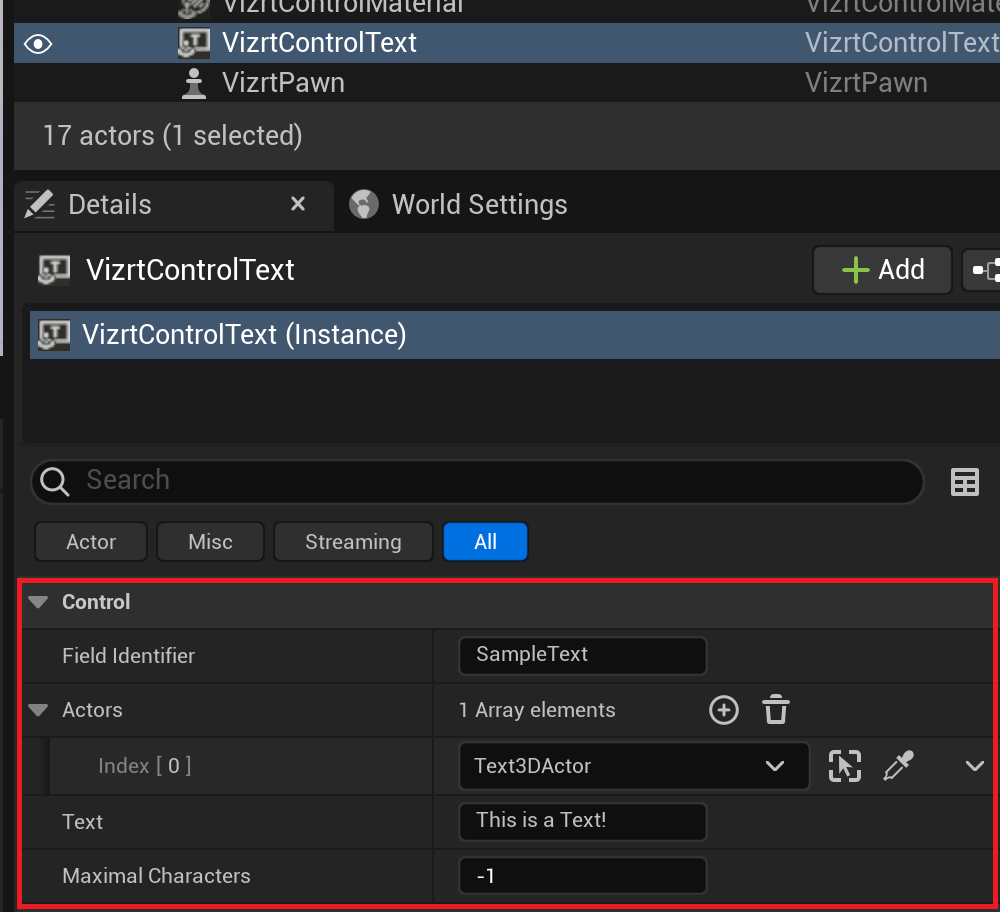
Select the Vizrt Control Text actor and go to Details.
-
In Control > Field Identifier set a name. This identifies the control object Field name in Viz Engine.
In Control > Actors, specify an Unreal actor which receives the text from the control object. For example a Text3D actor. The Control > Text property receives the text from the Viz Engine Control Object.
-
In Viz Engine, go to the Control tab. Select Control Objects.
-
The control object for the Unreal ControlText is shown. If not, click the Refresh UE Control Objects button in the Control Object plug-in.
-
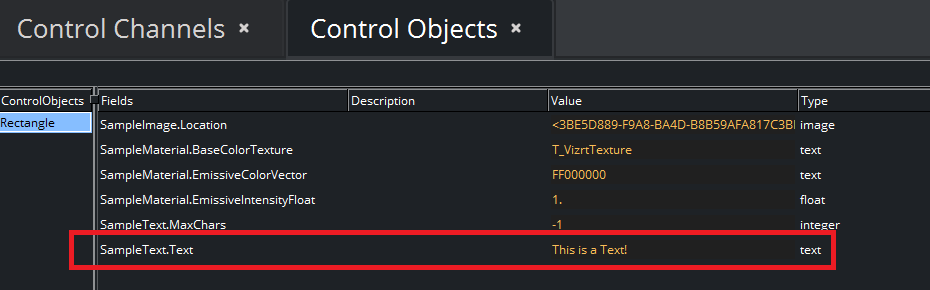
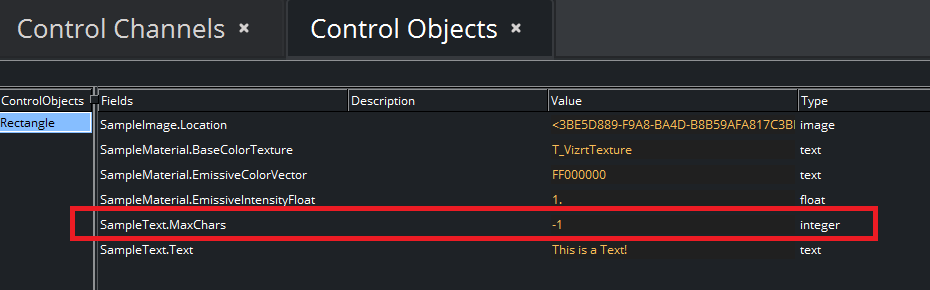
Set the Value of the Text field of the control object.
-
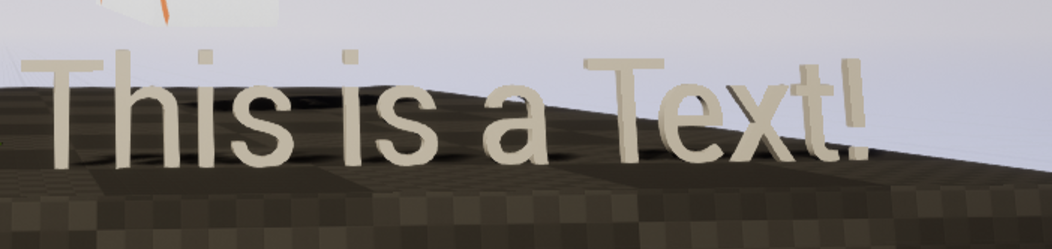
The Unreal Text3D actor updates its text.
-
It's possible to limit the number of displayed characters using the MaxChars field of the control object.
Control Material
-
In Unreal, add a Vizrt Control Material actor to the world.
-
Select the VizrtControlMaterial actor and go to Details.
In Control > Field Identifier set a name. This identifies the control object Field name in Viz Engine. In Control > Actors, specify the Unreal actors which are to have their materials changed by the Control Object. For example, specify a Cube actor (in this case named CUBE TO SET).
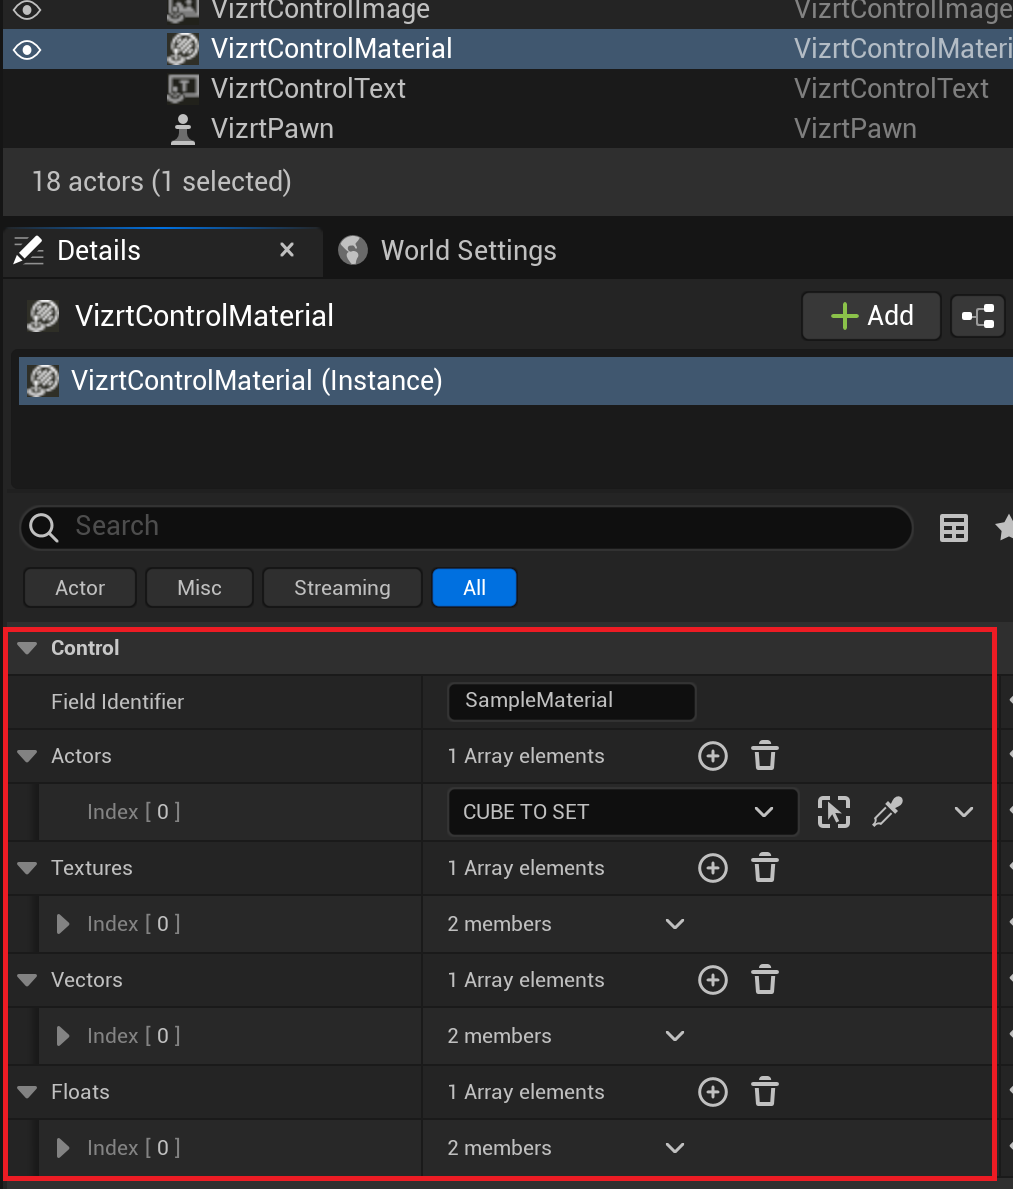
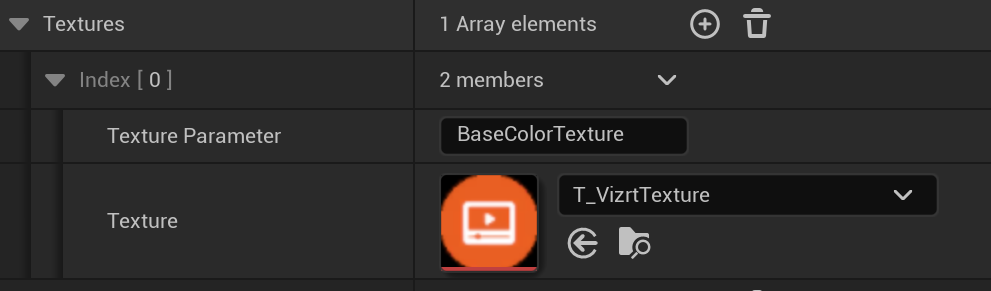
In Control > Textures, specify images of type VizrtTexture which links to a parameter of type TextureSampleParameter2D in the actor material. The Texture Parameter field must have the same name as the material parameter in the target actor.
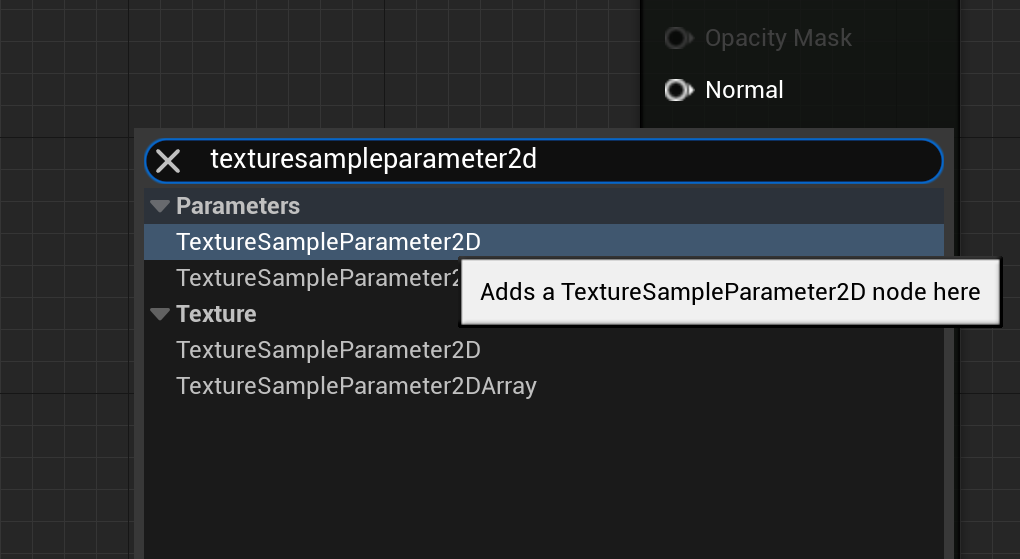
To Setup the Unreal Material Parameter: To create the matching parameter in the material, double click the material applied to the target actor to open the material editor.
Create a TextureSample2D parameter by double clicking in the empty space of the material editor, searching for texturesampleparameter2d and selecting TextureSampleParameter2D
Rename the parameter to match the Texture Parameter specified above. In this case it was named BaseColorTexture.
Drag the RGBA node of the parameter and connect it to Base Color in the material.

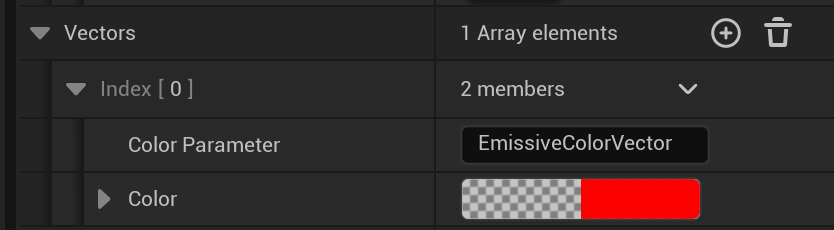
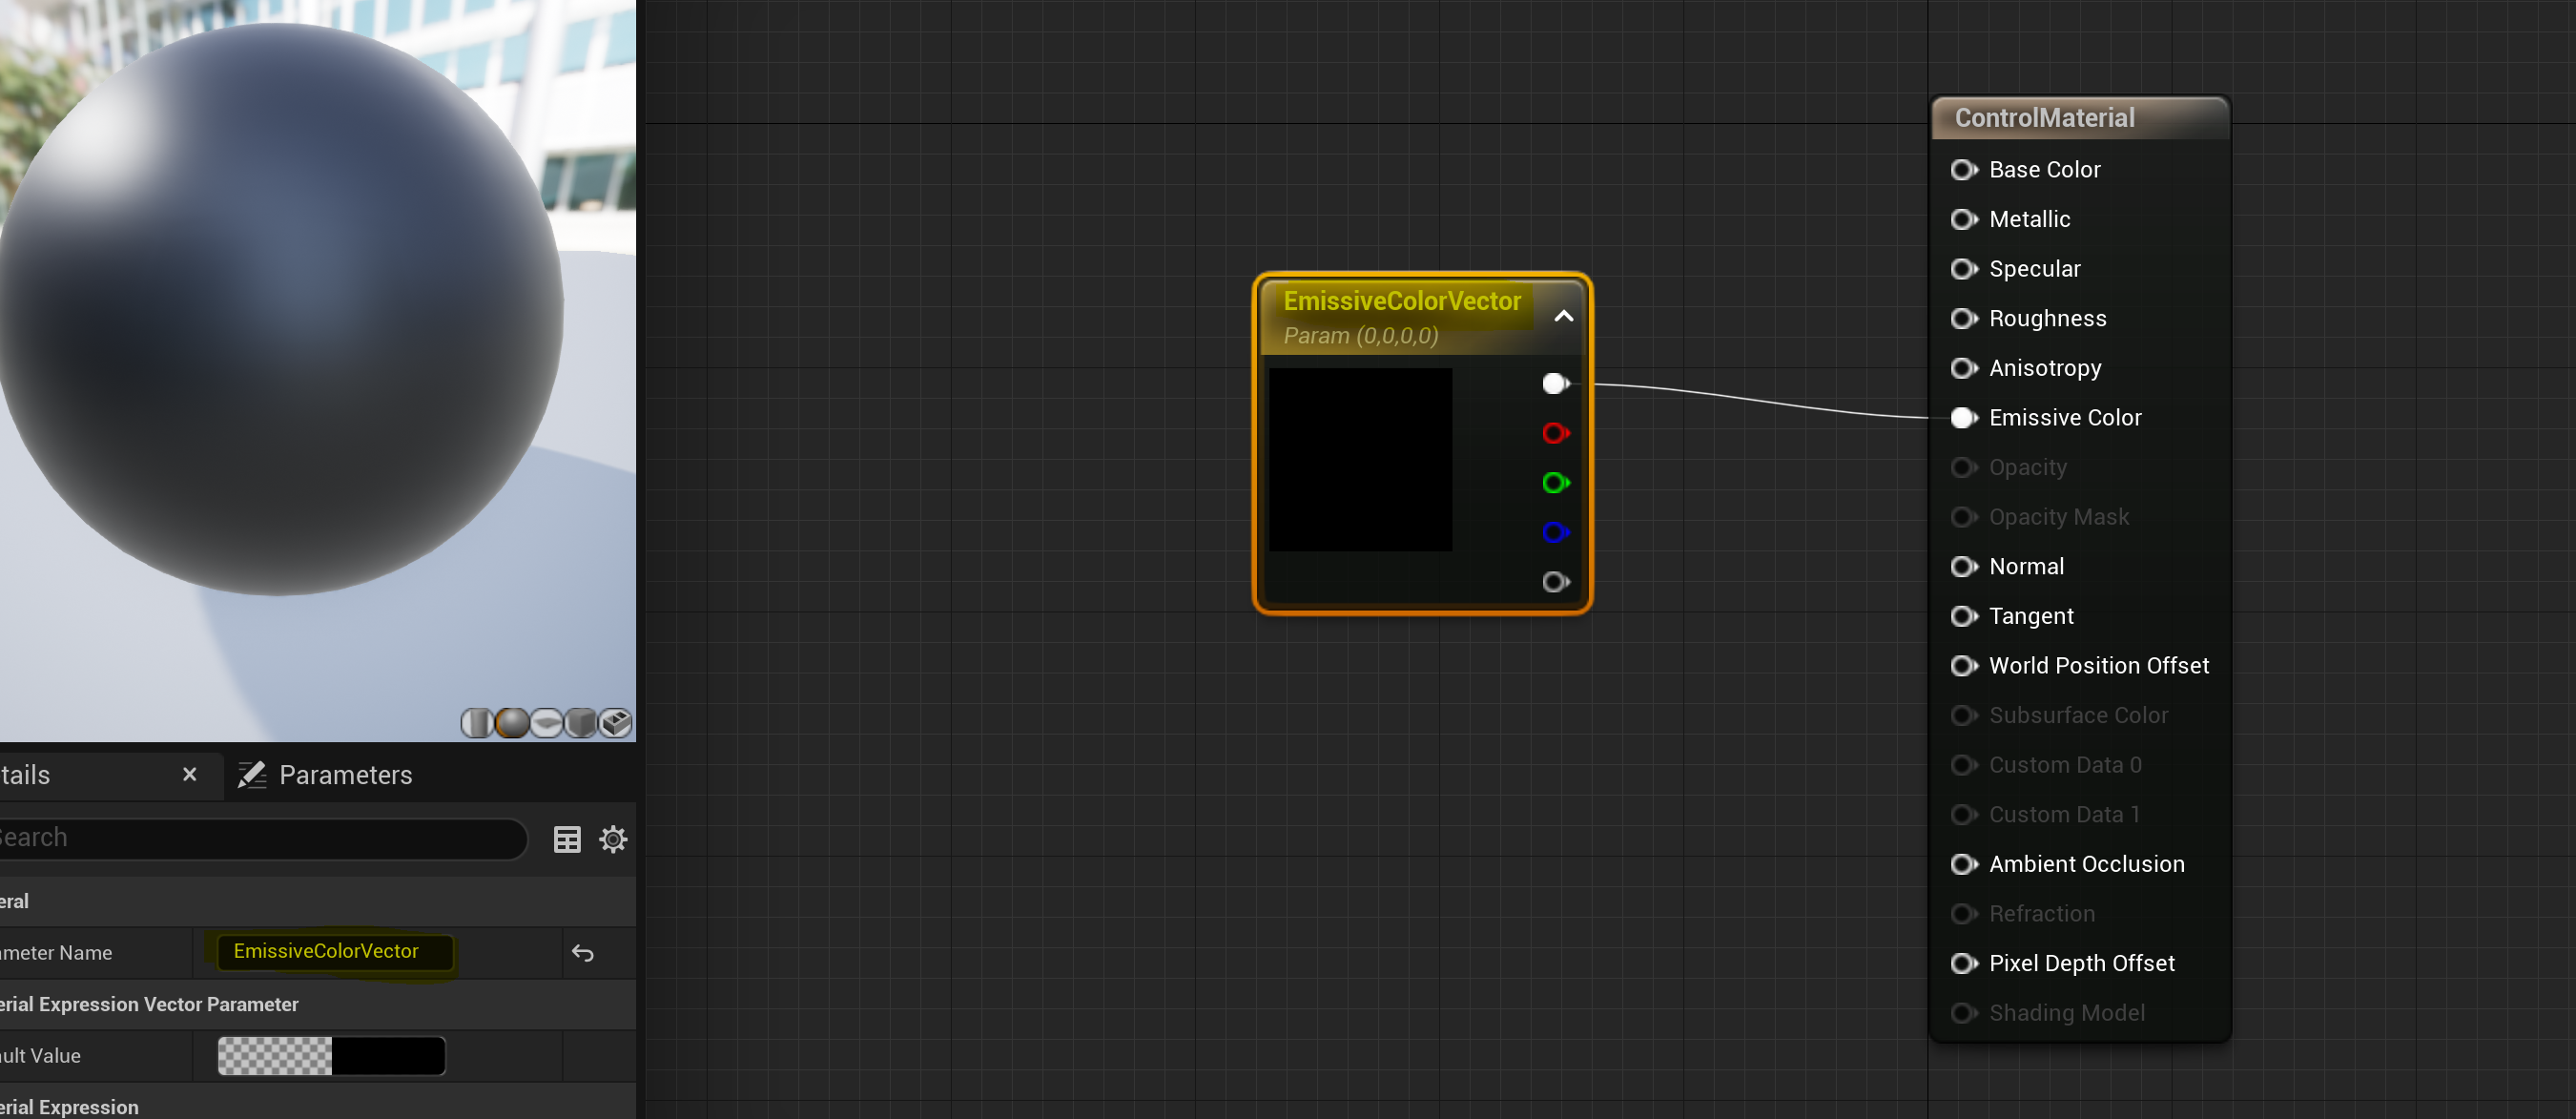
In Control > Vectors specify a color/vector which links to a parameter of type Vector in the actor material. The Color Parameter field must have the same name as the material parameter in the target actor.
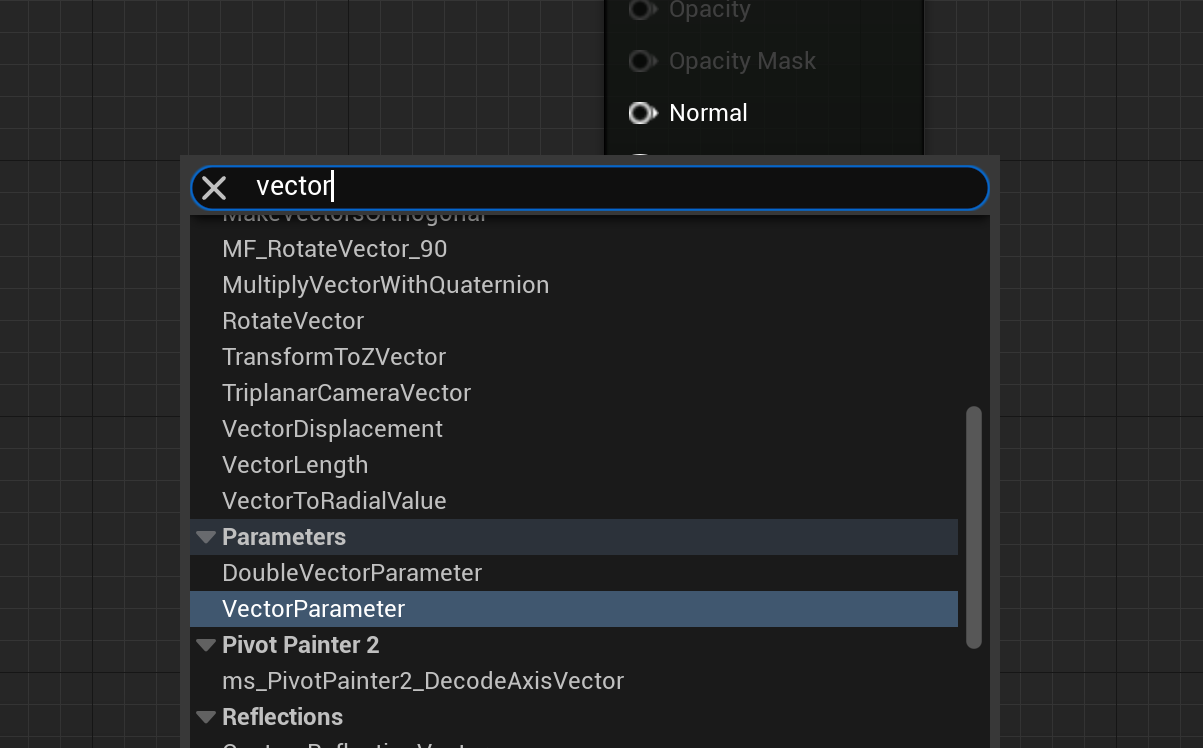
To Setup the Unreal Material Parameter: To create the matching parameter in the material, double click the material applied to the target actor to open the material editor. Create a Vector parameter by double clicking in the empty space of the material editor, searching for vector and selecting VectorParameter.
Rename the parameter to match the Color Parameter specified above. In this case it was named EmissiveColorVector. Drag the RGBA node of the parameter and connect it to Emissive Color in the material.
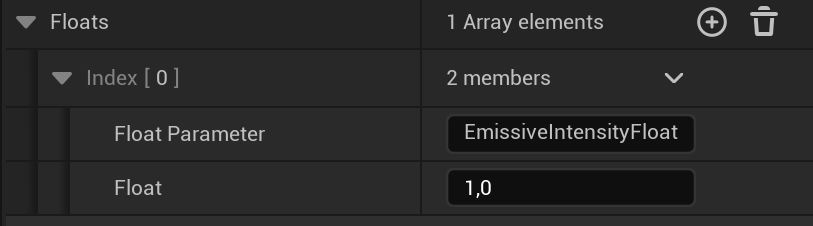
In Control > Floats, specify a float number which links to a parameter of type float in the actor material. The Float Parameter field must have the same name as the material parameter in the target actor.
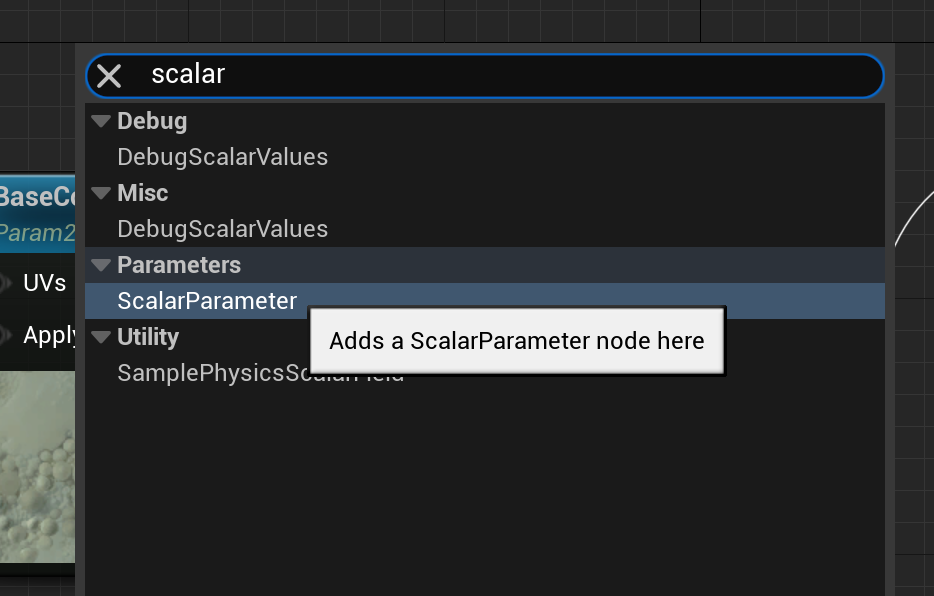
To Setup the Unreal Material Parameter: To create the matching parameter in the material, double click the material applied to the target actor to open the material editor. Create a Scalar parameter by double clicking in the empty space of the material editor, searching for scalar and selecting ScalarParameter.
Rename the parameter to match the Texture Parameter specified above. In this case, it was named EmissiveIntensityFloat. Drag the output node of the parameter and connect it to the rest of the graph. In this case it is connected to a Multiply node that scales the intensity of the emissive color parameter.
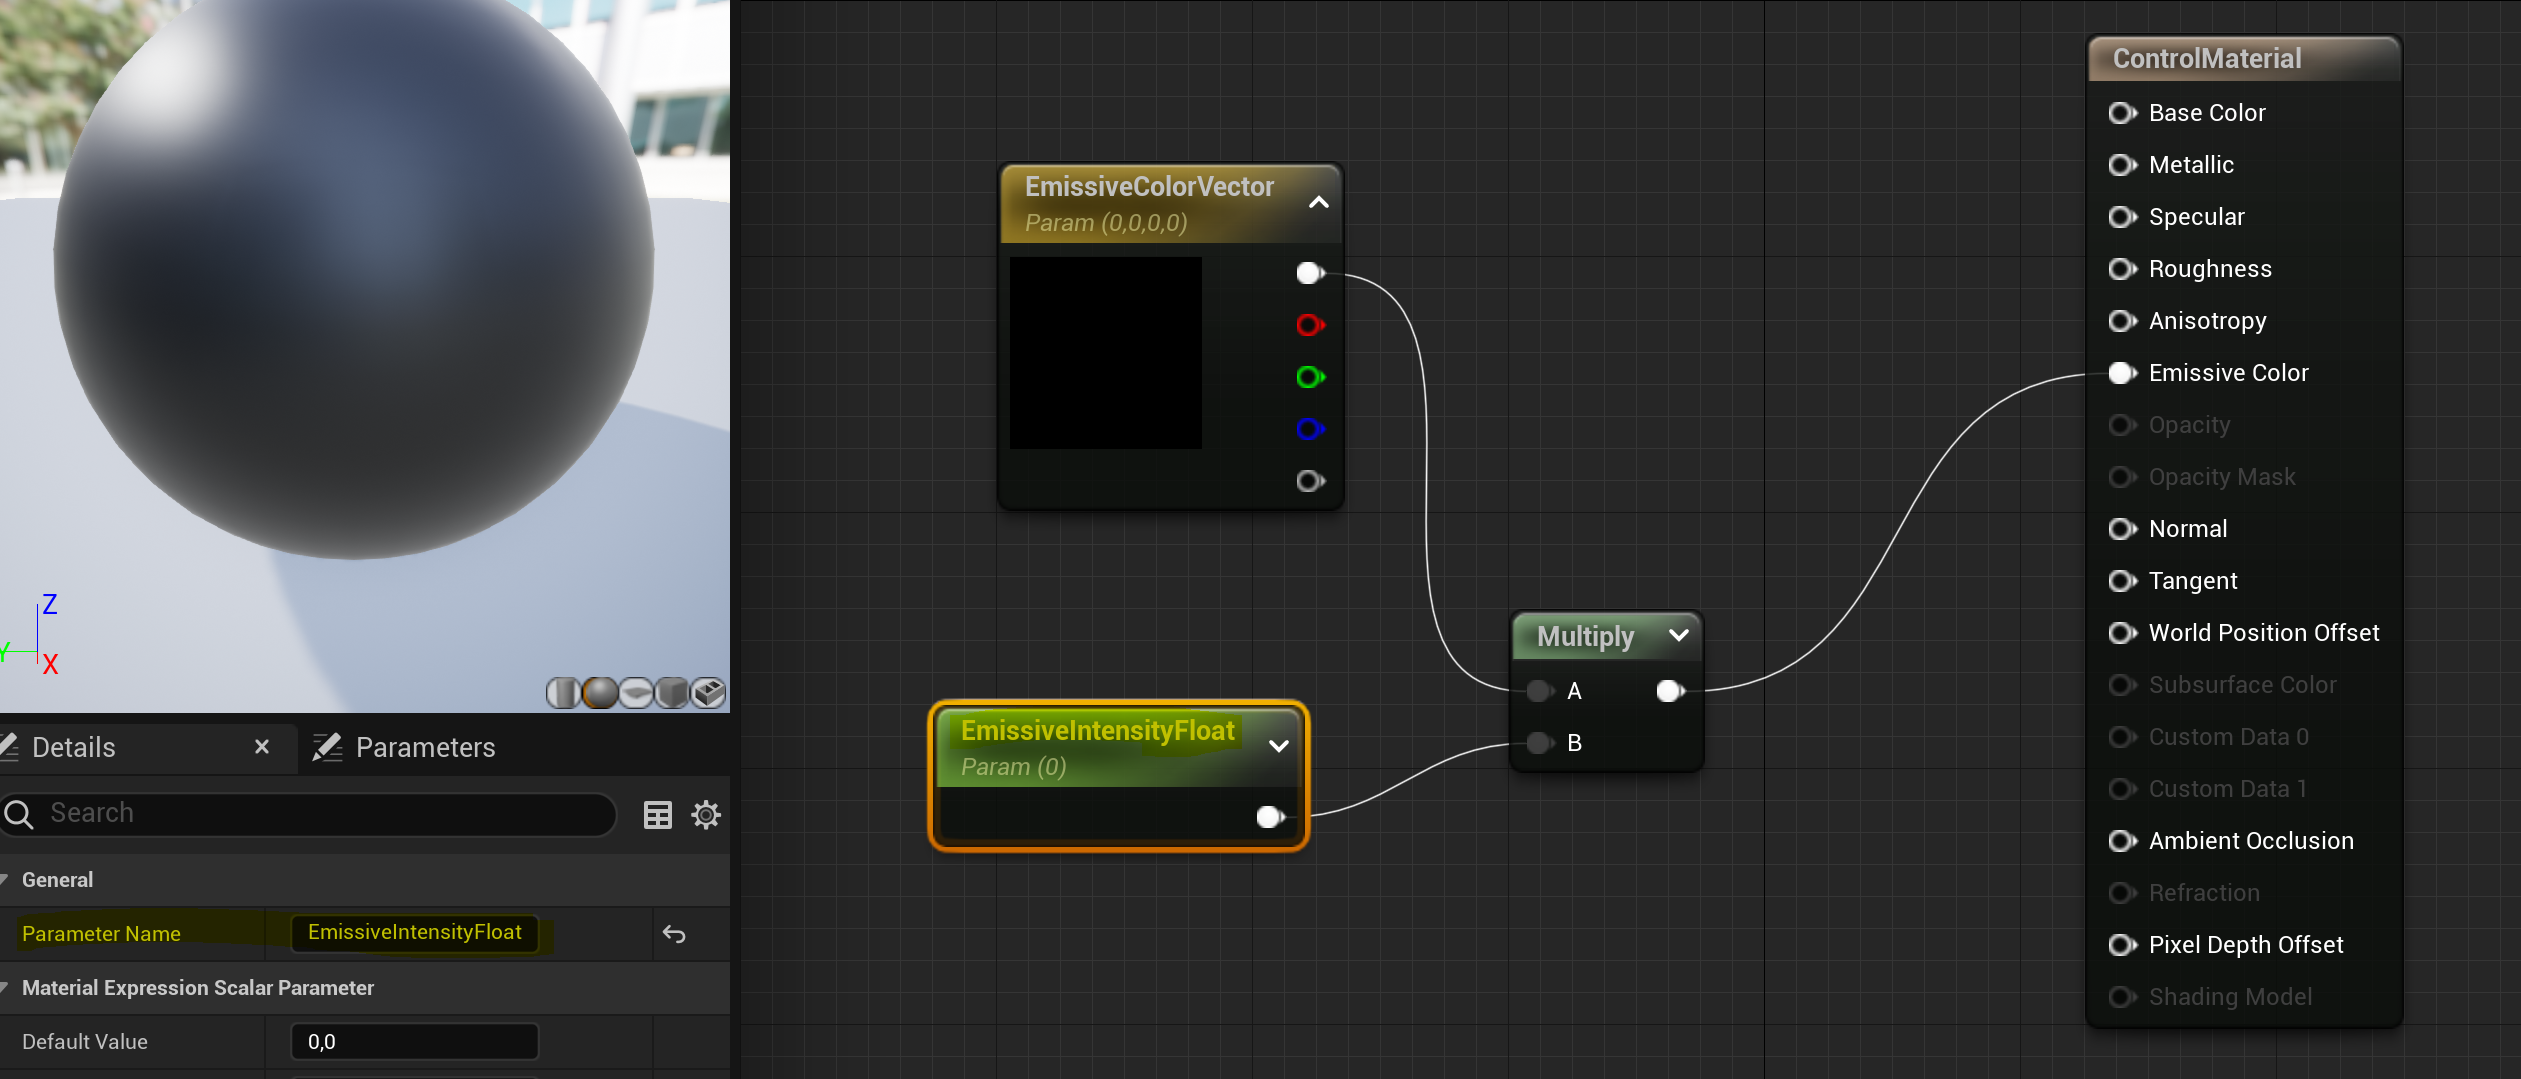
Note: Inspect the material M_Cube present in the sample scene /Plugins/VizrtMedia/Content/SampleScenes/ControlObjects for a material with parameters matching the steps above.
-
In Viz Engine, go to the Control tab. Select Control Objects.
-
The control object for the Unreal ControlMaterial is shown. If not, click the Refresh UE Control Objects button in the Control Object plug-in.
-
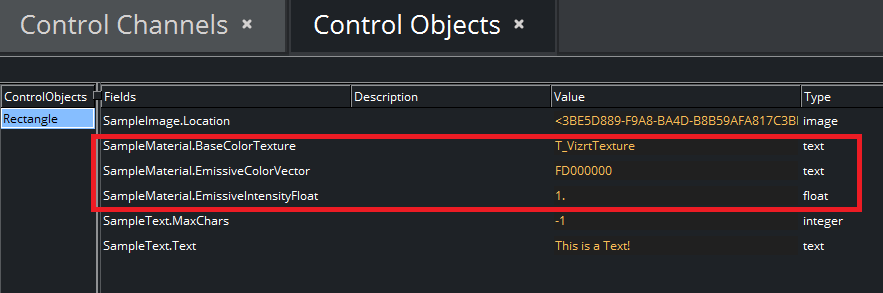
Set the Value of the corresponding fields of the control object to an Unreal VizrtTexture name, a vector (in the form of a packed integer) and a float.
-
In Unreal, the target actor, in this case a cube, is updated.

Control Animation
The control object for the control animation is not yet available in Viz Engine.