
Viz Artist User Guide
Version 5.0 | Published December 20, 2022 ©
Lights and Shadows
This section contains information on the following topics:
Lighting in the Viz Engine Render Pipeline
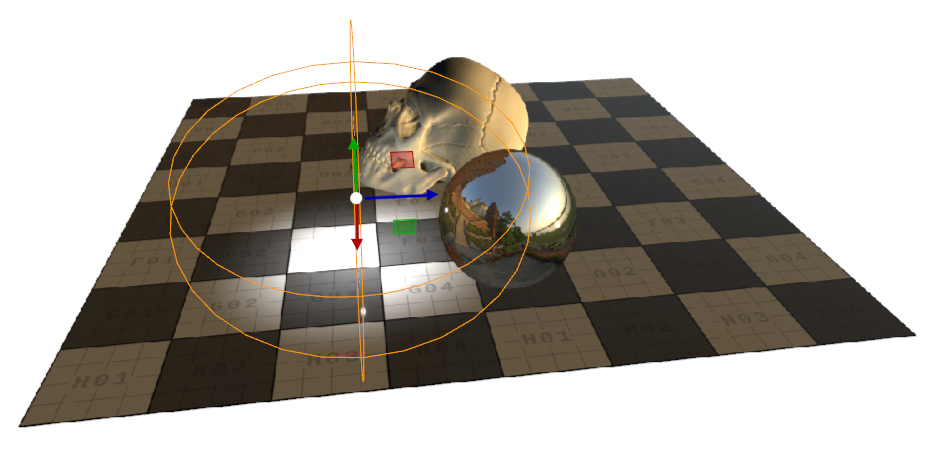
Lights in the Viz Engine Render Pipeline are different than we've been using them in the Classic Render Pipeline. The scene-based eight lights are gone now and no longer supported. To use lights with the Viz Engine Render Pipeline, you need to place a light object onto a container. Light properties like position, rotation or size can be controlled by simple changing the containers transformation.


Lighting is a basic factor when using a physical-based rendering approach. Environment Maps, PBR Materials and Light sources are essential for a photo realistic rendering.
Tip: ![]() For a quick overview (for example, if you've freshly imported a new geometry), you can use the default light settings next to the scene editor. This applies default lighting without the need to set everything up first. Be sure to turn it off again when you start setting up your lighting!
For a quick overview (for example, if you've freshly imported a new geometry), you can use the default light settings next to the scene editor. This applies default lighting without the need to set everything up first. Be sure to turn it off again when you start setting up your lighting!
The Viz Engine Render Pipeline supports eight lights per type per geometry. If you need more lights, lights can be split into light layers.
Light Layers
Every light has a light layer property, the Light Layer plug-in can be applied to a certain group of containers. The light with its corresponding bit-wise layer number is only applied to the light layer group.
Working with Environment Maps
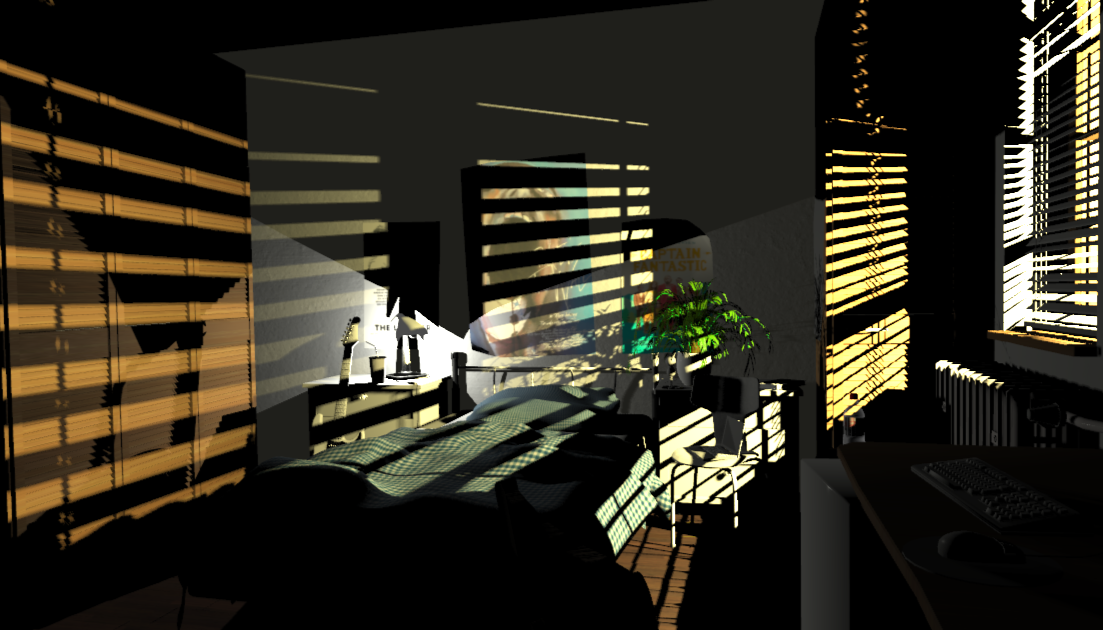
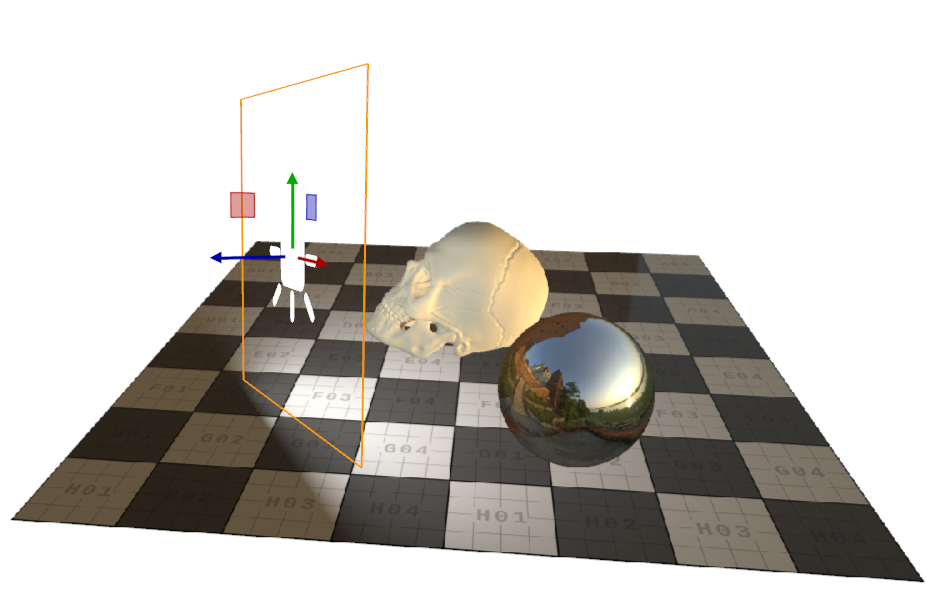
The Viz Engine Render Pipeline follows the concept of realistic lighting environments for PBR materials by using environment maps. Every Viz Engine scene should have a High Dynamic Range Image (HDRI) spherical environment map applied. Such a map represents a wide-view of our surrounding area. If our graphic is supposed to be used as an AR element inside a TV Studio, the environment map should represent your actual studio to achieve the same lighting conditions as in the real world.
In terms of a proper HDRI environment map, it should be:
-
A Map in latitude/longitude format.
-
HDR 16-bit color depth.
-
Prefiltered.
HDRI refers to the fact that the environment contains light information that extends beyond the usual color range from 0 to 255. This comes into play when we talk about correct Tonemapping. Details in bright and dark areas can be controlled for realistic light and reflection effects.
Image maps are imported as .EXR files. Once you have imported these files, right click on them and select Prefilter Environment Map and save it as a new map. These maps are required for correct rendering and need to be applied in the Scene Settings Asset Placement. All pixels in the map are treated as light source. Environment Maps can consume quite a lot of memory inside your Graphic Hub.
Environment Maps in Graphic Hub are labeled with ENV:
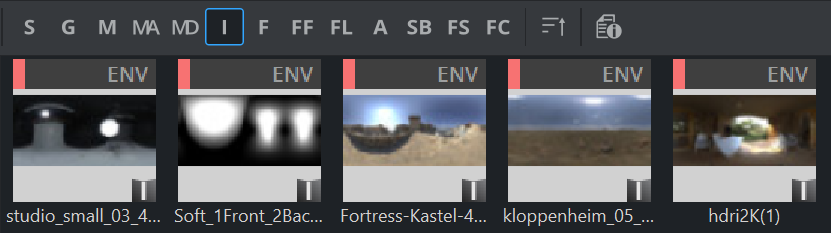
Only pre-filtered Environment maps can be used, any other image will show a warning message.
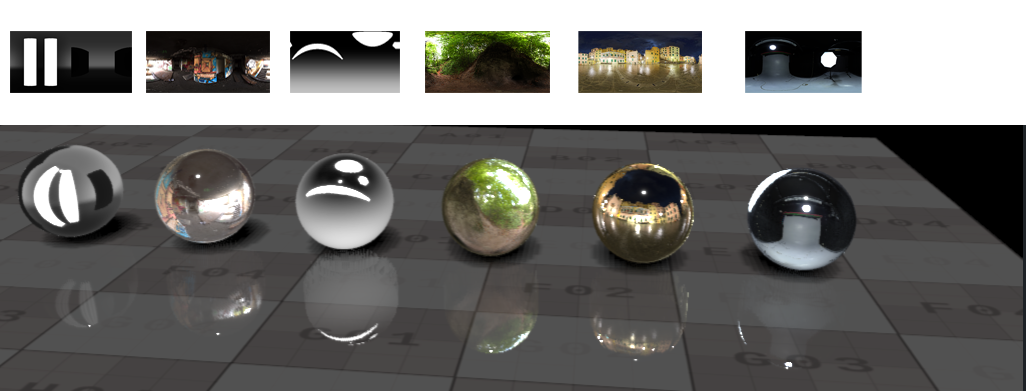
The environment can be rotated to bring lights into the correct position. In addition, the intensity can also be varied. The following illustrates some images with different environment maps applied:
Credits: Environment Maps taken from https://hdrihaven.com/
Directional Lights
Directional lights (also known as Distant lights) are lights that shine into a parallel direction. All rays are present everywhere in your scene as there is no falloff: The intensity stays the same. In nature, real directional lights do not exist, in computer graphics they are mainly used to simulate strong light sources far away emitting all objects. A good reference example would be the sun. That's why you would usually only have one distant light in your scene, responsible for a global, scene-wide light.
Directional lights are only controlled by an object's container rotation, position or scaling do not have any influence. They have a specular and a diffuse intensity.

In addition, the number of light cascades used for directional lighting can be set in the light properties. The higher the cascade setting, the better the quality of shadows.
Area Lights
An area light is defined by a square area and sends out light equally into the square's main direction without any falloff. They can be used to simulate flat light panels or rays from a portal light. Area lights are the only lights that do not emit any specular light, nor do they cast shadows!
They are defined by their position, rotation and scaling of the container's transformation.
Point Lights
Light emitted from a single point, into all directions. The typical usage for point lights is for example a classical light bulb.
In comparison to the directional light, they have a falloff and are not influenced by any direction. The light casts equally into all directions, but the position is important; while for directional lights, the position doesn't matter.
Spot Lights
Spot lights project light rays onto a geometry using a cone of light. They are very similar to point lights, except that instead of emitting into all directions, they are restricted to a cone. Spot Lights can be used, for example as a flashlight of a lighthouse.
Information: Be careful when using spotlights and shadows! The cascading shadows need to be calculated six times per light, shadows on spotlights decrease your performance.
Working with IES Files
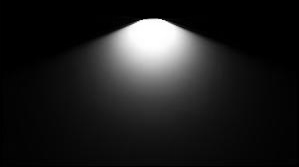
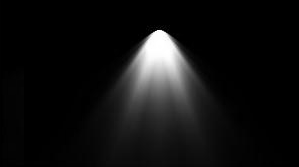
Viz Engine supports IES files, which stands for Illuminating Engineering Society. IES files describe how a real light is being distributed from a Light Source. By using an IES profile, the the distribution of light emitted from shapes a more realistic light fixture. Many vendors supply a IES profile for their lights.
|
Basic Light |
Light with IES profile |
|
|
|
|
|
|
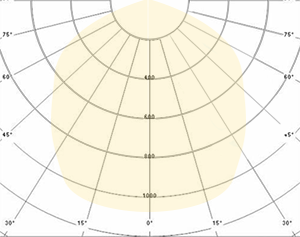
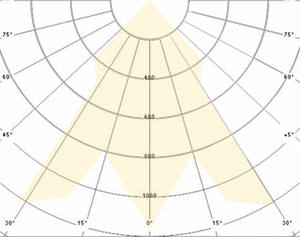
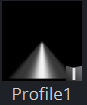
Import .ies files as images to Graphic Hub. Viz Engine creates a preview for the image based on the profile information contained in the IES file:
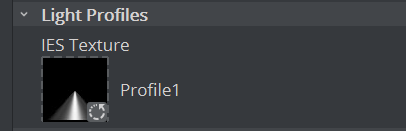
Apply the IES profile to the light by dragging it onto the Light Profile setting in Point or Spot lights:
Using IES light profiles adds more realistic lighting to your scenes:
Information: IES Files are supported on Point and Spotlights only.
Information: If an IES profile is applied to a Spotlight, its cones mask the IES profile effect. The maximum outer cone angle for the Spotlight is 180 degrees, so any IES information beyond this point is lost.
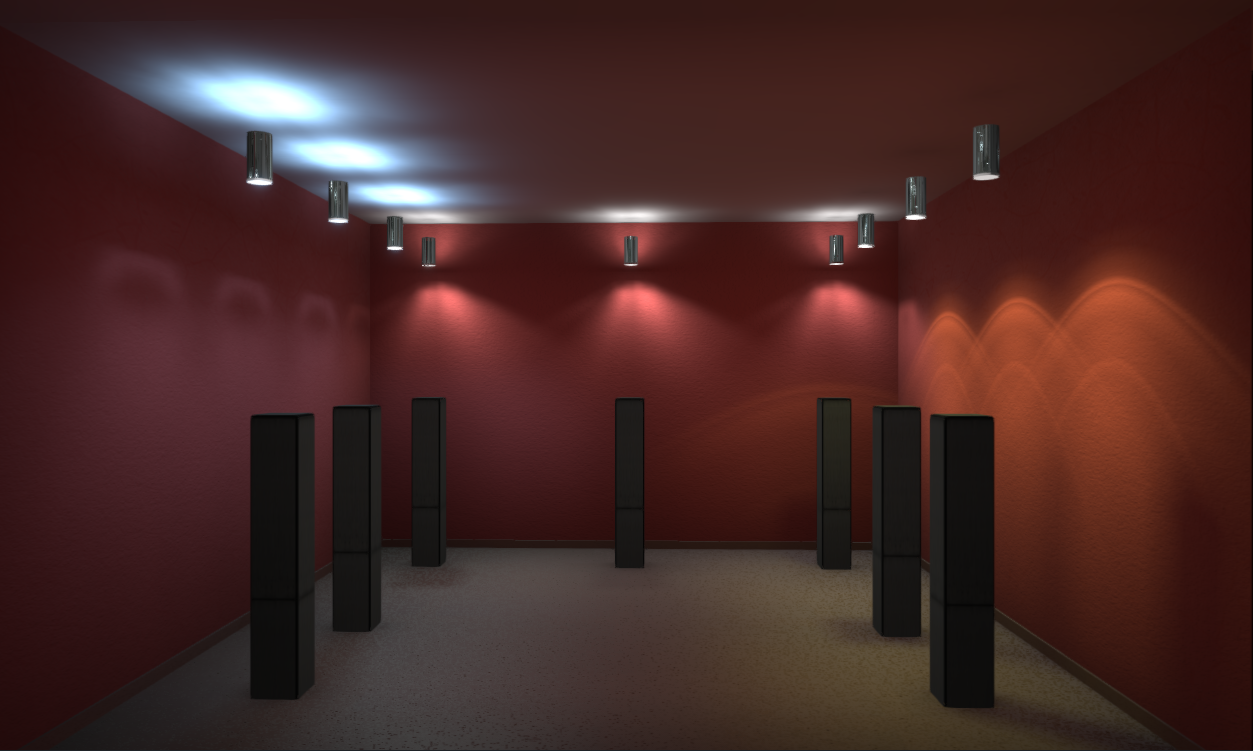
Shadows
Lights cast shadows, the approach how shadows are created has completely changed and been optimized.
To use shadows, the following preconditions need to be fulfilled:
-
A light sources supporting shadows (Directional, Point, Spot Lights) and shadow casting enabled on the light.
-
Shadows need to be turned on in Scene Settings > Render Settings. This is a global setting for the whole scene.
-
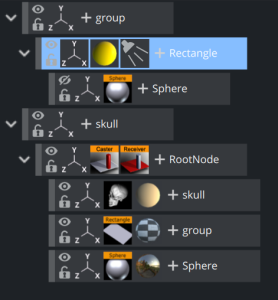
Every Geometry that needs to receive and cast shadows must have a caster/receiver plug-in applied.
The shadow rendering algorithm used is Cascaded Shadow Mapping, which splits a light frustum into multiple ones, where each frustum gets its own shadow mapping texture.
The sequences' shadow mapping panel supports multiple configurations, which are scene global options for the shadow rendering:

-
Enable: Turns shadow mapping on and off for the scene.
-
Resolution: Sets resolution of a single shadow mapping texture.
-
PCF Samples: Determines the number of samples used for softer shadows. The higher the softer the shadow, but the higher the performance impact.
-
Alpha Threshold: Sets the threshold for alpha masked shadows, when the alpha is lower than the given threshold, a pixel is discarded.
Each light has additional options that influence the way the shadow textures are being generated:
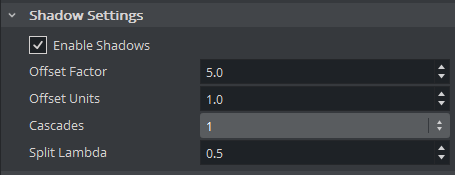
-
Enable Shadows: Enables shadow casting of this light.
-
Offset Factor / Units: Influences the way depth values of a shadow map are being written. Higher values help reducing shadow acne.
-
Cascades: Sets number of textures this light uses for shadow mapping.
-
Split Lambda: Influences the way the frustum splits are calculated. It's a factor to blend between logarithmic and uniform distribution of the splits.
The quality of your shadow is also influenced by the Camera Near and Far value. The larger this distance, the less quality you'll have. Therefore, it is recommended to set the values to a real world environment. The units are in centimeters, a Far value of 20 meters does not make any sense if your objects has only a few meters of depth.
Troubleshooting Shadows
What is wrong if I do not see my shadows? It could be:
-
The Environment is too Shiny
Try to use another Environment Map with less light or reduce the Environment Intensity.
-
Default Lighting is Enabled
Make sure that you do not have the default lighting button ( ![]() ) enabled. This is for a quick check only (for example, if your geometry has been imported correctly). This enables a default light.
) enabled. This is for a quick check only (for example, if your geometry has been imported correctly). This enables a default light.
-
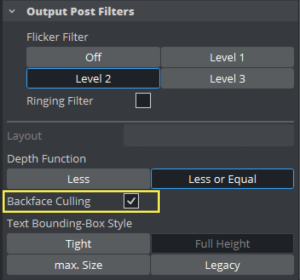
Rendering is Occurring on Backface
Viz Engine does not render shadows on the backface, for instance if a rectangle is flipped by -90° or surfaces are flipped inside out. If Rendering is needed, than you have to add an Expert plugin with Backface turned on.
A global backface rendering can be turned on in the scene settings, if your shadow appears, you are rendering on the wrong side of your geometry.
-
Point Light Radius is too Small
Point Lights require quite a large radius to take effect. Try to increase the value for the Radius.
-
A Quality Issue
-
The quality of Shadows depends on various factors. Verify that your camera far and near values match your scene dimensions. A far value of 20000 means that your scene is about 20 meters in depth, usually this can be set closer.
-
Try to use fewer cascades, as more cascades cause less performance.
-
Shadow Map Resolutions. Keep in mind that a 4K shadow map for Point lights needs to be rendered six times. A good compromise between cascades and lightmap size needs to be found.
-
Note: Keep in mind that Area Lights do NOT cast shadows.