
Viz Artist User Guide
Version 5.0 | Published December 20, 2022 ©
Precision Keyer + Compositing on Unreal Engine 5
The Precision Keyer is now available as an Unreal Integration with the Unreal Engine 5. This is a quick guide to help set up the Keyer in the Unreal Engine with the Vizrt Compositor plug-in.
Warning: Do not use Temporal Anti-Aliasing methods (Temporal AA and Temporal Super Resolution) with the Compositor and Keyer as this will lead to possible artifacts on the image (similar to key and fill being out of sync). On the project settings set the Anti-Aliasing to FXAA or MSAA.
Precision Keyer Basics
Sending the Clip and Matte Scene
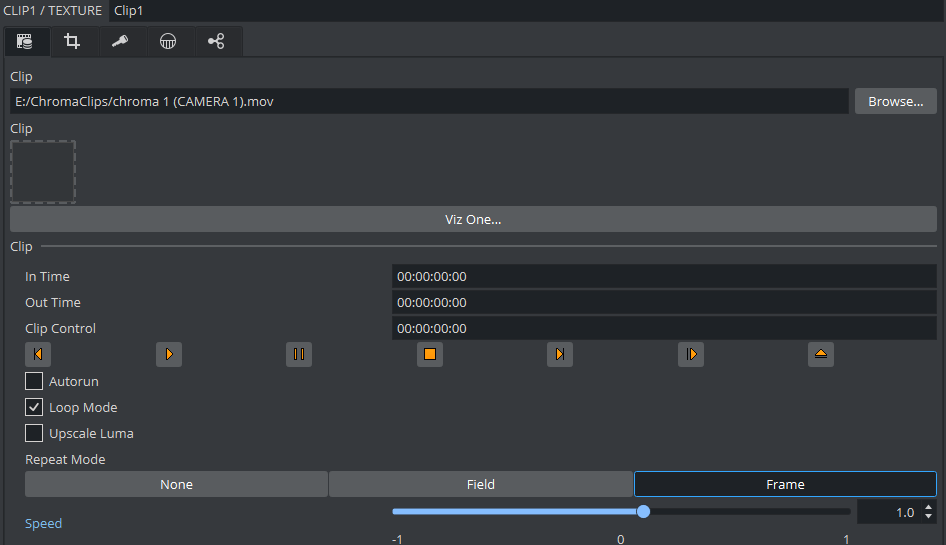
To send the Clip scene in Viz Engine and have it playing in Unreal:
-
Grab CLIP1 from the plug-ins.

-
Add to the Media tab.

-
Add a clip.
-
Make sure you are sending the Original clip if you want to change parameters with Viz Arc.

-
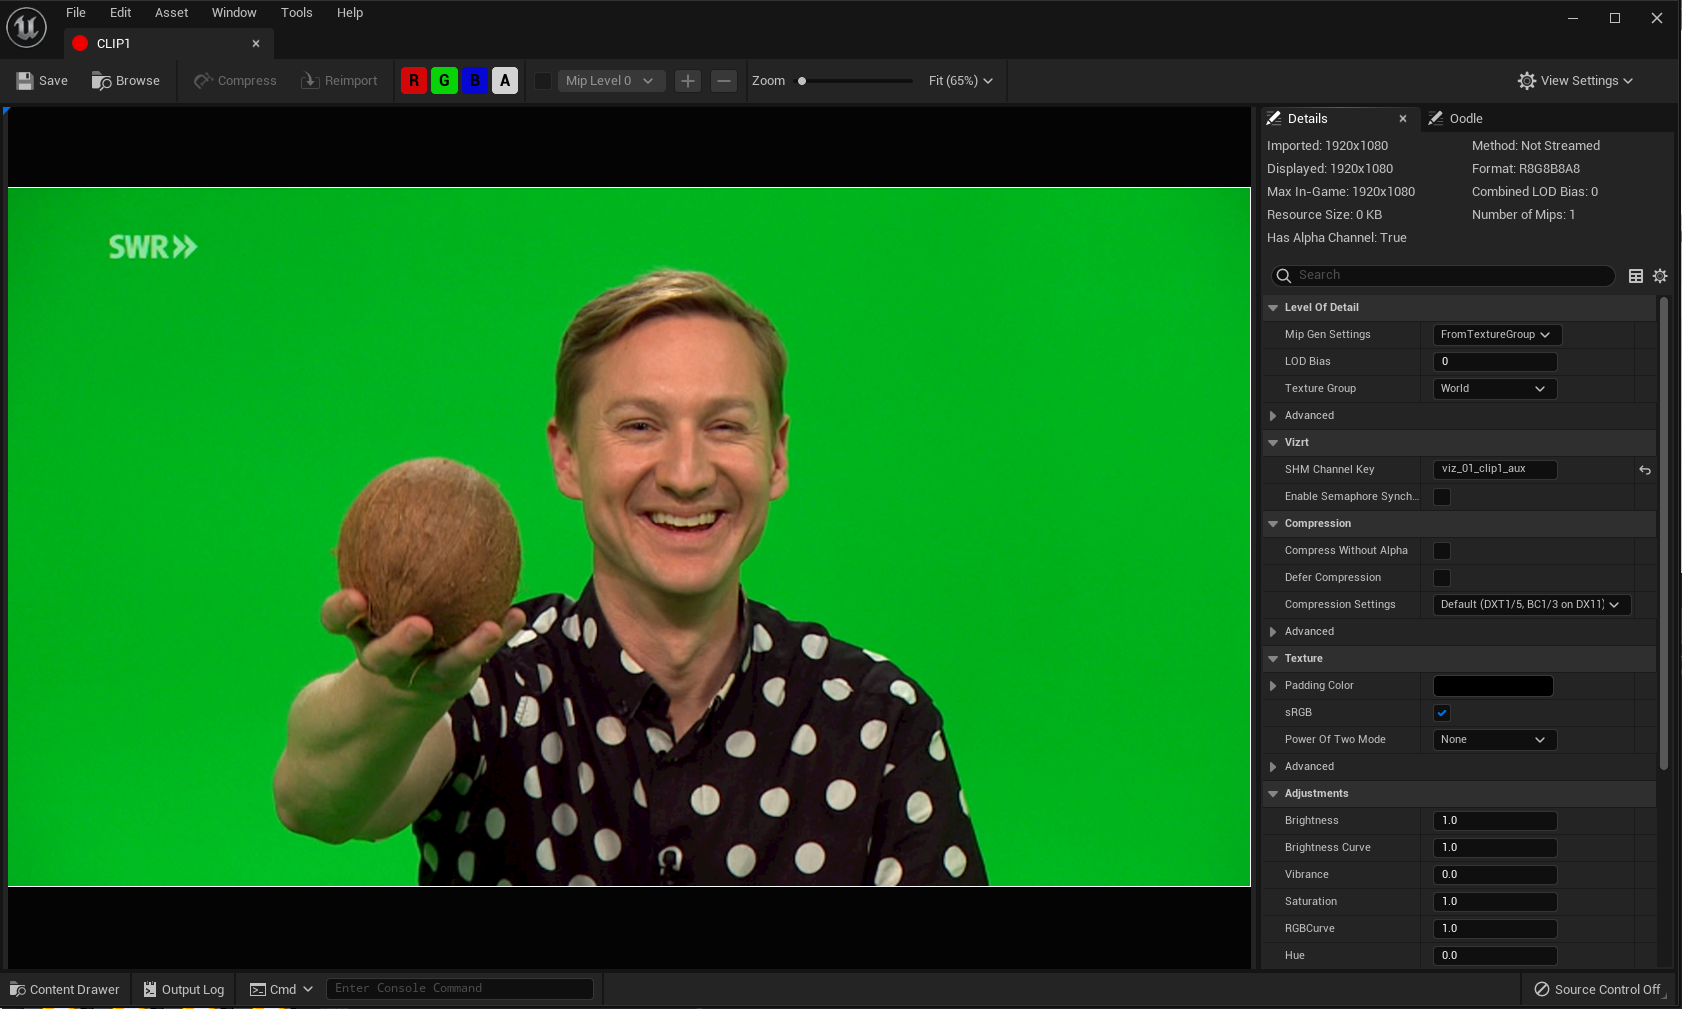
In the Unreal Engine, find the CLIP1 asset. It receives the clip when in play.

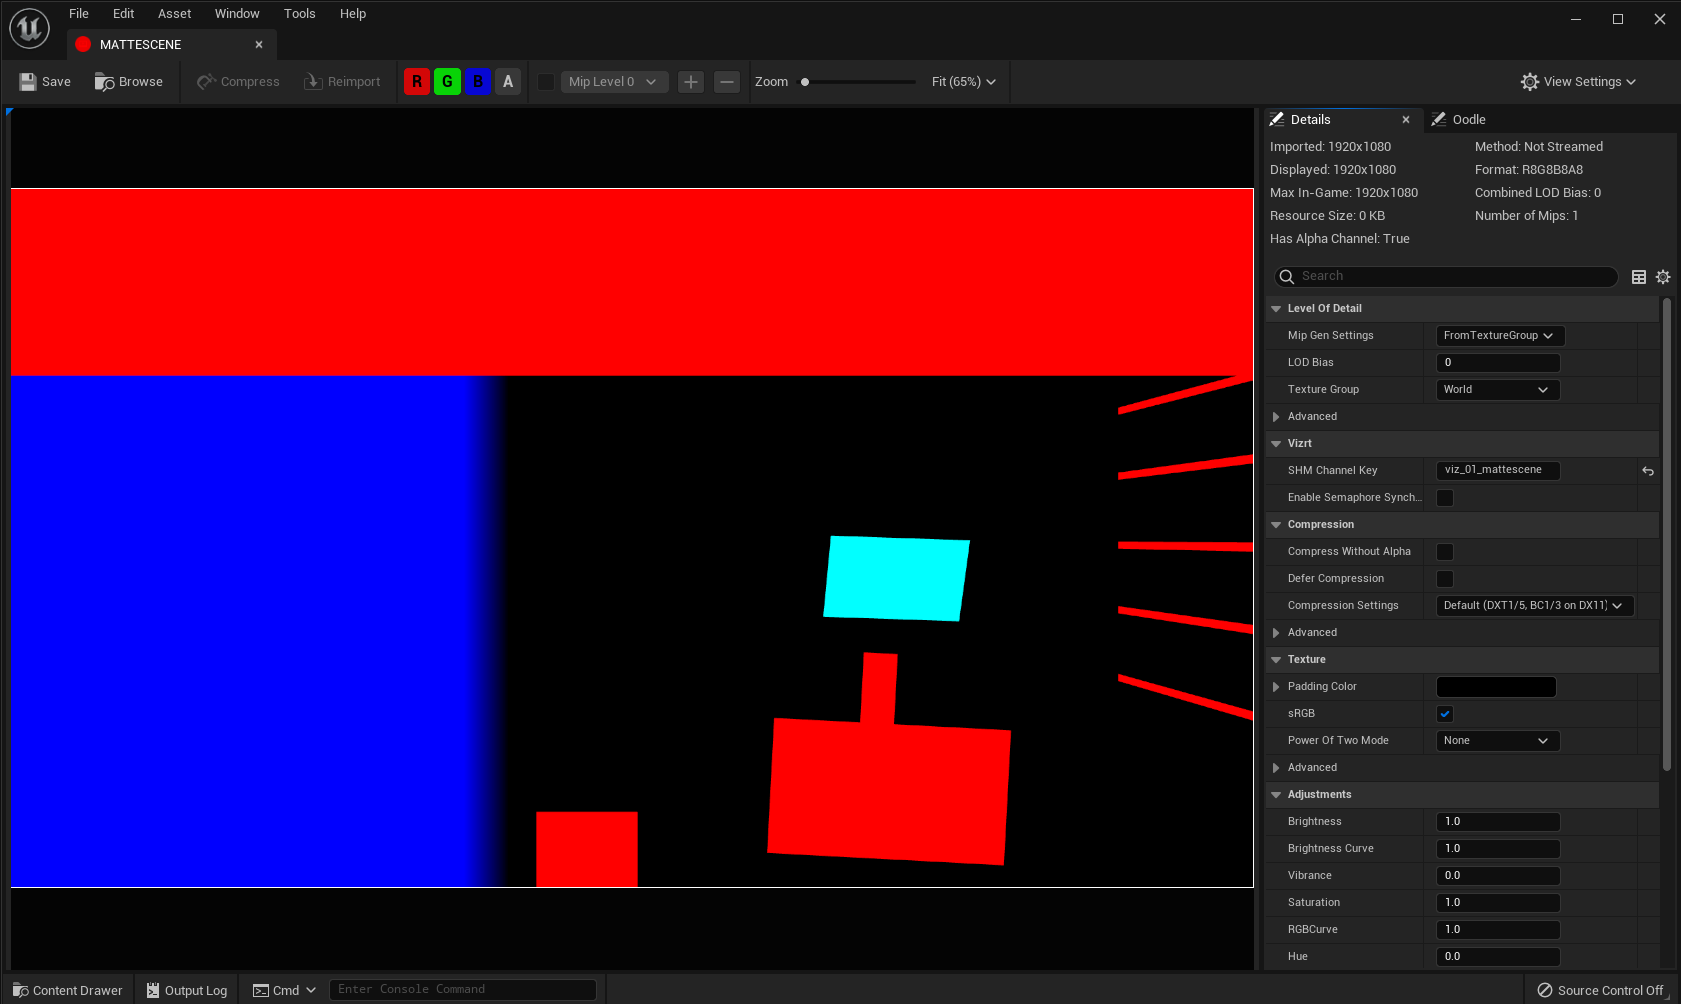
To send the Clip scene in Viz Engine and receive it in Unreal:
-
Add a Matte Scene in Viz.

-
In the Unreal Engine, find the MATTESCENE asset, it has the matte scene when in play.

The process to send a LIVE input is the same as with the clip, but using LIVE1 as the asset.
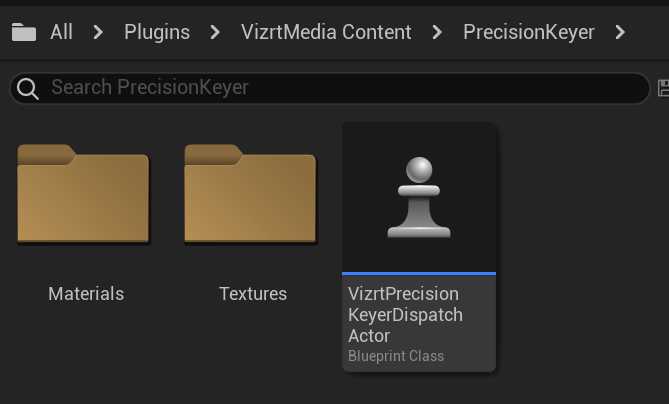
Setting up the Keyer Actor
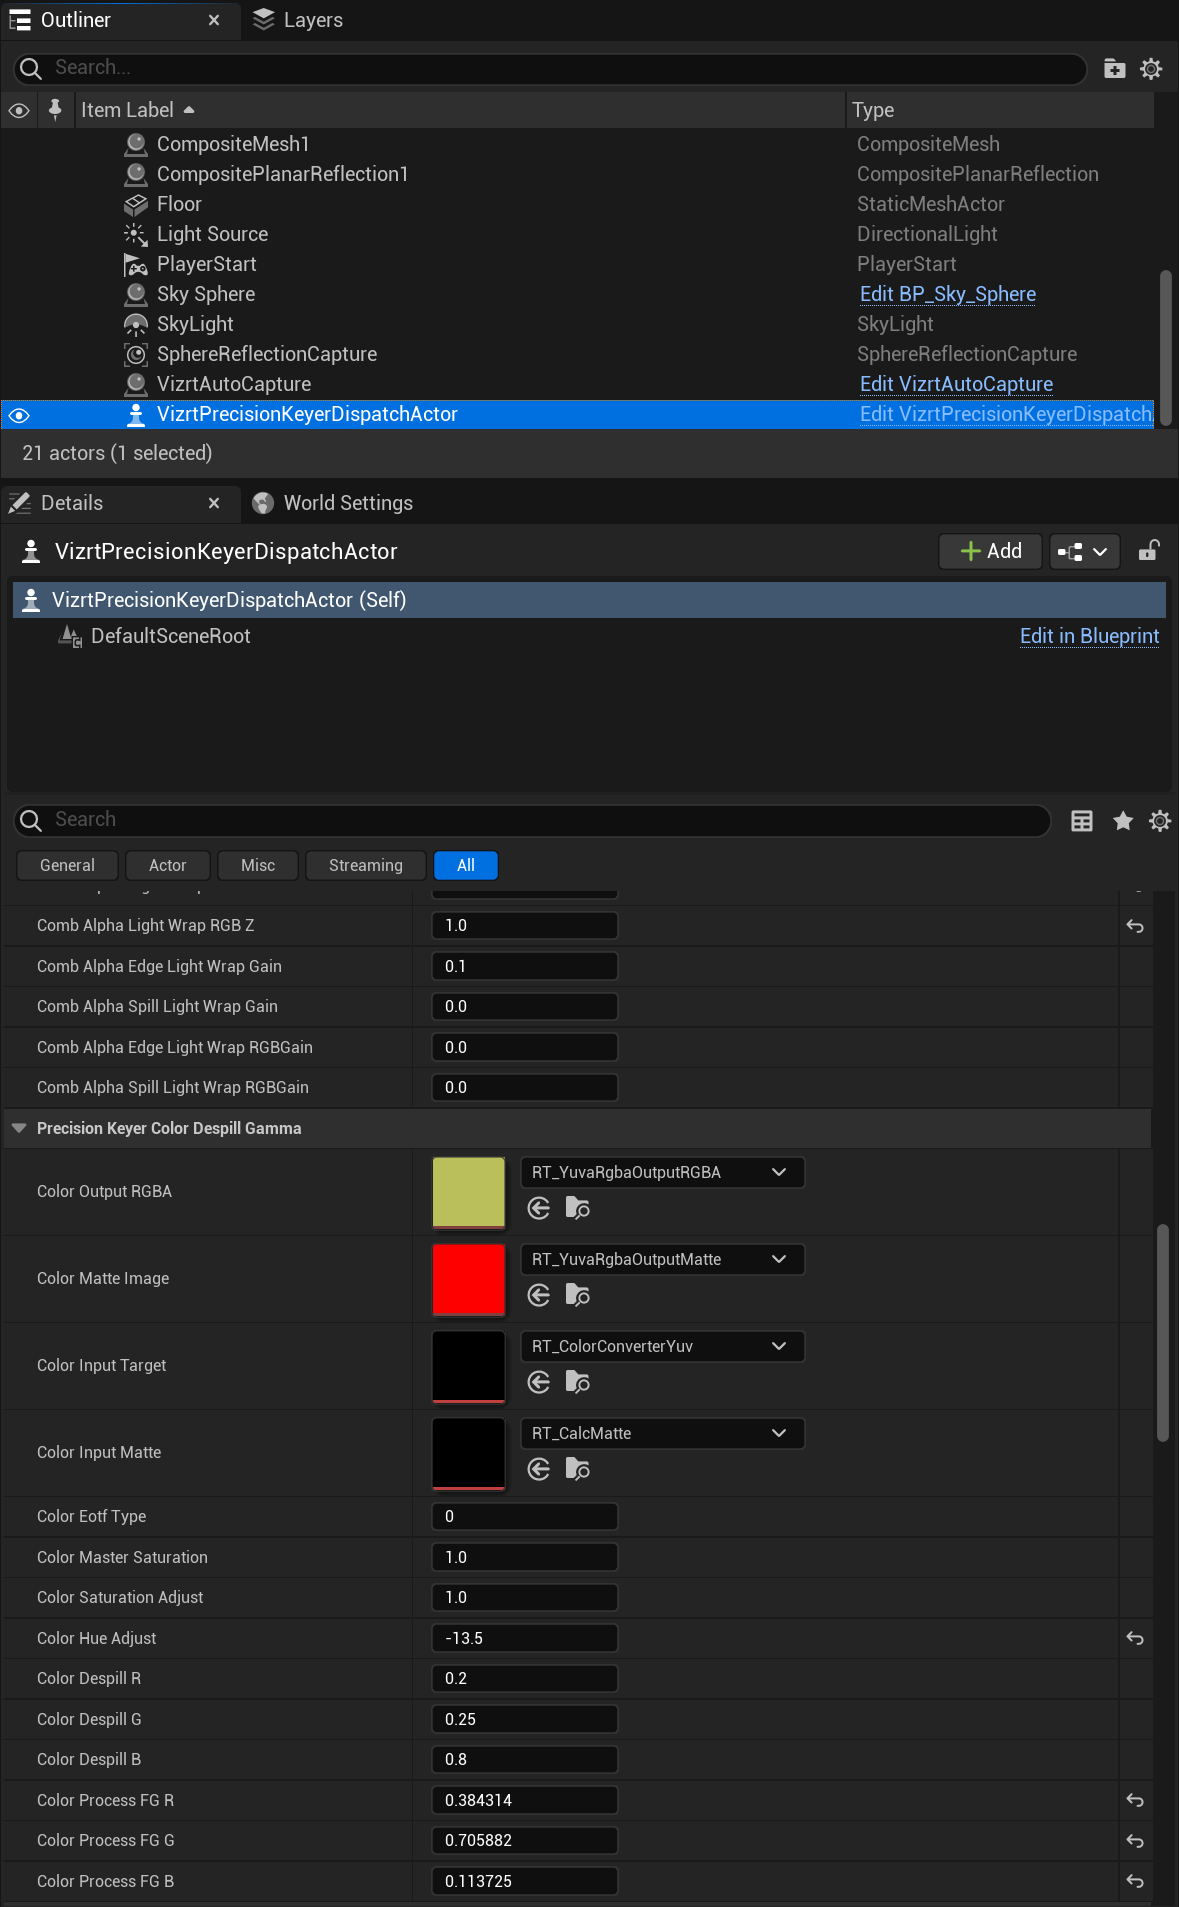
The Precision Keyer is rendered via an actor called VizrtPrecisionKeyerDispatchActor . The default values take the CLIP and MATTESCENE that come from Viz Engine. To change the values, we access the actor in the world and change those values or use one of the sync options illustrated below.
To grab the Actor, navigate to VizrtMedia Content >PrecisionKeyer and drag the VizrtPrecisionKeyerDispatchActor blueprint to the level.
The UE Precision Keyer can now be synced with Viz Engine and Viz Arc. As soon as the parameters change on Viz Arc, they are synced with Unreal Engine. Some small tweaking can be done via Viz Arc.
Using the Compositor Plug-in
Setting up the Composite Mesh
If the plugin is not activated by default we need to activate it.

We need to drop the Composite Mesh into the level.

After dropping the Composite Mesh into the level we have the following:
Setting up the Composite Planar Reflections
For the Shadows and Reflections, refer to Reflections and Shadows Compositing in UE5.
Setting up the Media Input and Keyer
Make sure you have the following activated on your Project Settings.

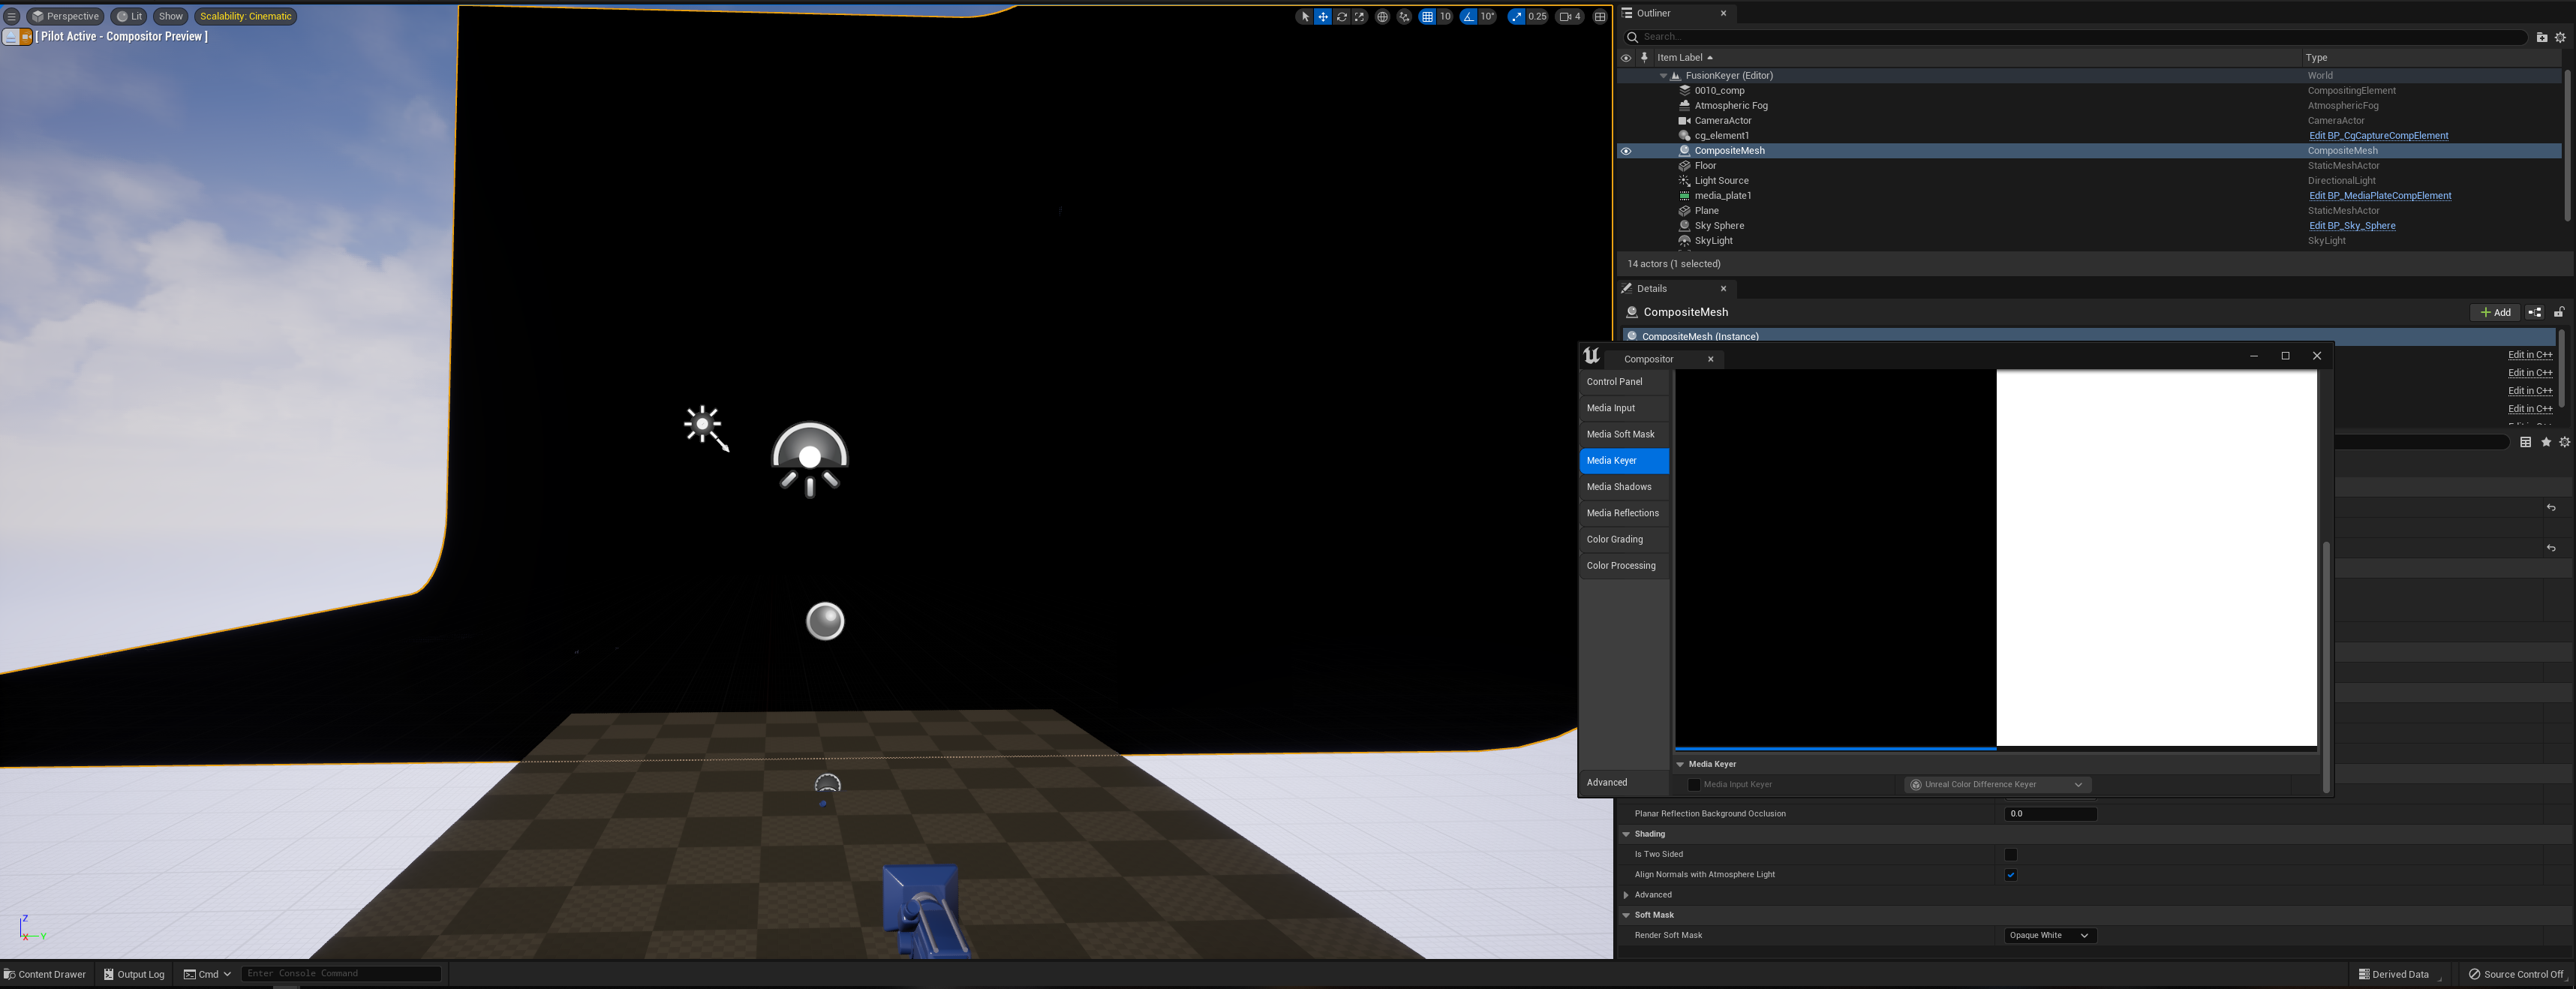
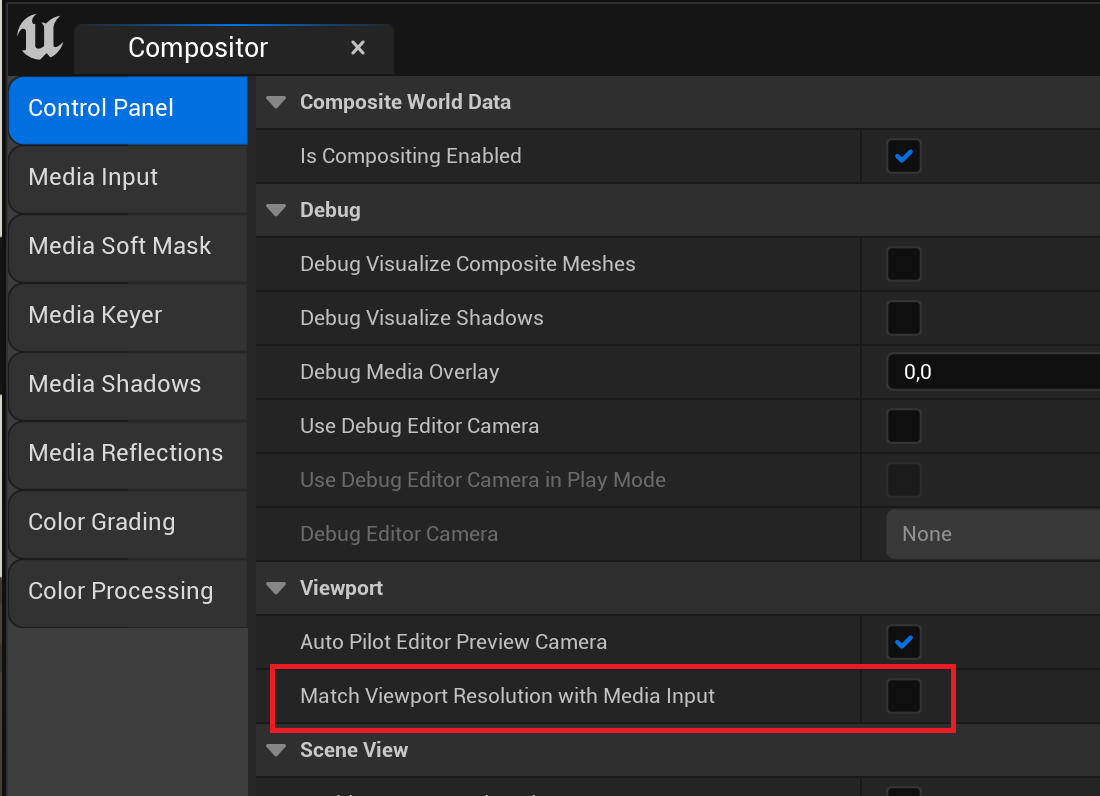
To change Compositor settings we need to open the Compositor Menu.

That shows the following menu.
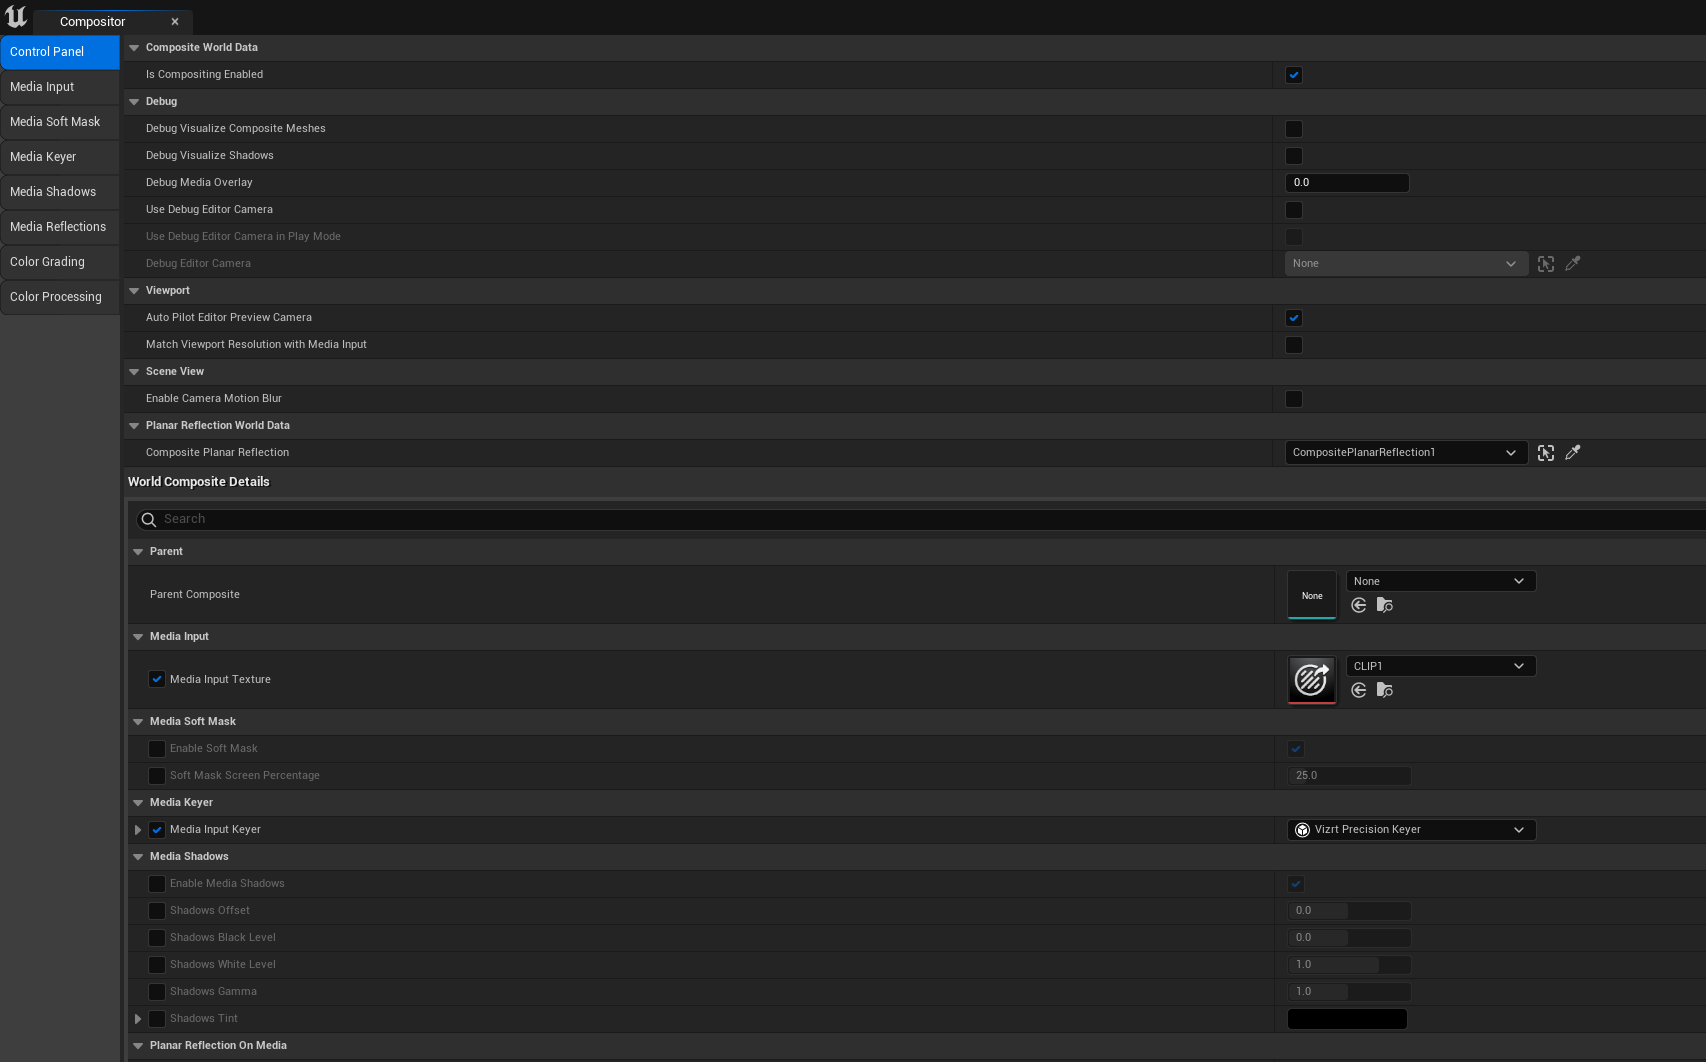
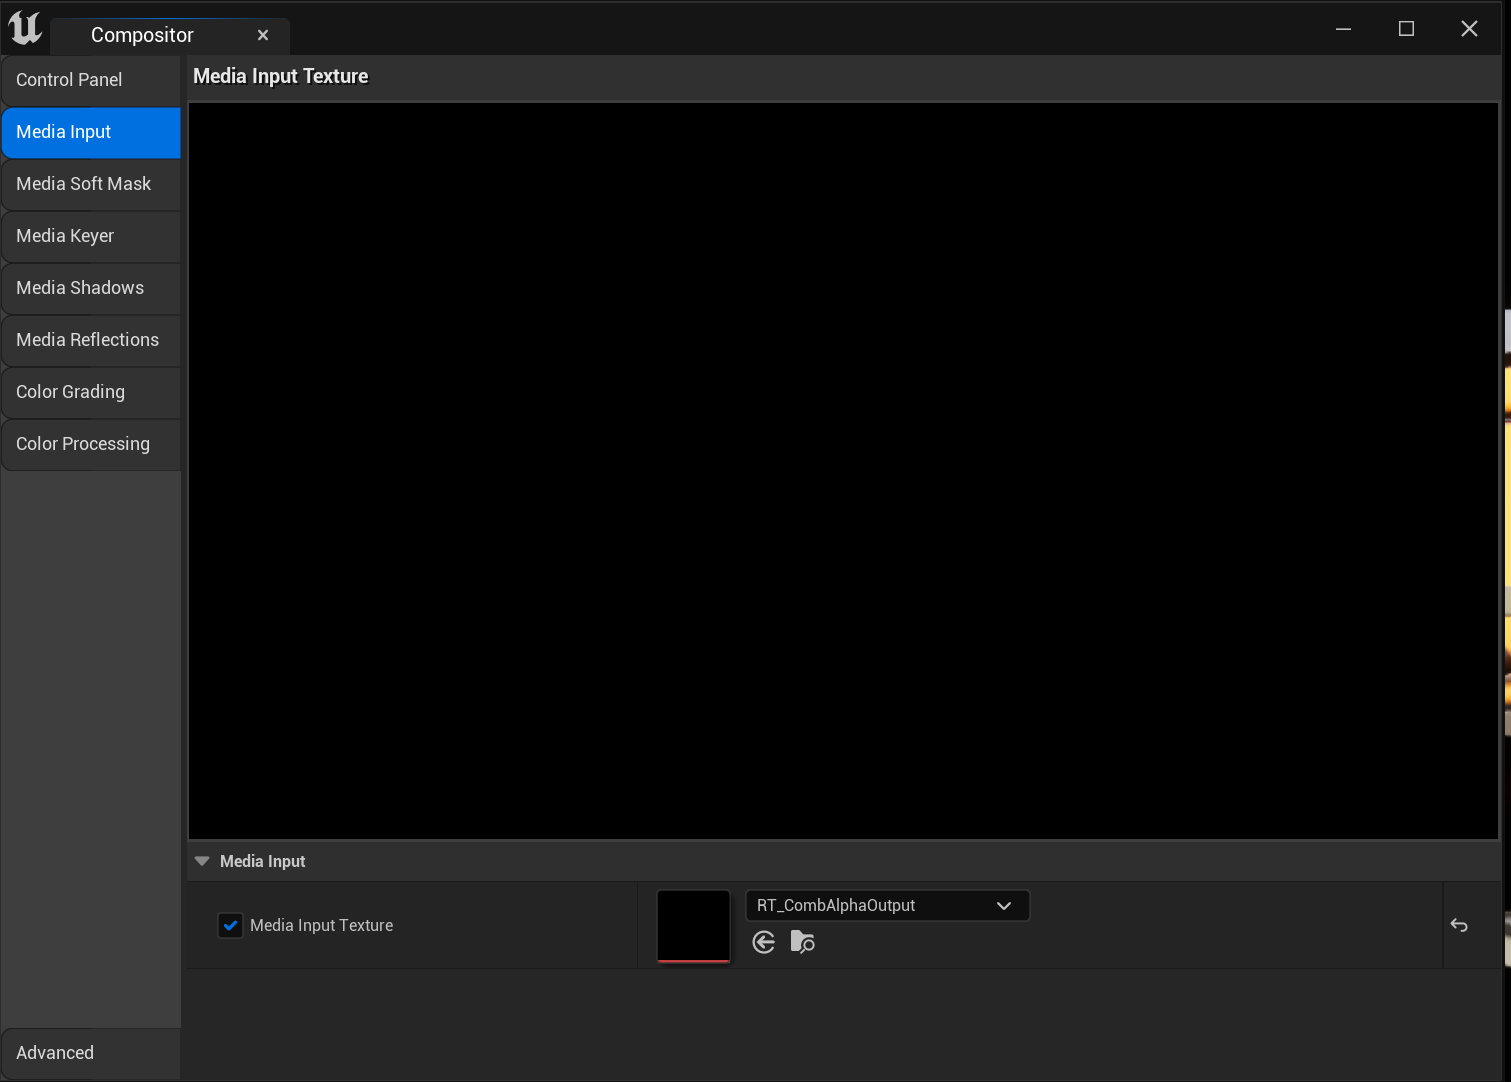
Note: For the 5.0.0 release, in the media input tab, select the input to use for the compositor. This should be RT_CombAlphaOutput, since that is the result of the media input being keyed by the Precision Keyer Actor. To select the Precision Keyer in subsequent versions, put the CLIP or LIVE in the Media Input Texture and the Vizrt Precision Keyer as in the screenshot (when putting the CLIP/LIVE on the Compositor Media Input, that same input is applied to the keyer actor on Play from 5.0.1 onwards).
Note: If the Unreal output is being sent to Viz Engine through an AUX asset with the Overscan option set to True (used when Lens Distortion is active), the option Match Viewport Resolution with Media Input must be set to False.
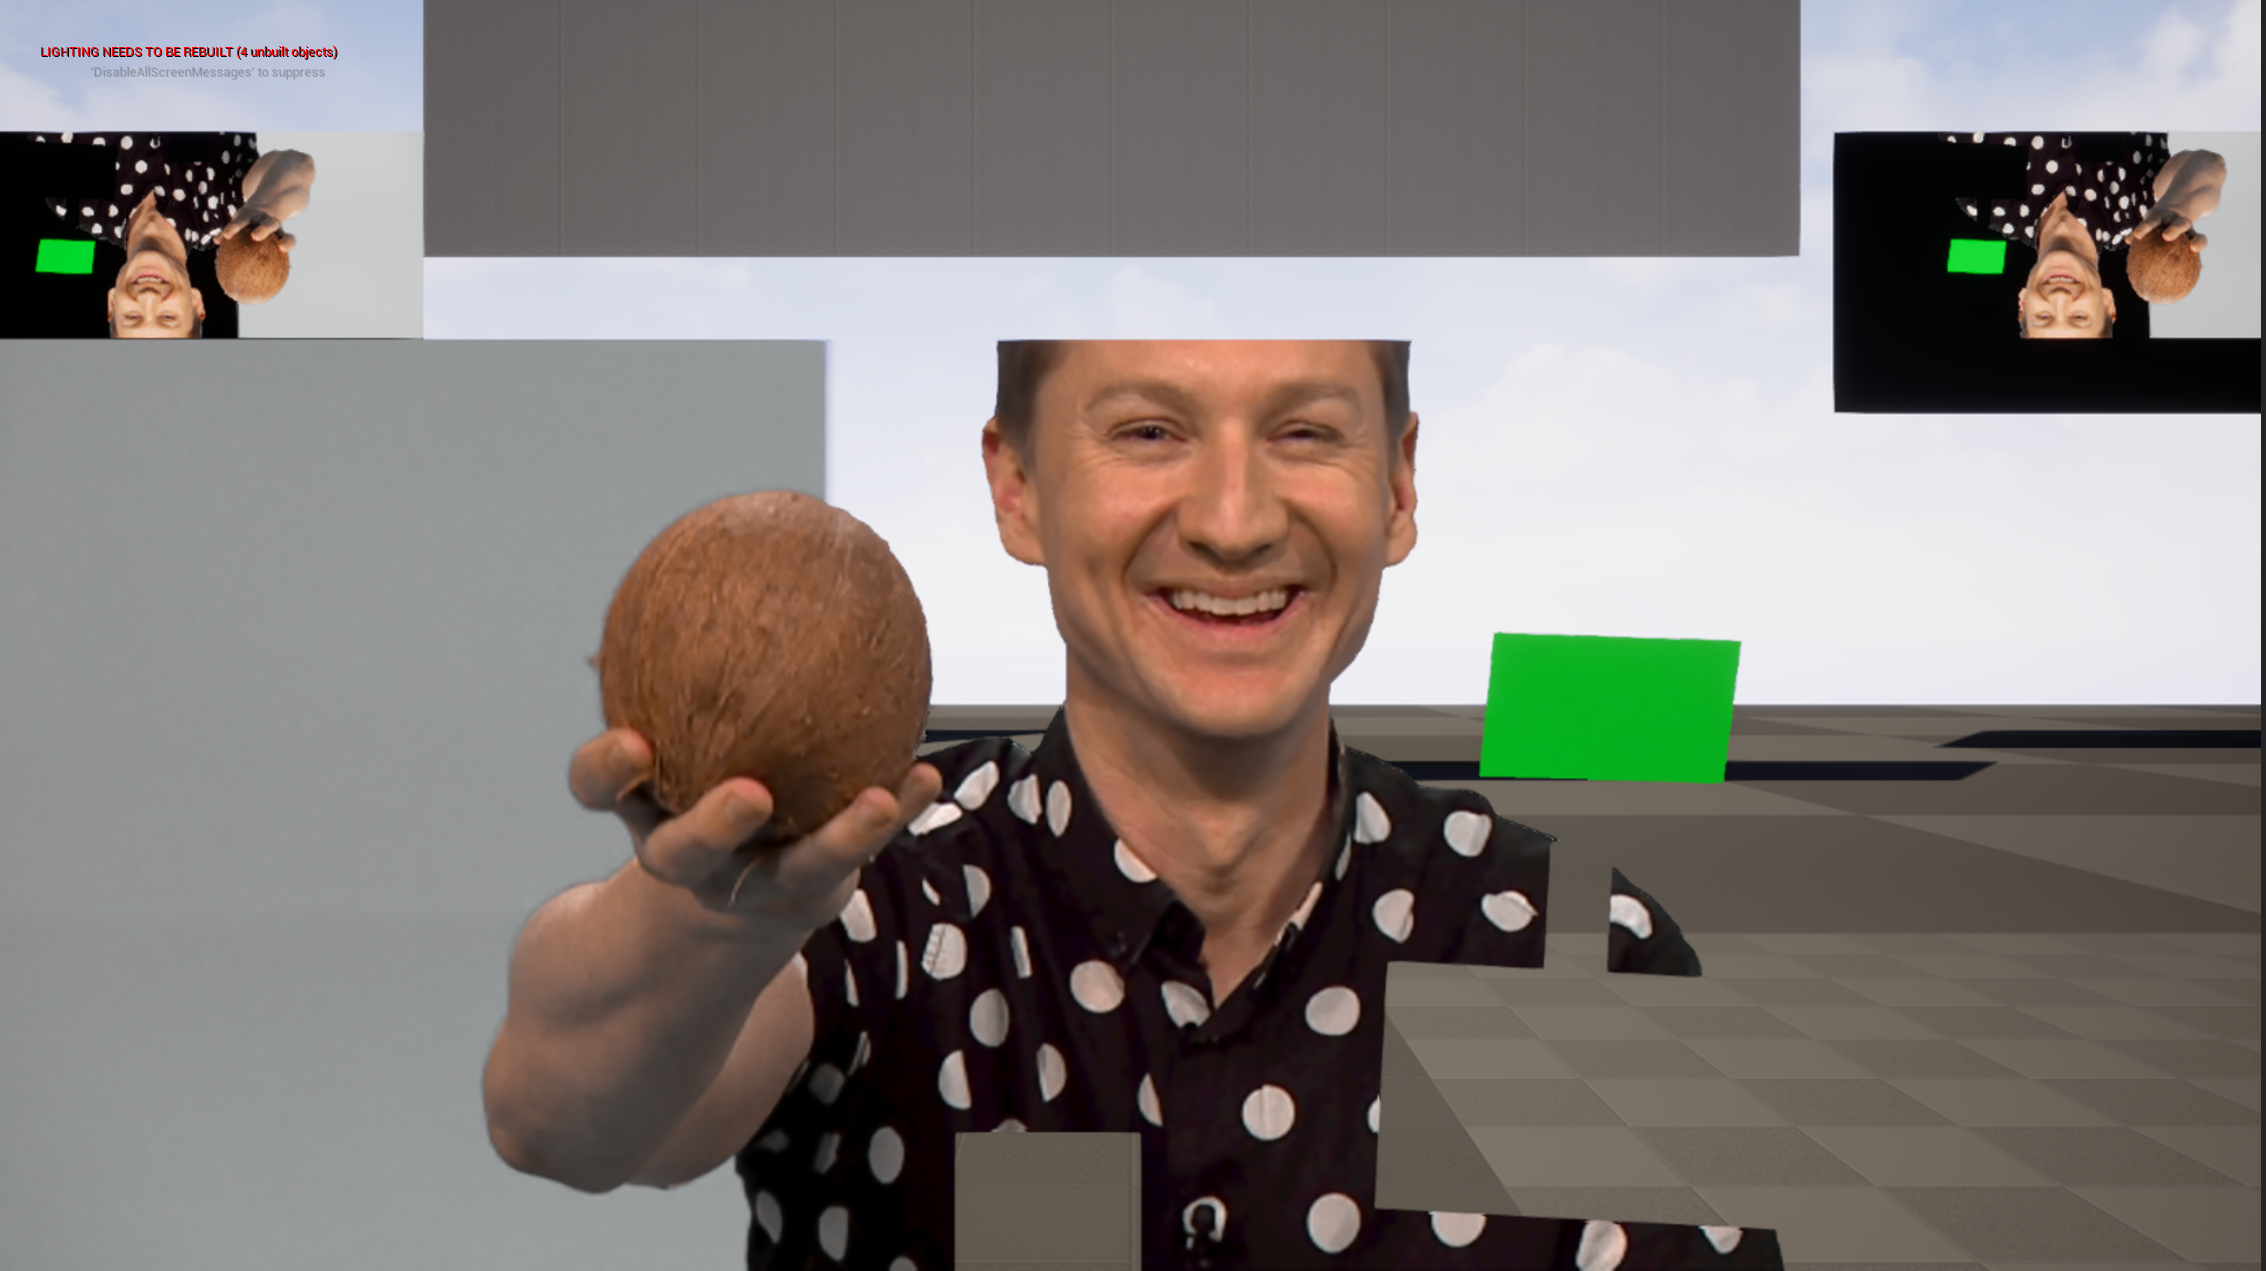
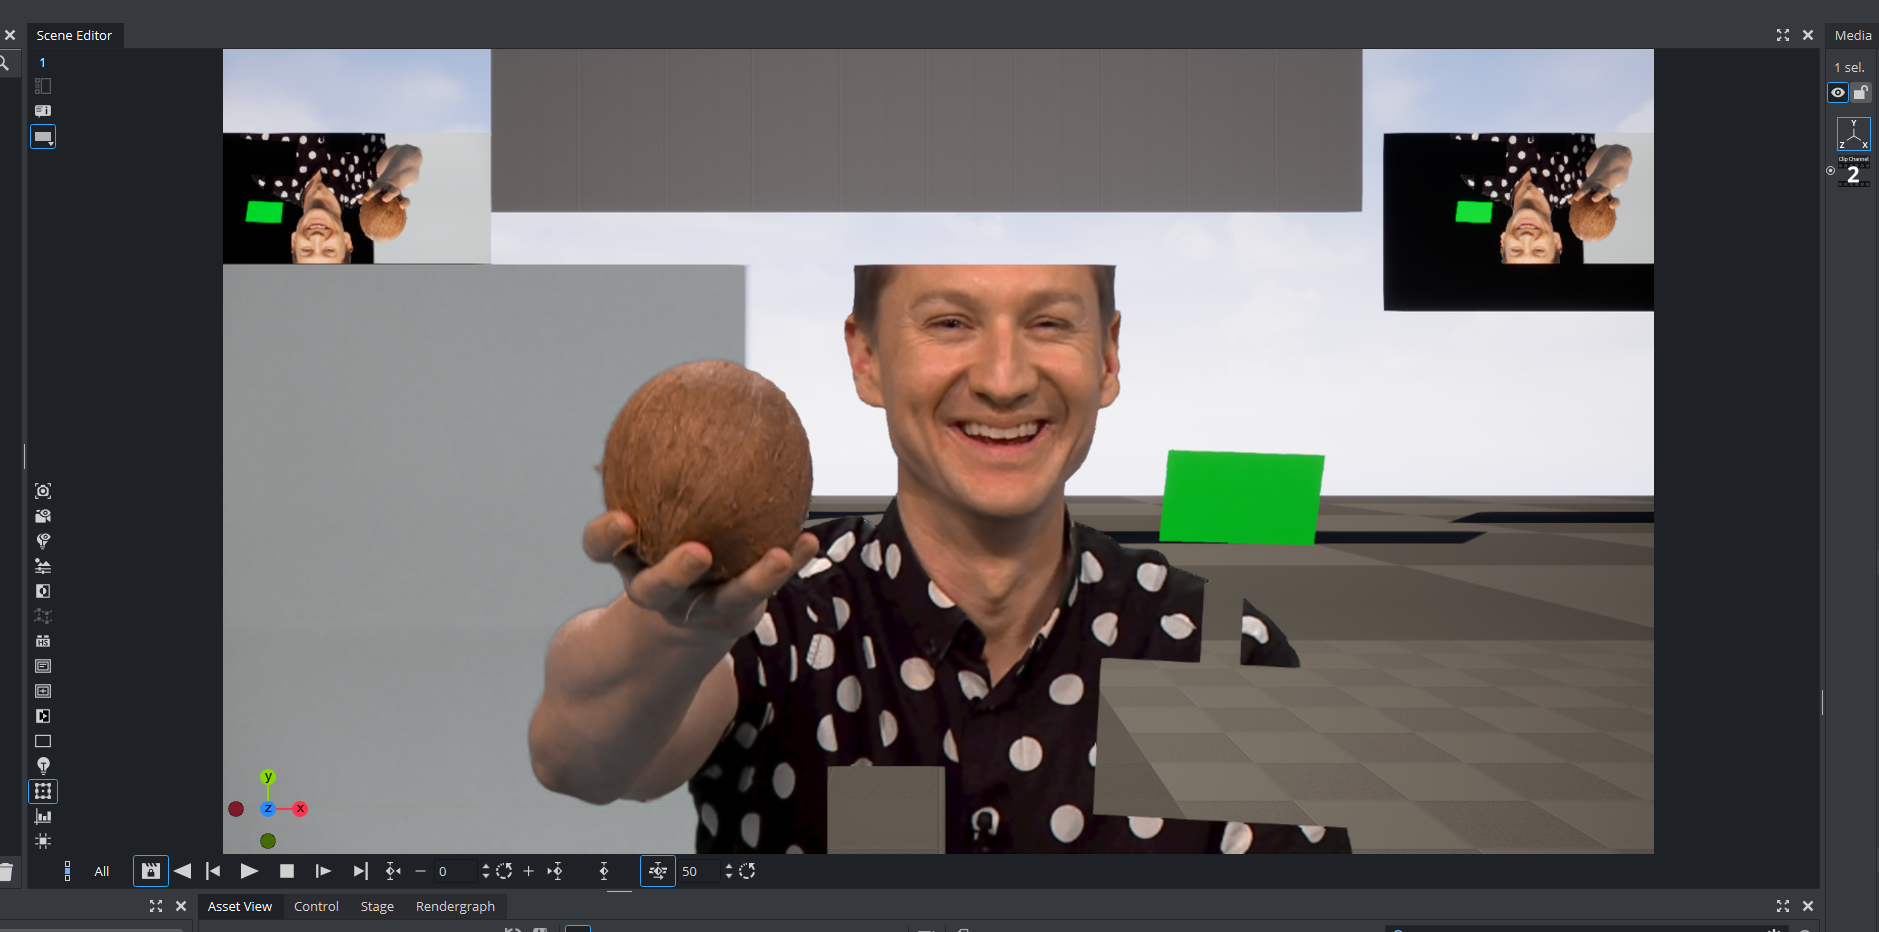
This is the result from the Precision Keyer:

If we have a matte scene the result reflects that.

This also shows on the Viz Engine side if the AutoCapture is properly set up.
Setting up the AutoCapture to Share the Result with Viz Engine
Drag the VizrtAutoCapture into the level.
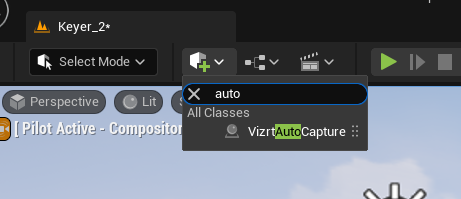
Make sure it has AUX1.
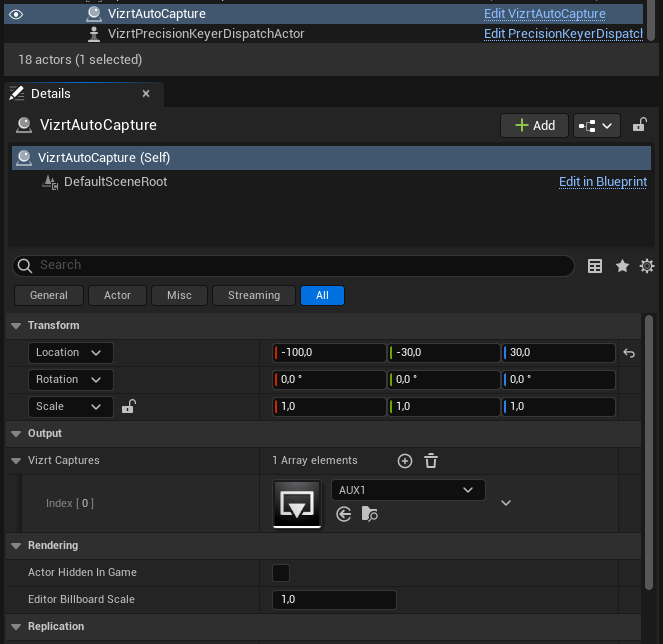
When playing the level (PIE or Game Mode), the output is shared with Viz Engine.
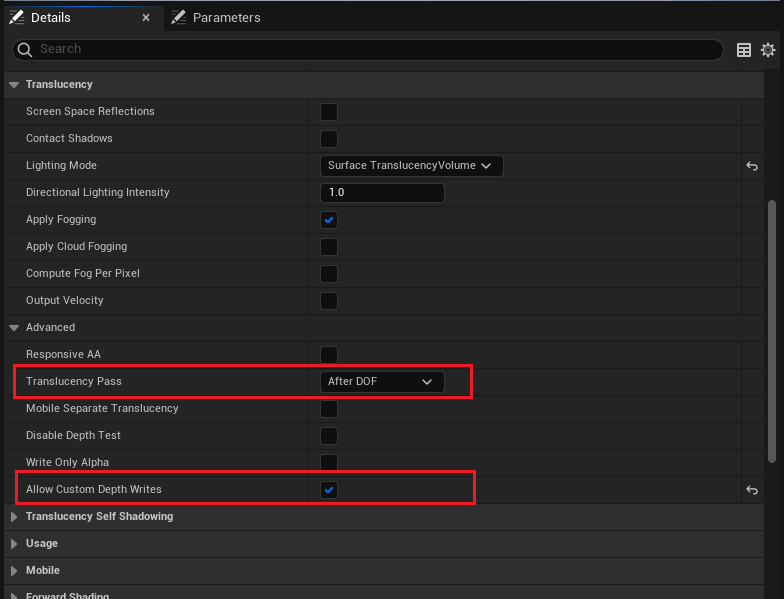
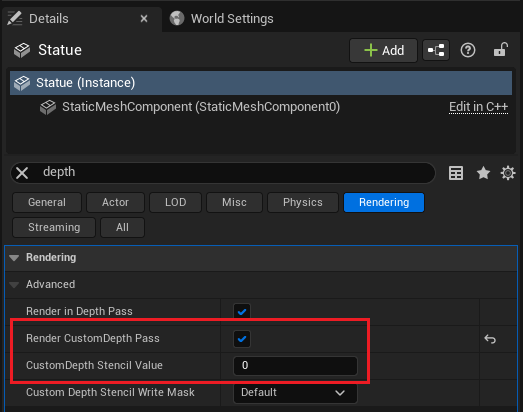
Working with Transparent Objects
If transparent objects are composited using the Vizrt Compositor, please make sure the Anti-Aliasing Method in Project Settings > Engine - Rendering > Default Settings is NOT set to Temporal Super-Resolution (TSR).

If your transparent object isn't being correctly rendered, you need to make sure that your Material is adapted to work with Vizrt Compositor. This is a two-step process:
-
On your material, set Translucency Pass > After DOF and Allow Custom Depth Writes > True.
-
On your Actor, set Render CustomDepthPass > True.
See Also