
Viz Artist User Guide
Version 5.0 | Published December 20, 2022 ©
Integration with Unreal Engine
This section explains how to set up Vizrt's Unreal Integration for Unreal Engine. This integration lets you use the render capabilities of the Epic Games' Unreal Engine and compose directly in Viz Engine for playout.
Surfaces from Unreal Engine can be added inside a Viz Engine scene and Media Assets from Viz Engine can be used inside the Unreal Engine environment. This provides professional Virtual Set productions and Augmented Reality graphics.
This section covers the following topics:
The Unreal Integration serves and provides surfaces from and to Viz Engine by using shared memory technology. This means that multiple Media Assets can be brought into Unreal Engine and surfaces rendered by Unreal can be captured and brought back into Viz Engine. You can attach a Vizrt Shared Texture to any surface and take advantage of Unreal's Cine Actor camera with all its post-processing effects.
Known Limitations
Starting from version 5.0 of the Unreal integration, it's now possible to have Unreal objects' shadows and reflections on top of Viz Engine input. It's also possible to use Unreal Engine effects which require an alpha channel (for example, bloom effects, glow, transparency) to be blended properly with a Viz Engine input by doing the composition in Unreal, using the Vizrt Compositor plug-in. However, there's no guarantee that all effects from Unreal Engine will be properly blended with Viz Engine.
Prerequisites
System Requirements
-
Valid WIBU license for Vizrt Media for Unreal.
Hardware Requirements
-
Nvidia Quadro RTX6000 or better.
-
64 GB of memory.
-
A certified Vizrt Render workstation like Lenovo P620 is recommended.
Software Requirements
-
Windows 10 64-bit version 1909 revision 1350 or higher, or versions 2004 and 20H2 revision 789 or higher.
-
Viz Engine version 5.0 or later.
-
Epic Games Launcher (needed to install Unreal Engine).
-
Unreal Engine and Viz Engine need to be installed on the same machine.
Information: Please note that Unreal Integration requires a valid WIBU license.
Information: For more details about Unreal Engine hardware/software requirements please refer to Unreal Engine Requirements. For specific feature requirements refer to the section Unreal Engine Requirements for Rendering Features.
Refer to the following version compatibility table for an overview of supported versions of the different software components:
|
Viz Engine Version |
Unreal Engine 5 |
Unreal Engine 4 |
Vizrt Media for Unreal Engine |
Legacy NcamAR Plug-in |
|
5.0 (Classic & Viz Engine Render Pipelines) |
5.0.3 |
- |
|
- |
|
4.4 (Classic & Viz Engine Render Pipelines) |
|
4.27.*, 4.26.* |
|
- |
|
4.3 (Classic & Viz Engine Render Pipelines) |
|
4.26.*, 4.25.* |
|
- |
|
4.2 (Classic & Viz Engine Render Pipelines) |
|
4.25.*, 4.24.* |
|
- |
|
4.1 (Classic & Viz Engine Render Pipelines) |
|
4.24.*, 4.23.* |
|
- |
|
4.0 (Classic Render Pipeline) |
|
4.20.*, 4.21.* |
- |
3.2.1 |
|
3.14 |
|
4.20.*, 4.21.* |
- |
3.2.1 |
|
3.13 |
|
4.20.*, 4.21.* |
- |
3.1.2 |
|
3.12.0, 3.12.1 |
|
4.20.*, 4.21.* |
- |
3.1.0 |
|
3.11.1 |
|
4.20.* |
- |
3.0.0 |
|
3.11.0 |
|
4.16.1, 4.16.2, 4.16.3 |
- |
2.0.0 |
To Install the Media plug-in
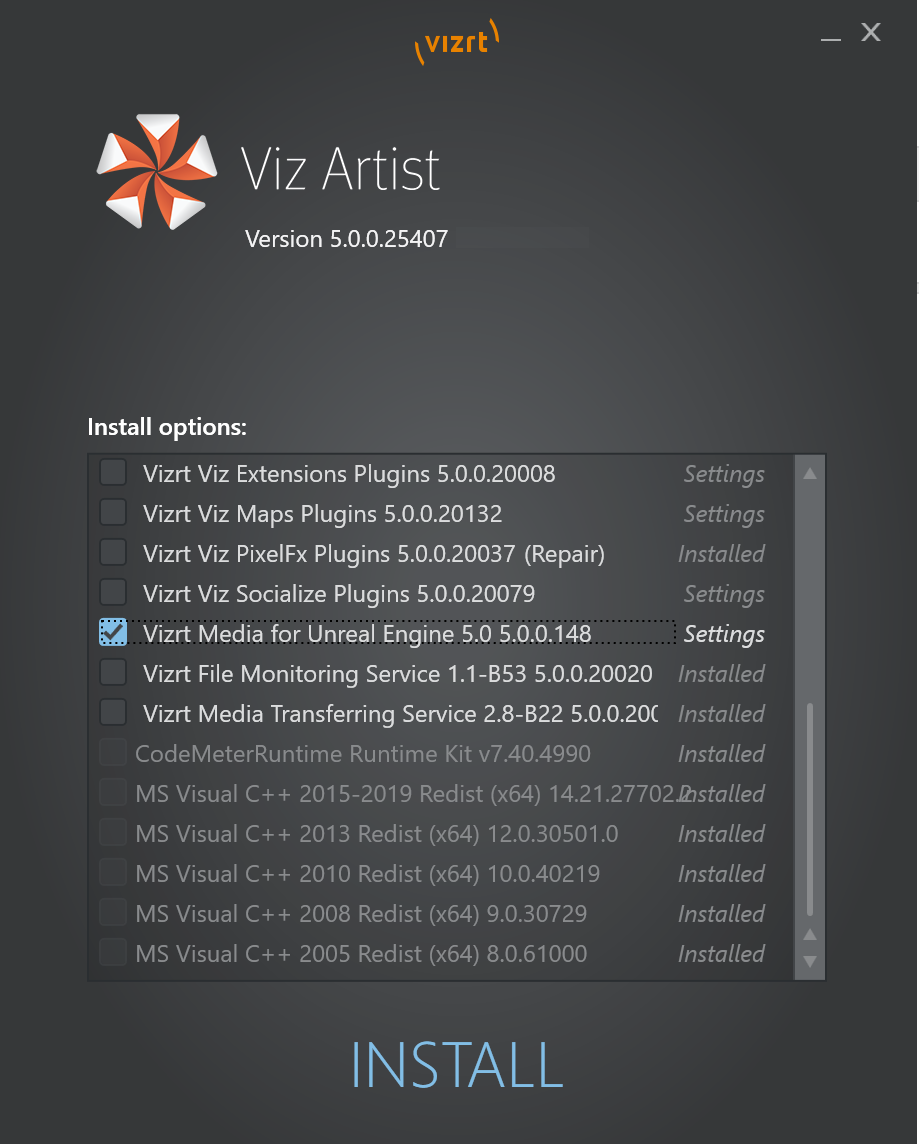
The Unreal Integration is part of the Bundle installer and also available as single .msi installer package. We recommend to use the Bundle Installer.
Note: There are several installers for specific Unreal Engine versions. Please make sure the correct one is selected in the Bundle installer.
After the installation is completed, the files are located in C:\Program Files\Vizrt\VizEngine\Resources\Unreal\5.0.
For all VizrtMedia plug-ins and assets to be available for:
-
A specific Unreal project: Copy the contents of the source folder to the Plugins folder of the Unreal project.
-
All Unreal projects: Copy the contents of the source folder to the Plugins\Runtime folder of the Unreal Engine installation.
|
Source |
Destination |
|
C:\Program Files\Vizrt\VizEngine\Resources\Unreal\5.0 |
C:\Program Files\Epic Games\UE_5.0\Engine\Plugins\Runtime |
Caution: Keep in mind that any changes made to the VizrtMedia assets and sample scenes are shared across all the Unreal projects if the source folder is copied to the Plugins\Runtime folder of the Unreal Engine installation.
Viz Engine Preparation
To prepare Viz Engine for dealing with Unreal scenes, start Viz Engine in Configuration Mode and switch to the Licensing section. Make sure the following licenses are selected or available:
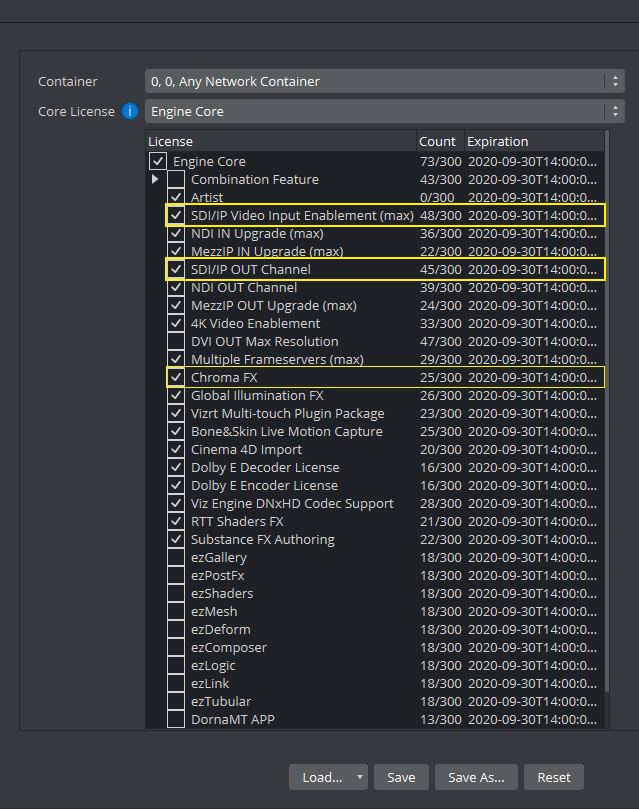
The following licenses are required:
-
SDI/IP Output Channel: For general SDI/IP output of the final compositing.
-
Chroma FX: (Optional) For virtual sets that require the use of Precision Keyer
In order for the Unreal output to be sent to Viz Engine, the following must be set in the Unreal Engine section of Viz Engine configuration:
-
Aux Rendering should be Active.
-
SHM Sync Master Mode should be set to UE Master.
-
SHM Sync Master Key should be set to viz_engine_SHMsync.
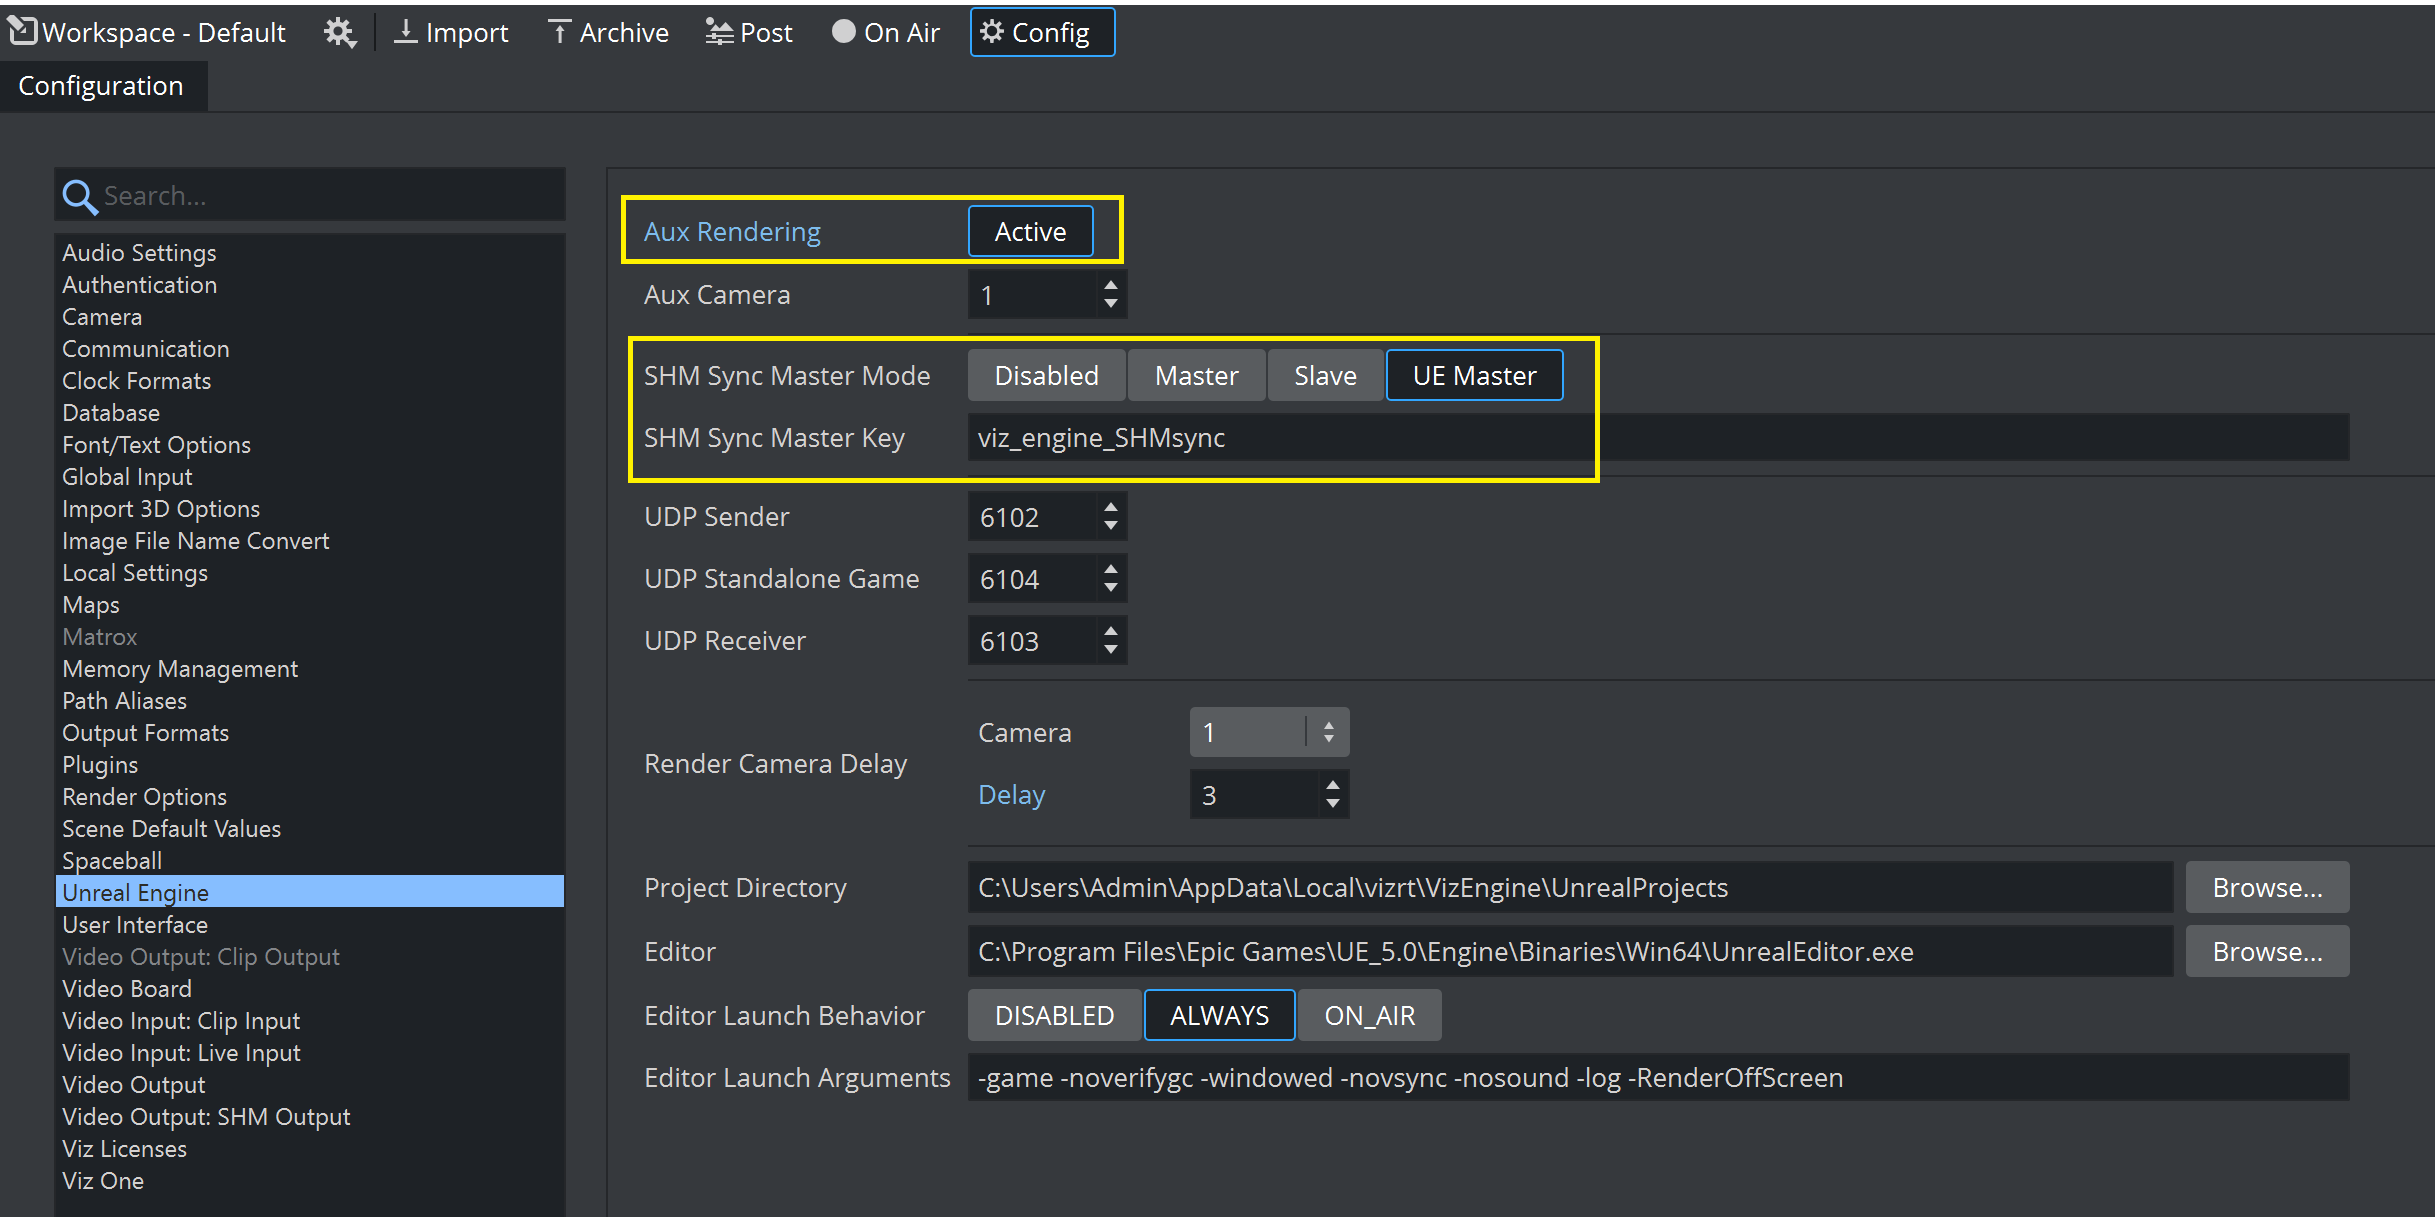
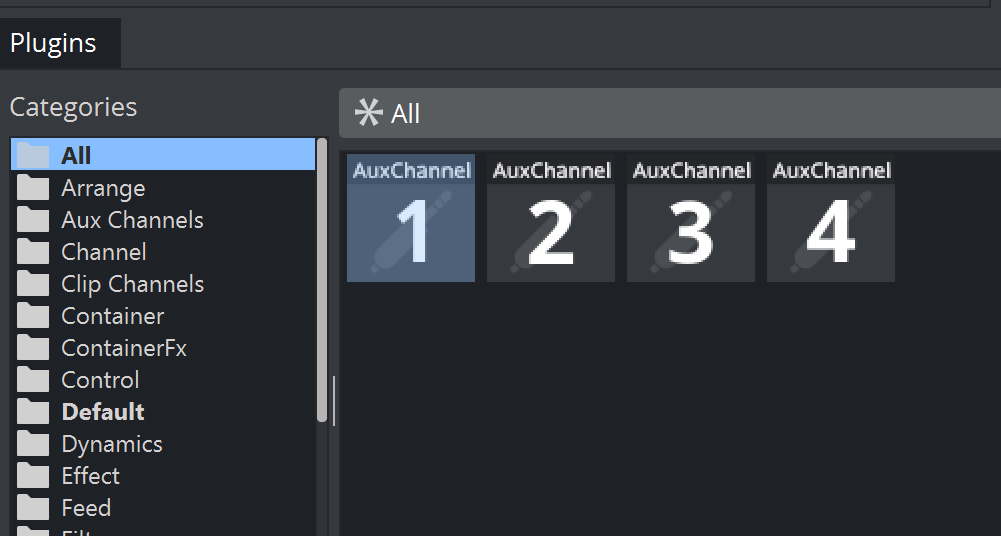
Save the configuration. Restart Viz Engine and make sure it is locked to a proper sync signal. The Unreal Engine sends data to Viz Engine using Aux channels. The following shows AuxChannel1 being used, but any AuxChannel can be used as long as it matches the AuxChannel configured in Unreal.
-
In Viz Artist, create an empty scene. Switch to the Render Pipeline you need.
-
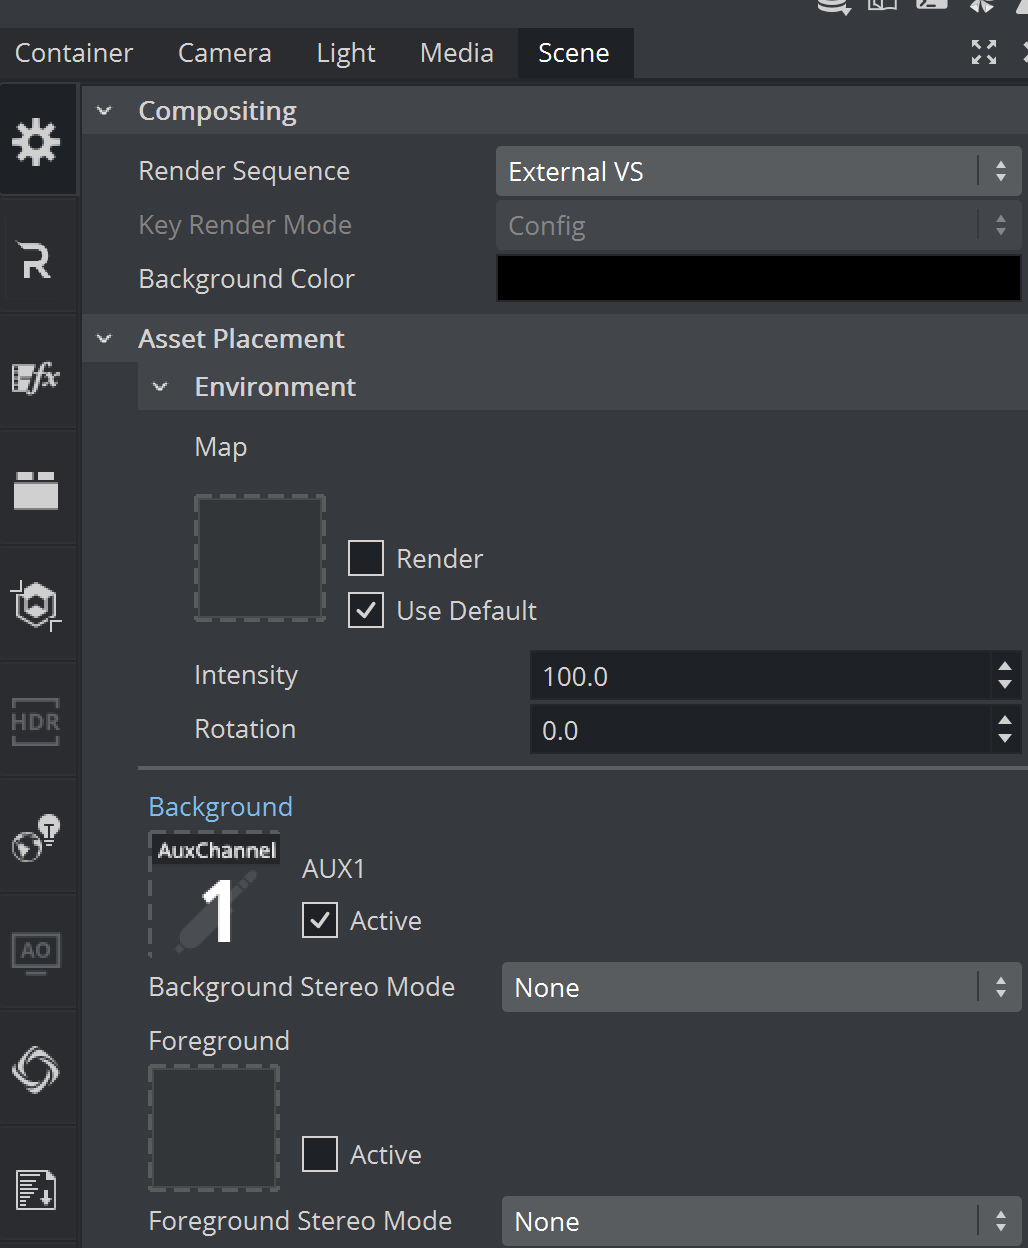
The Render Sequence should be set to External VS (for Virtual Sets) or External AR (for Augmented Reality).
-
Add AuxChannel1 to the Media tab.

-
Add the AuxChannel1 onto the Scene Background property in Scene Settings. (for Virtual Sets) or Foreground (for AR). The rendered output of Unreal shows up as the Scene Background once Unreal is setup.
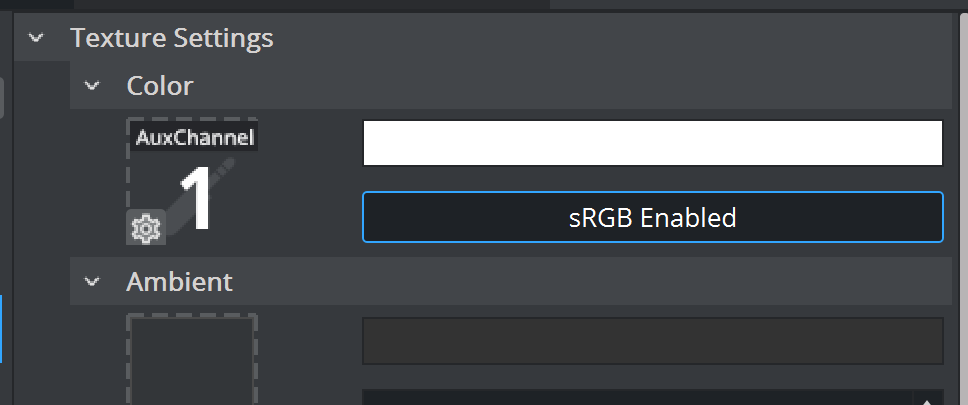
The output from Unreal can also be applied to a Viz Engine material (for example a Phong material).
-
Drag the AuxChannel to the Color property of the Material.
-
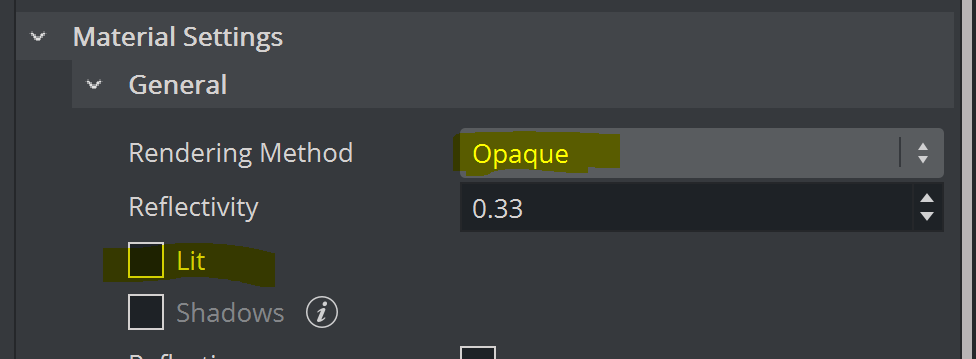
Set Rendering Method to Opaque and uncheck Lit in the Material Settings.
Unreal Engine Preparation
Enable Vizrt Media for Unreal Engine
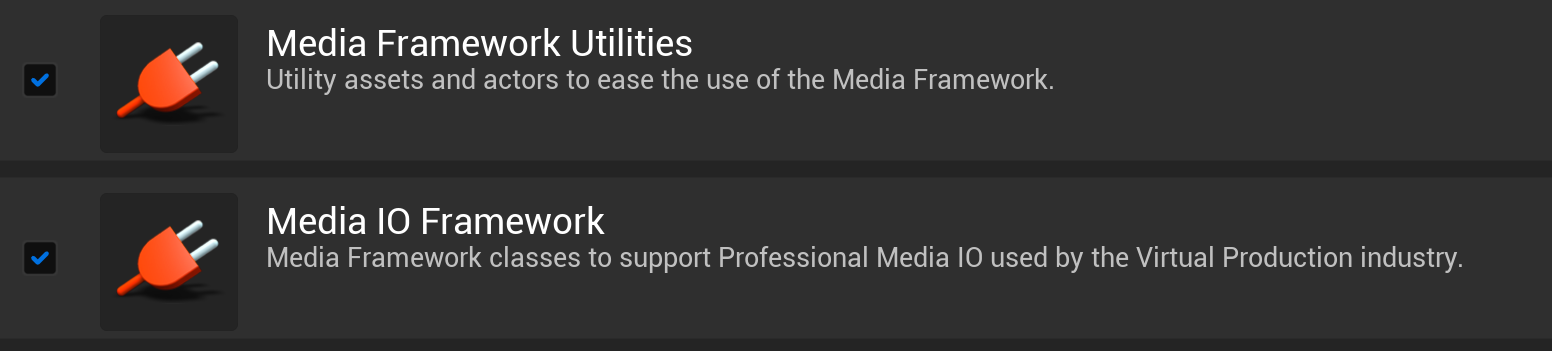
-
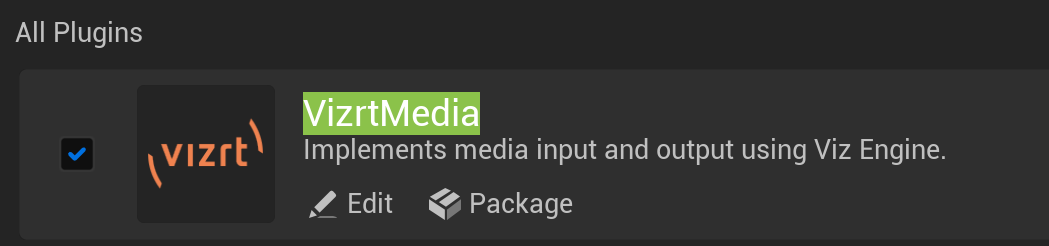
Click on Settings/Plugins and enable VizrtMedia.
-
Search for Media IO Framework and Media Framework Utilities from the list of available plug-in sections and make sure they are selected.
-
If the graphics composition is to be done in Unreal then the Vizrt Compositor plug-in must also be selected.

-
Click on Restart Now to apply those changes to our Unreal configuration.
Licensing
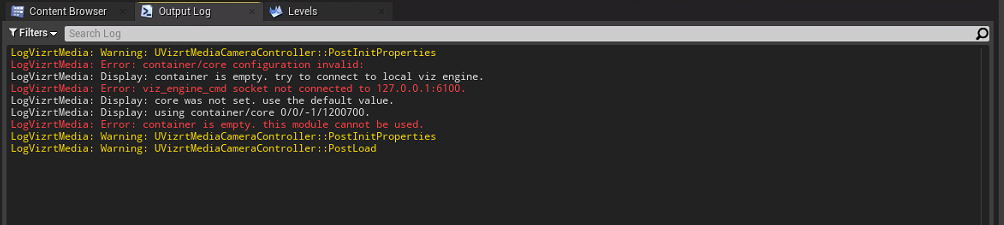
Vizrt Media for Unreal Engine requires a valid license. Without any license the plugin does not operate correctly and no valid timecode is available. To verify if a license is available and acquired by Unreal, simply check the Log entries and Filter for Vizrtmedia.
|
Output without Correct License |
|
|
|
Output with Correct License |
|
|

To setup a correct license, it is recommended to start Viz Engine and have the Vizrt Media plug-in query Viz Engine for its license configuration. Be sure the correct Command Map Port is set in the Vizrt Media Settings by clicking on Edit > Editor Preferences and navigating to Plugins > VizrtMedia:
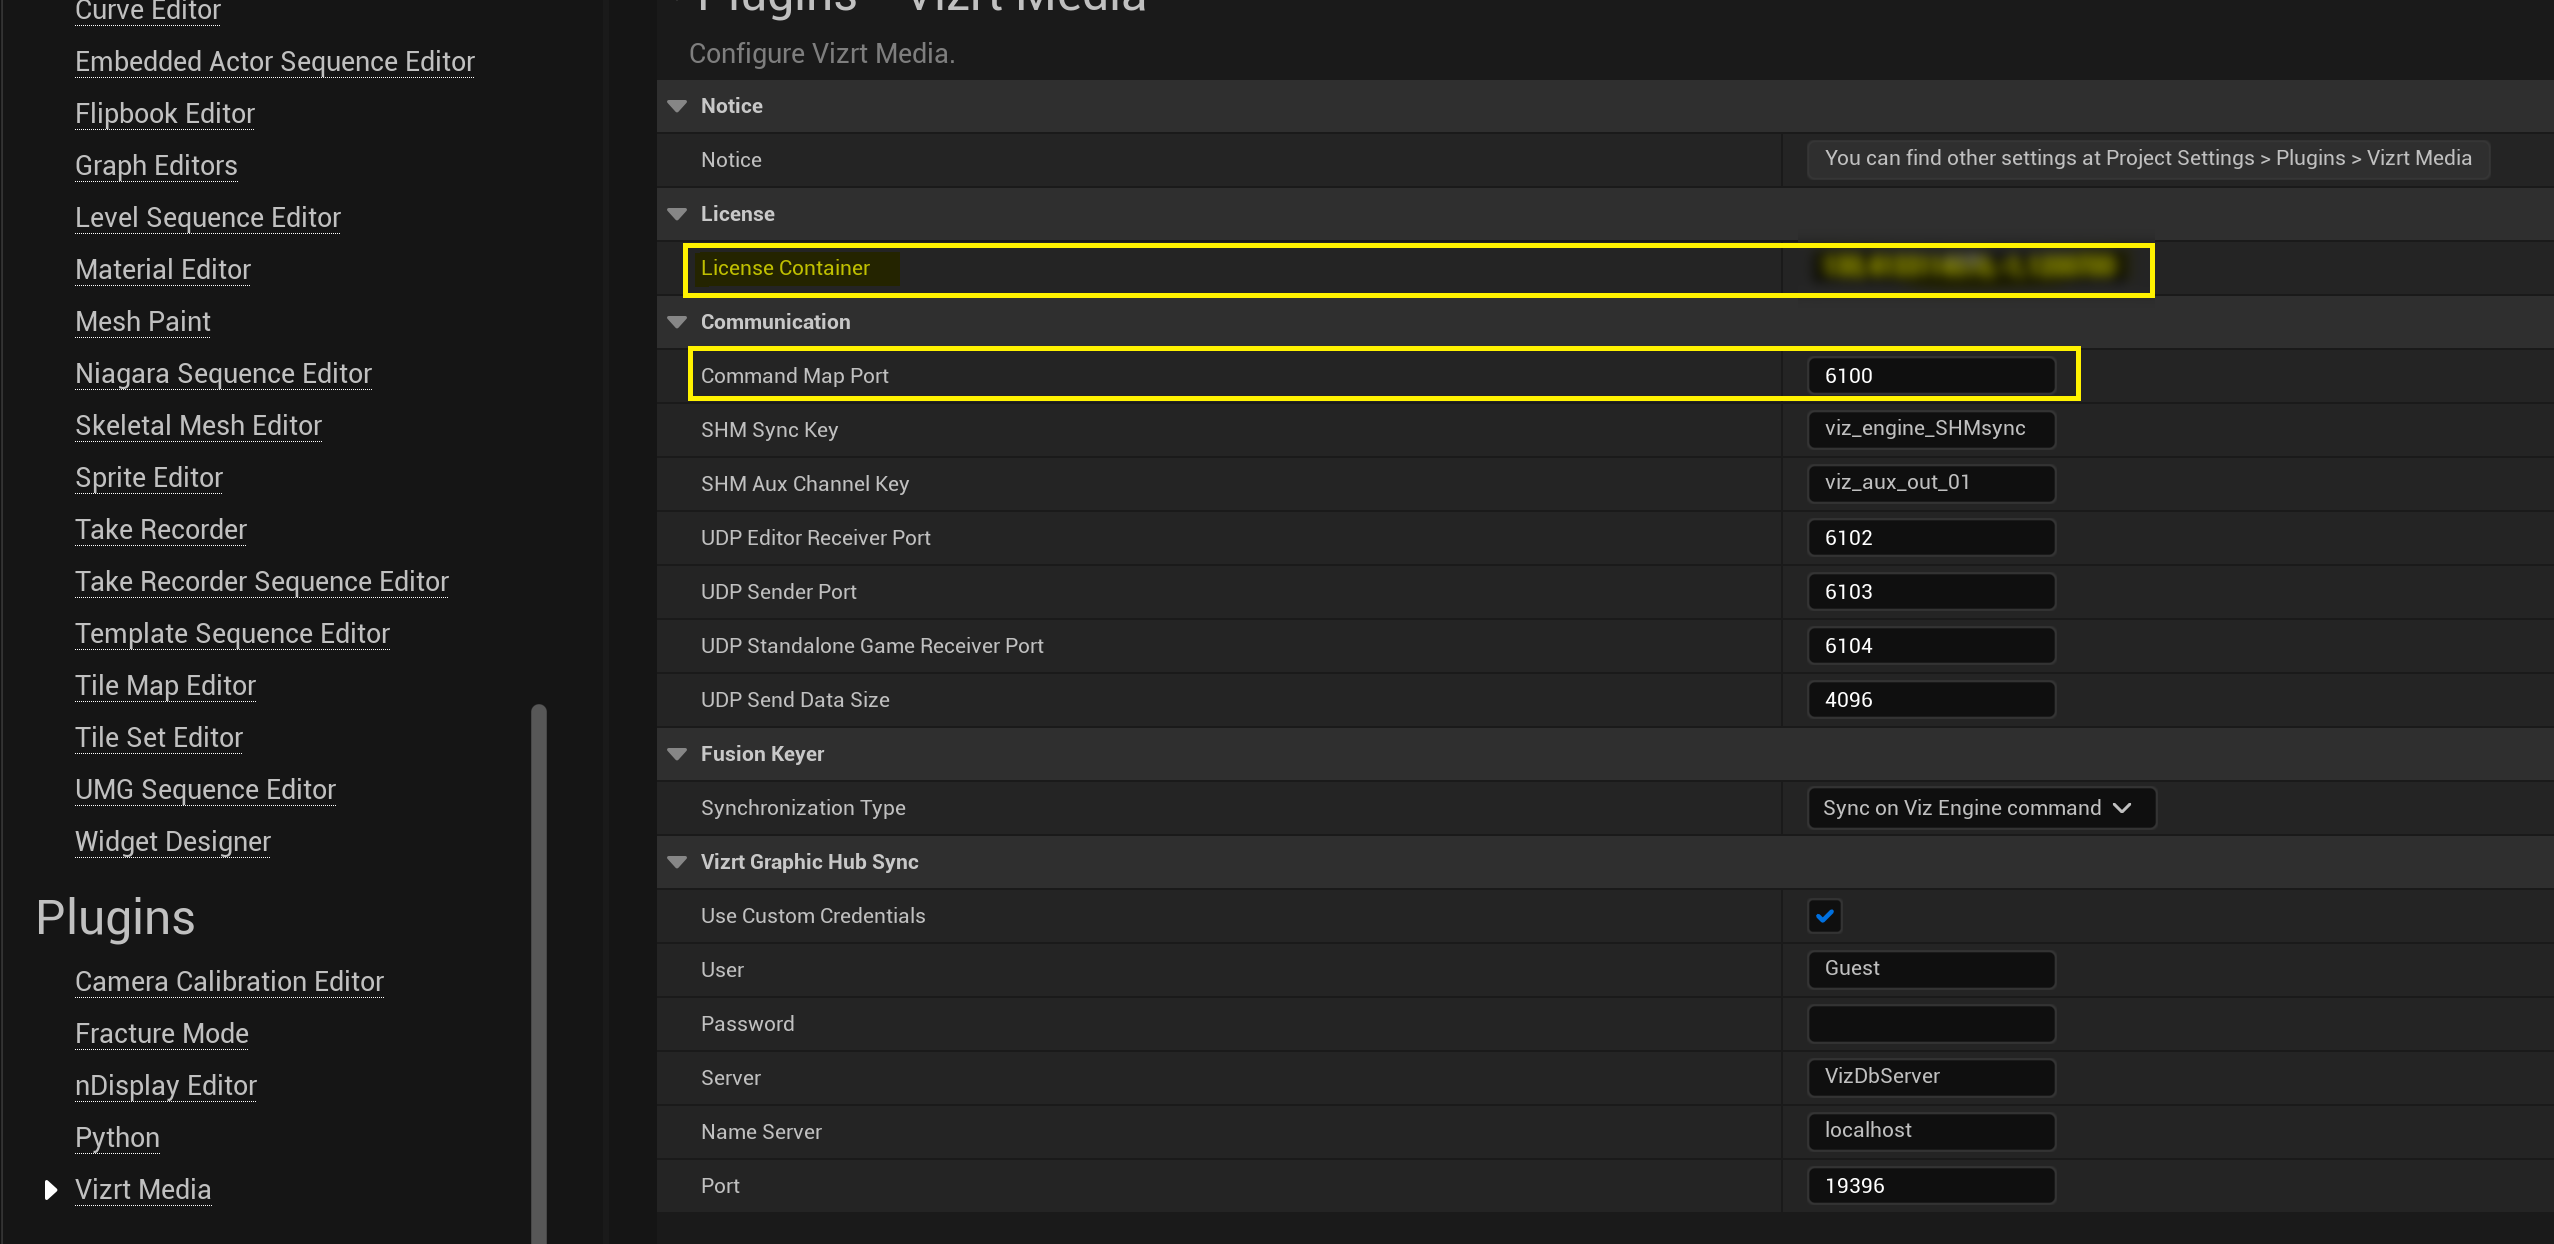
If Viz Engine finds a correct container with a valid Vizrt Media for Unreal license, this one is used and added in License Container. These settings are stored in an .ini file located in %localappdata%\UnrealEngine\5.0\Saved\Config\WindowsEditor\EditorSettings.ini.
The setting in the .ini file is used. If there is no entry in the .ini file, Viz Engine is queried for a valid container. If the setting in the .ini file is incorrect, Vizrt Media for Unreal fails to load.
Information: If the Vizrt Media for Unreal license is located on a different location (server) rather than the Viz Engine licenses, you need to manually change the .ini file. The entry has the following format: CONTAINER-MASK,CONTAINER-SERIAL,LICENSE-LOCATION,WIBU-CORELICENSE-ID
To Establish Correct Syncing with Viz Engine
A timecode provider is required to sync the Viz Engine with Unreal Engine, as both of them need to exchange data on a given timestamp.
-
Select Settings > Project Settings in the list of settings select Engine General Settings.
-
Scroll down to Framerate settings and click on the Show Advanced arrow.
-
In the list of Custom Time steps, you should now see a VizrtCustomTimeStep, select this one.
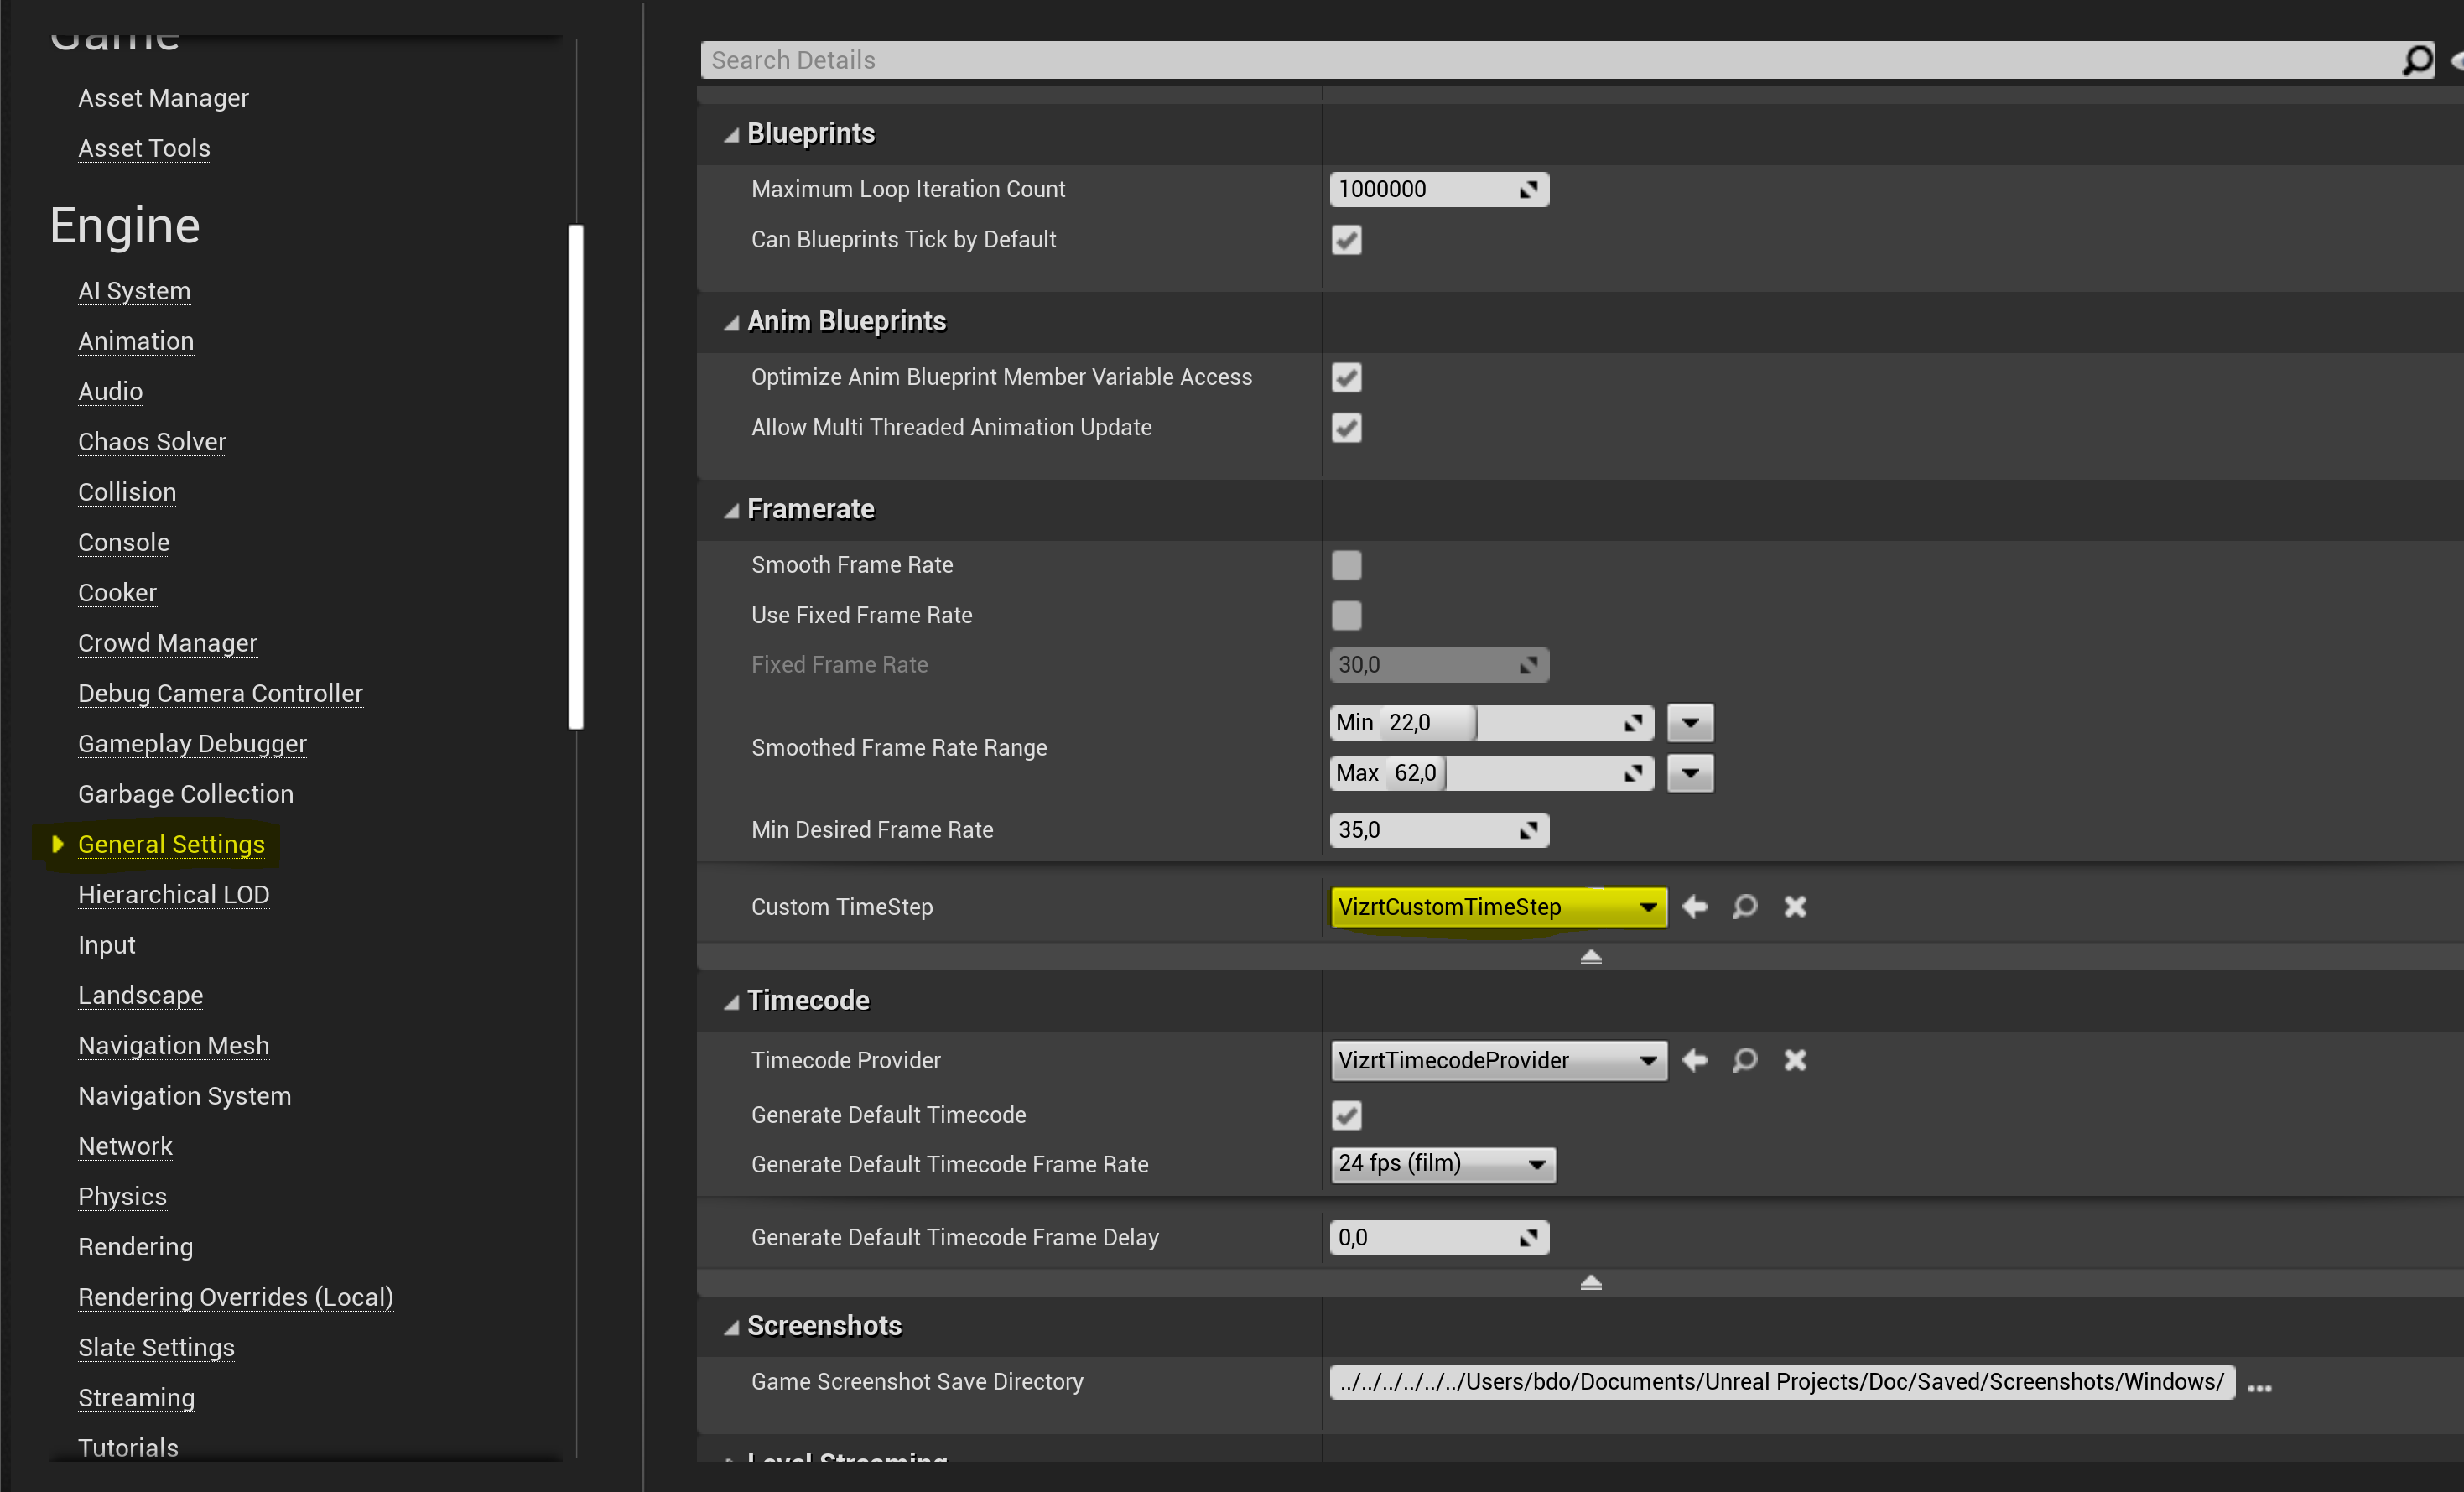
-
In the Timecode section, select VizrtTimecodeProvider as the Timecode Provider.

-
Press the Apply Button and restart Unreal Engine by clicking on the Restart Now button on the lower right.
-
Verify if the timecode is correct. Select Window > Virtual Production > Timecode provider:
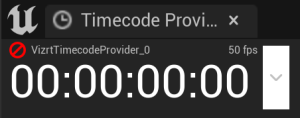
The timecode shows an invalid timecode. This is because Viz Engine is not running to provide a valid time code. -
Start Viz Engine and after a few seconds, the timecode should show an increasing value, based on the uptime of Viz Engine.
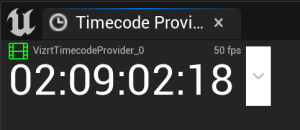
A correct timecode is absolutely mandatory.
Tip: Unreal Engine can show the current framerate within its render window. Open the console and type stat FPS and press ENTER. The current frame rate is now shown in the Editor Window. The information shown should be green and shows a value of 50 FPS (depending on your settings).
To Use the Vizrt Media plug-in
-
Start Unreal Engine. Now you can either load your existing project or create a new one based on a template.
-
Now choose a Blank project and uncheck Starter Content
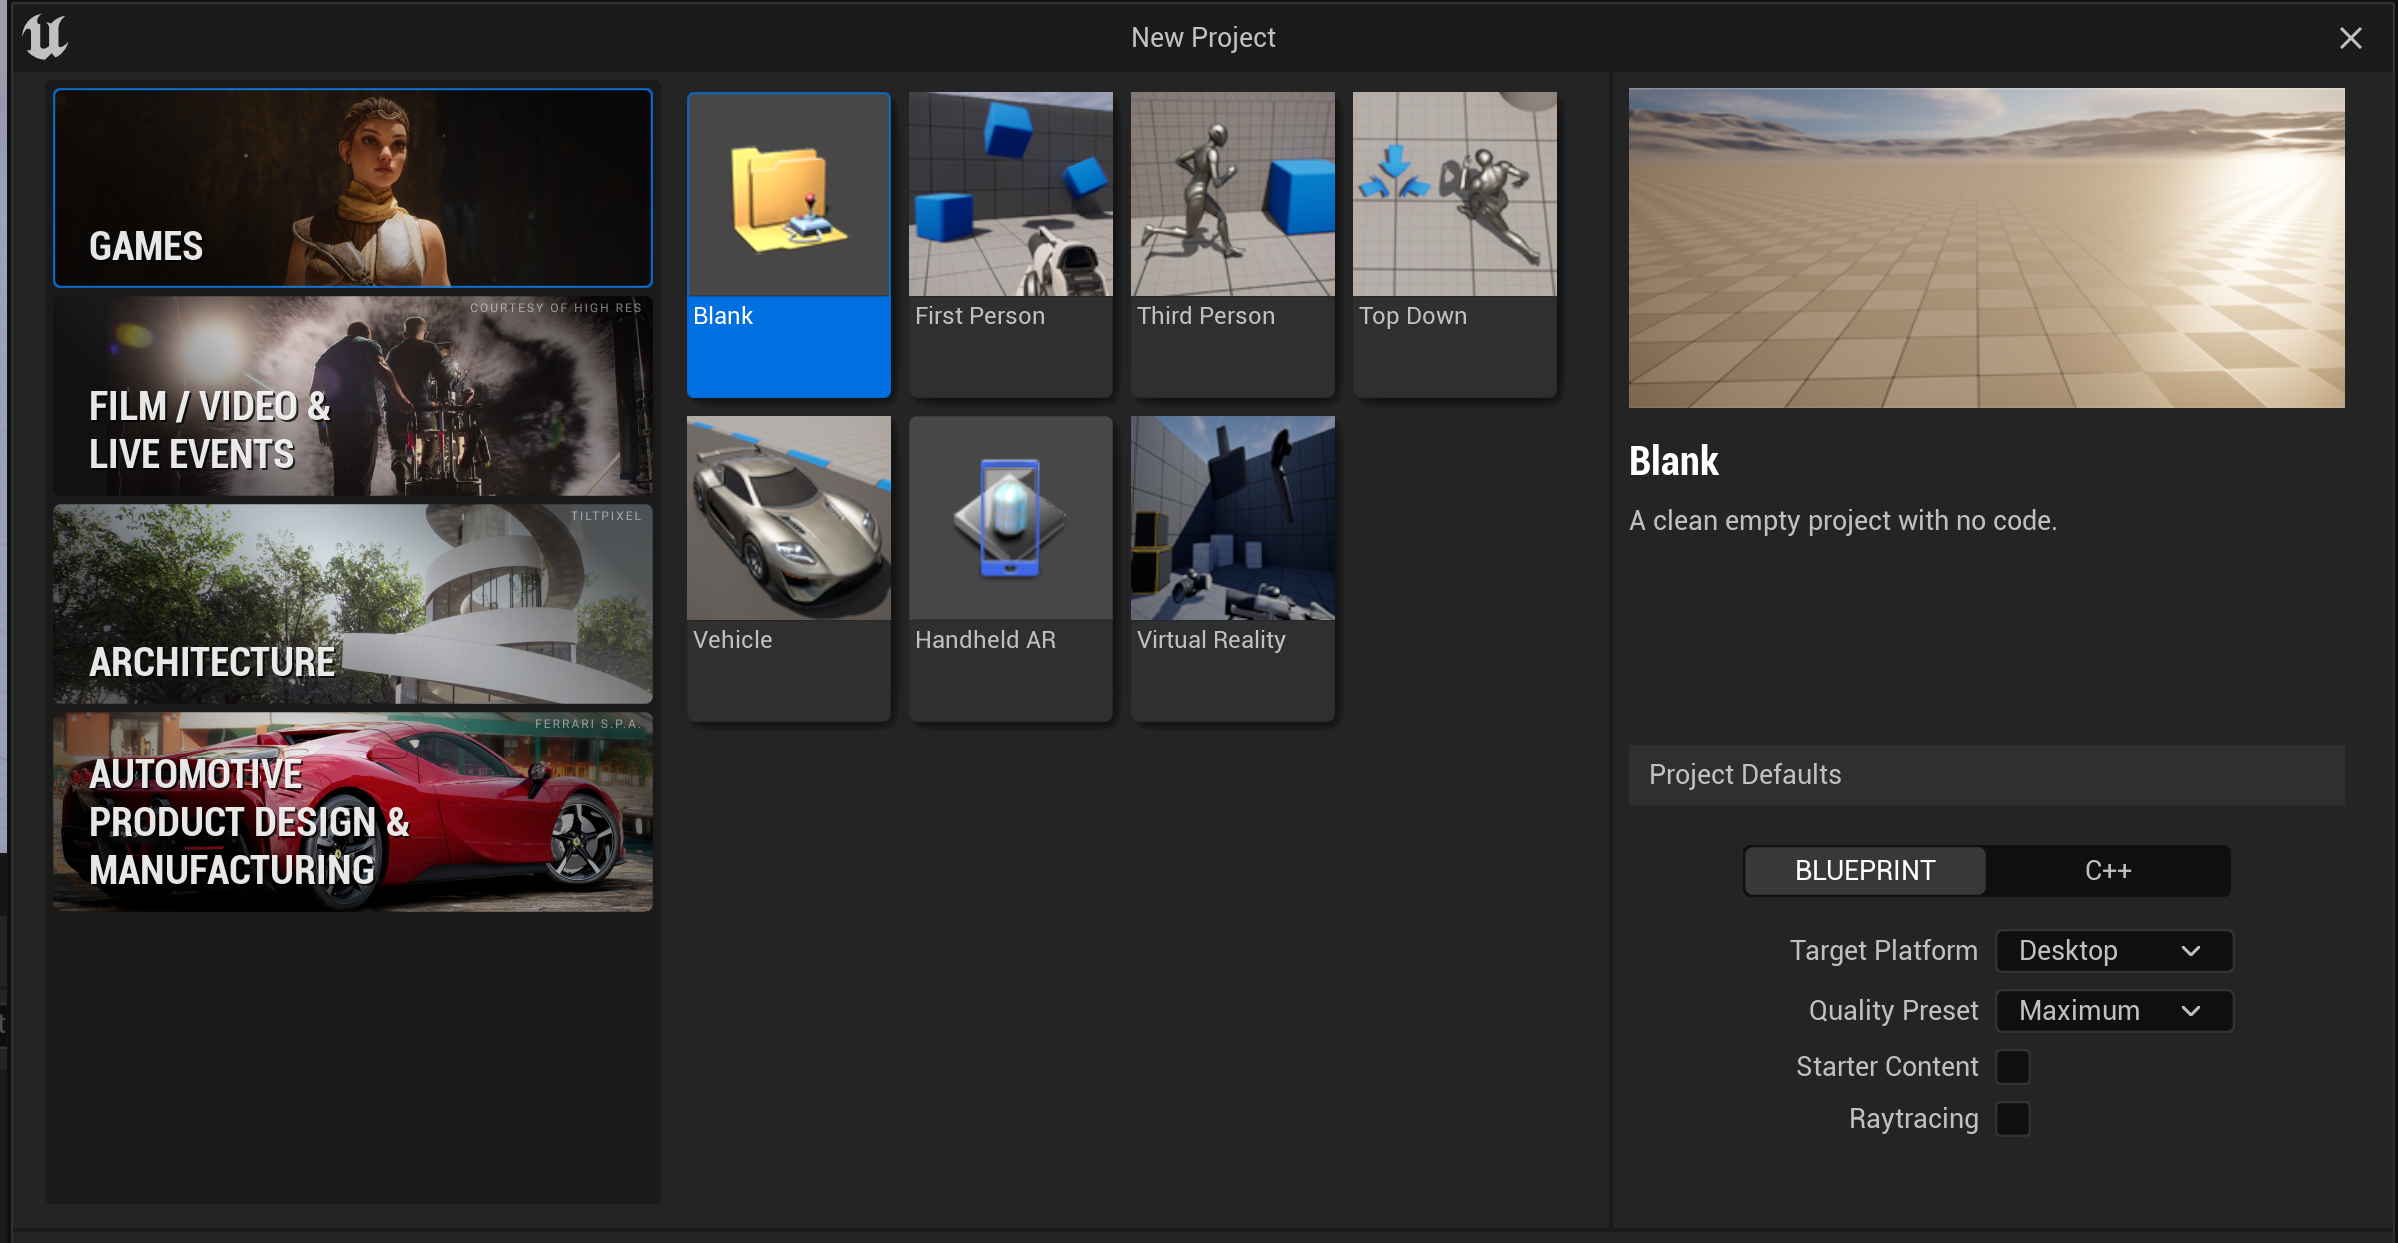
-
Click Create. Unreal Engine now restarts and loads your new Project.
The next step is to configure Unreal engine and use the VizrtAutoCapture blueprint to bring the output from Unreal Engine to Viz Engine for compositing.
Auto Capture
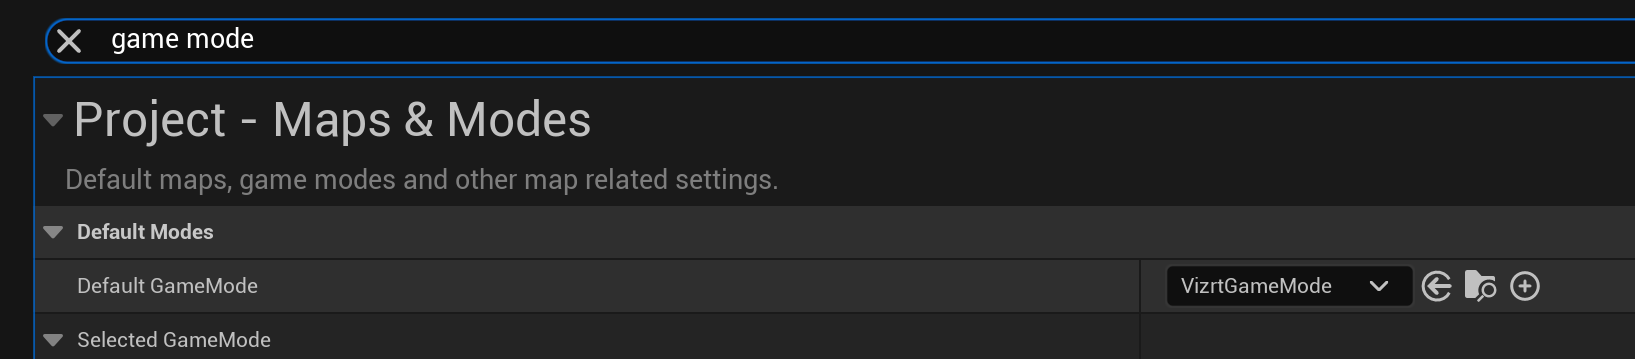
After you've created your project, go to Settings > Project Settings:

Type Game Mode in the upper search menu and set the Default GameMode to VizrtGameMode.
Type Pixel Format in the upper search menu and switch the Frame Buffer Pixel Format to 8bit RGBA for SDR rendering or Float RGBA for HDR rendering.
![]()
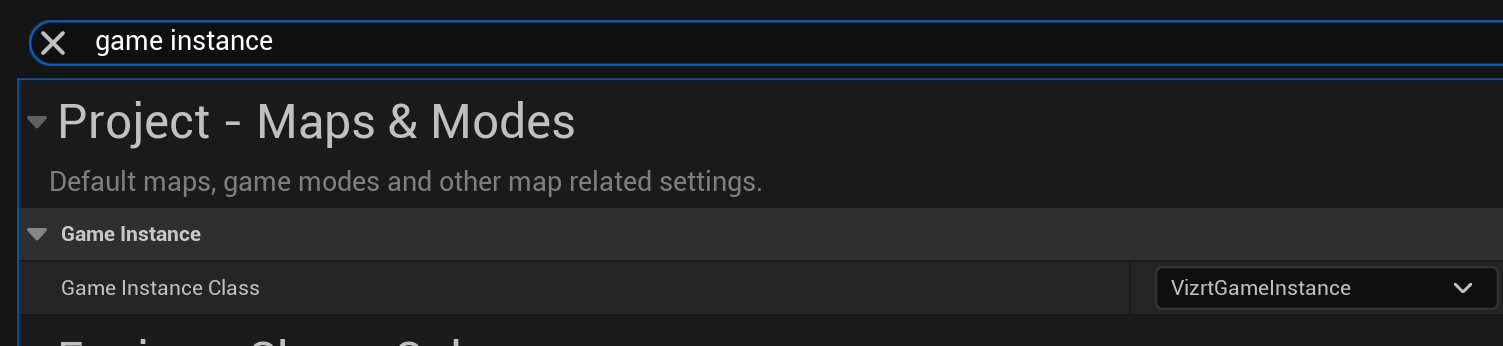
Type Game Instance in the upper search menu and set Game Instance Class to VizrtGameInstance
Verify the correct Game Mode in World Settings (Settings > World Settings):

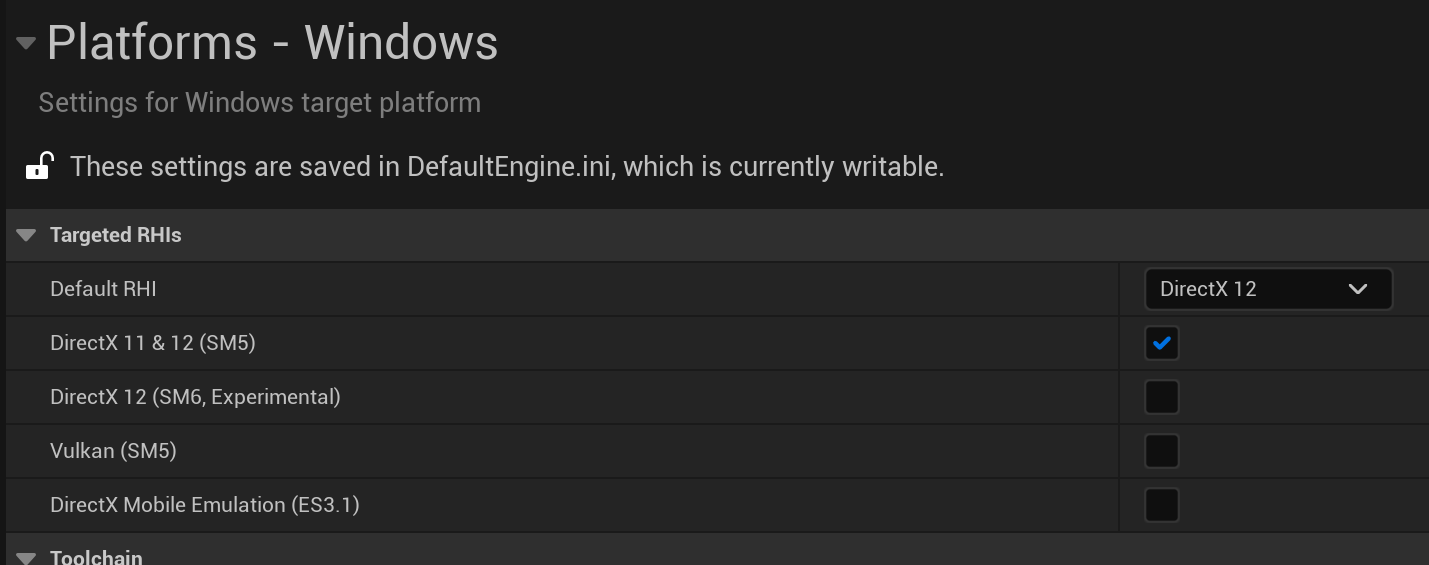
Set the rendering platform to DirectX 12 in Platforms > Windows
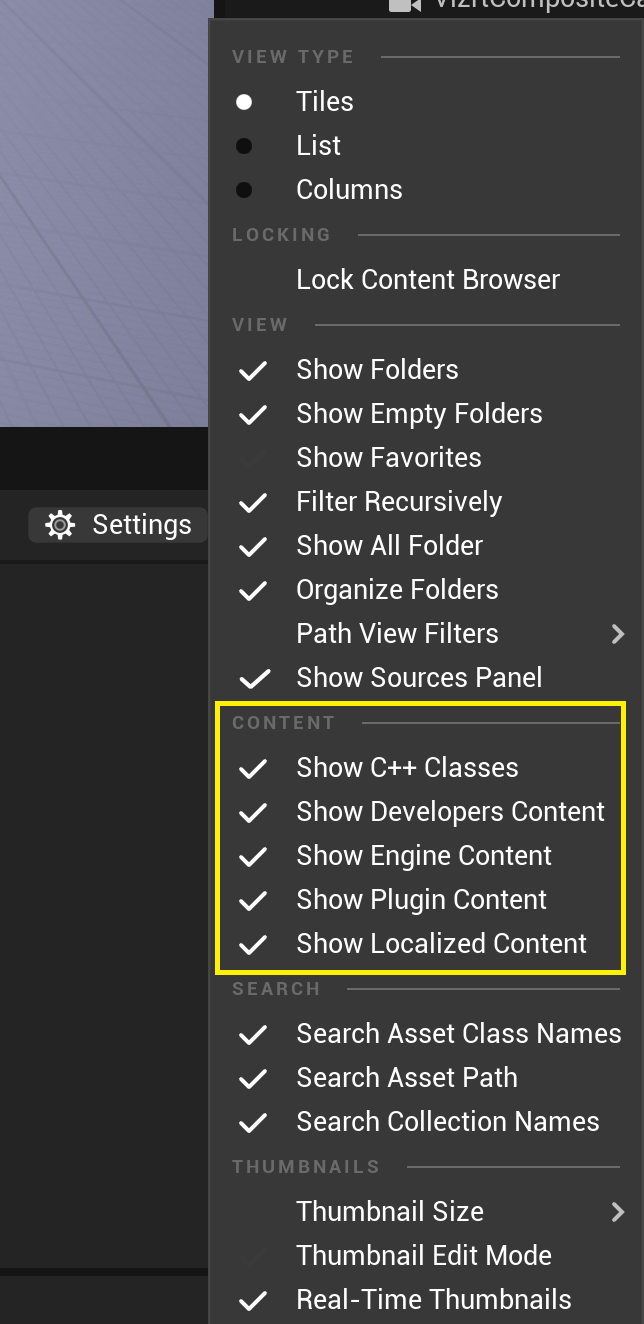
The next step is to set up the correct blueprint to capture the Unreal Engine rendering. Select All Content in the View Options of the Content Browser:
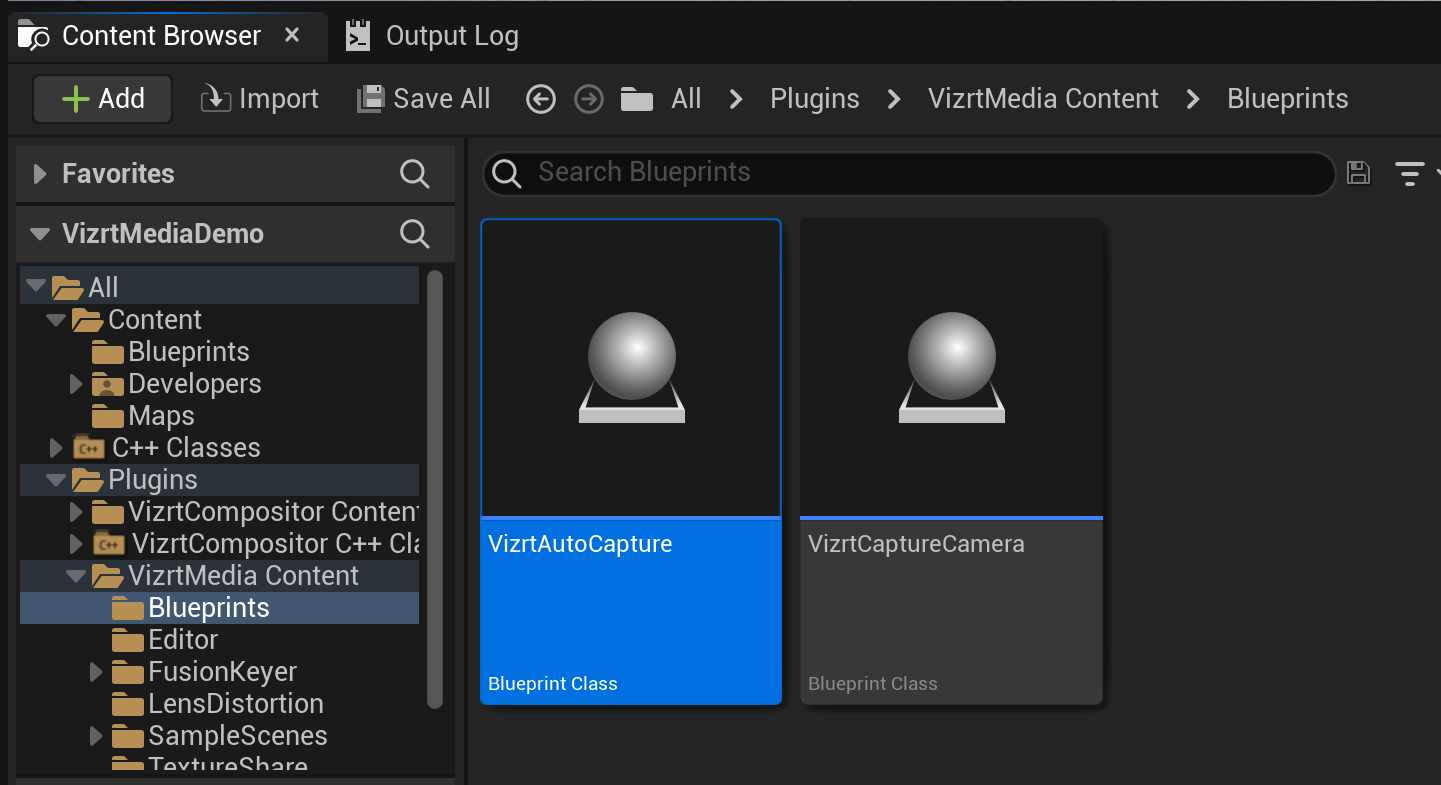
This allows the VizrtAutoCapture Blueprint to show up in Plugins > VizrtMedia Content > Blueprints. Select it and drag it into your World:
A capture must be added for the VizrtAutoCapture object. Click on VizrtAutoCapture in the World Outliner, then Details and scroll down to Vizrt Captures. Add a capture using one of the AUX assets and make sure the AUX number matches the AuxChannel used in Viz Engine.
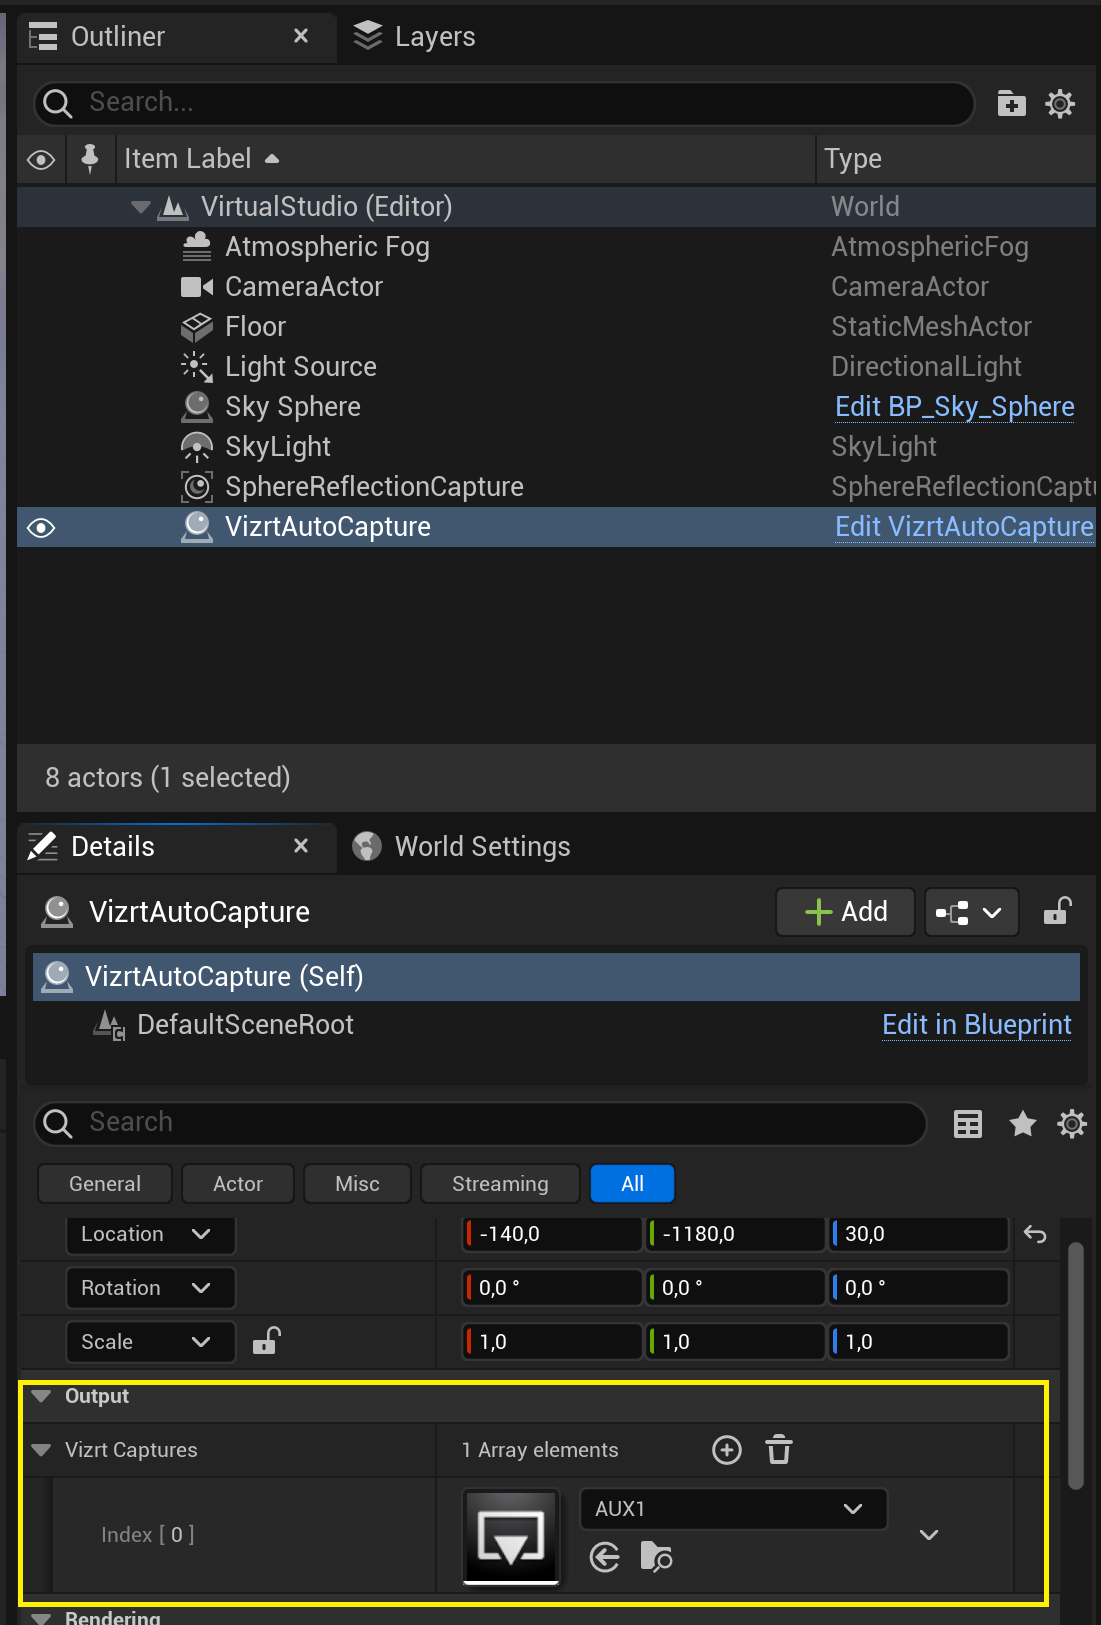
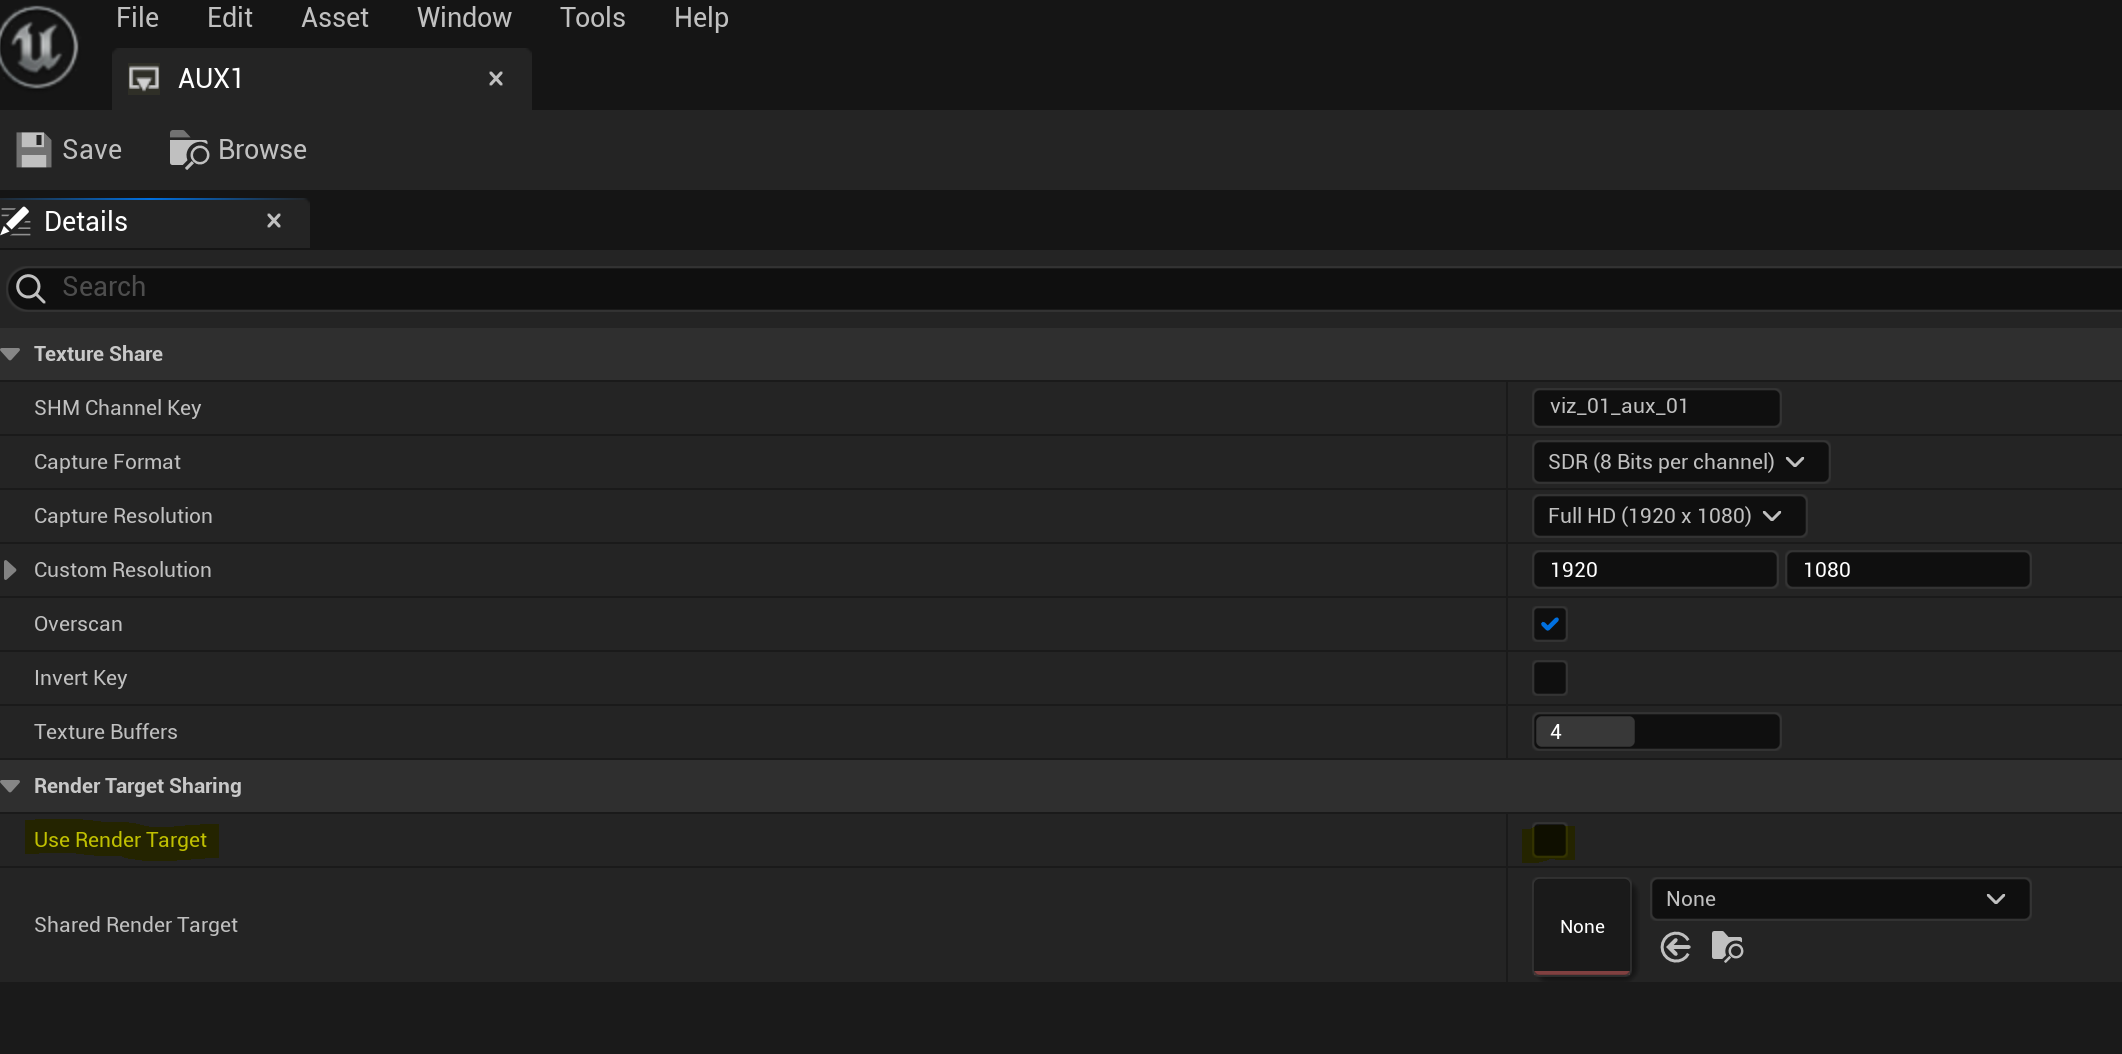
The AUX asset can be configured. Make sure its settings match the project requirements and that Use Render Target is unchecked.
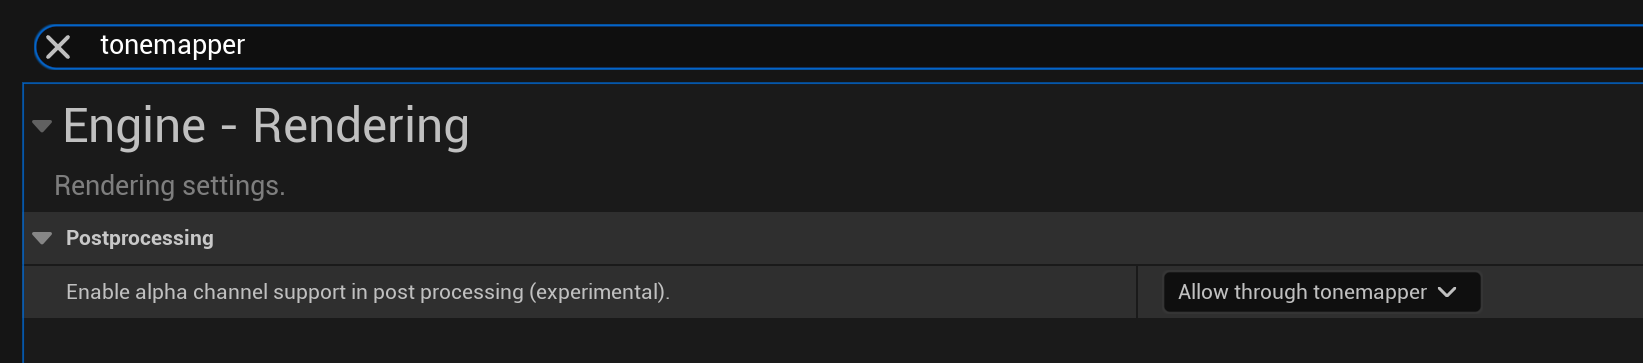
Information: For key information to be sent to Viz Engine, set Enable alpha channel support in post to Allow through Tonemapper in Project Settings.
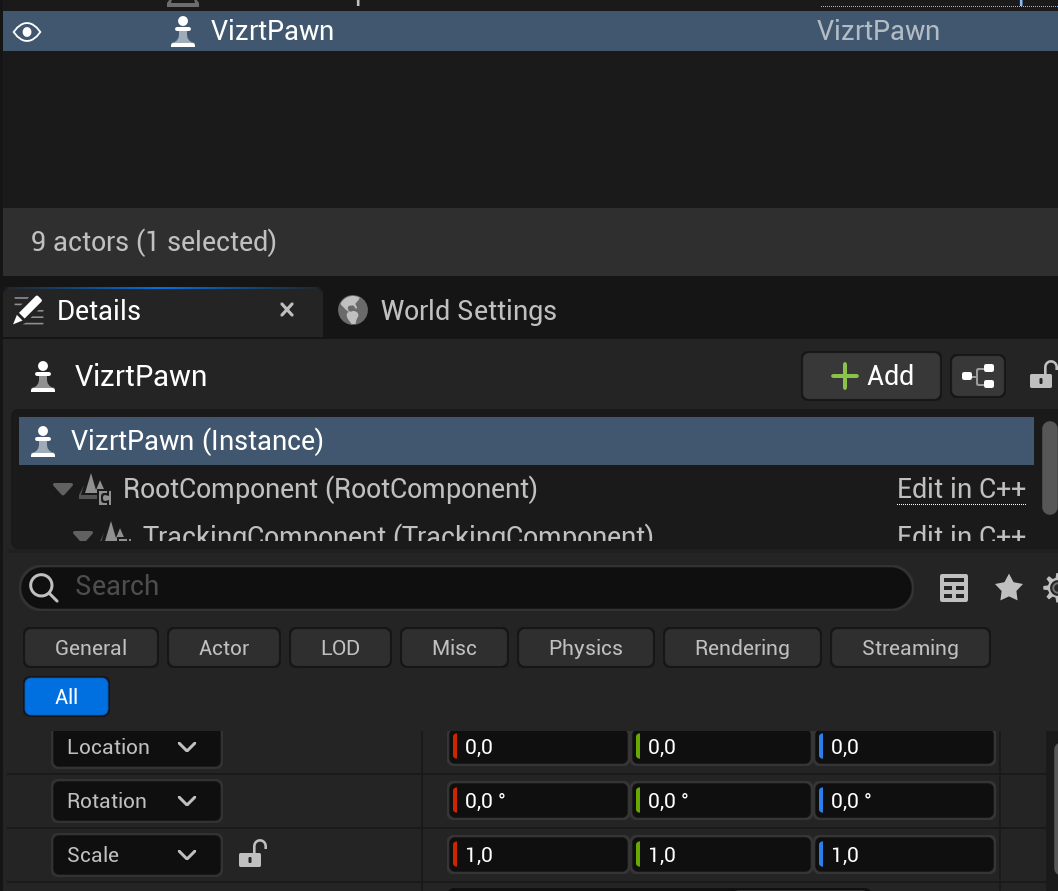
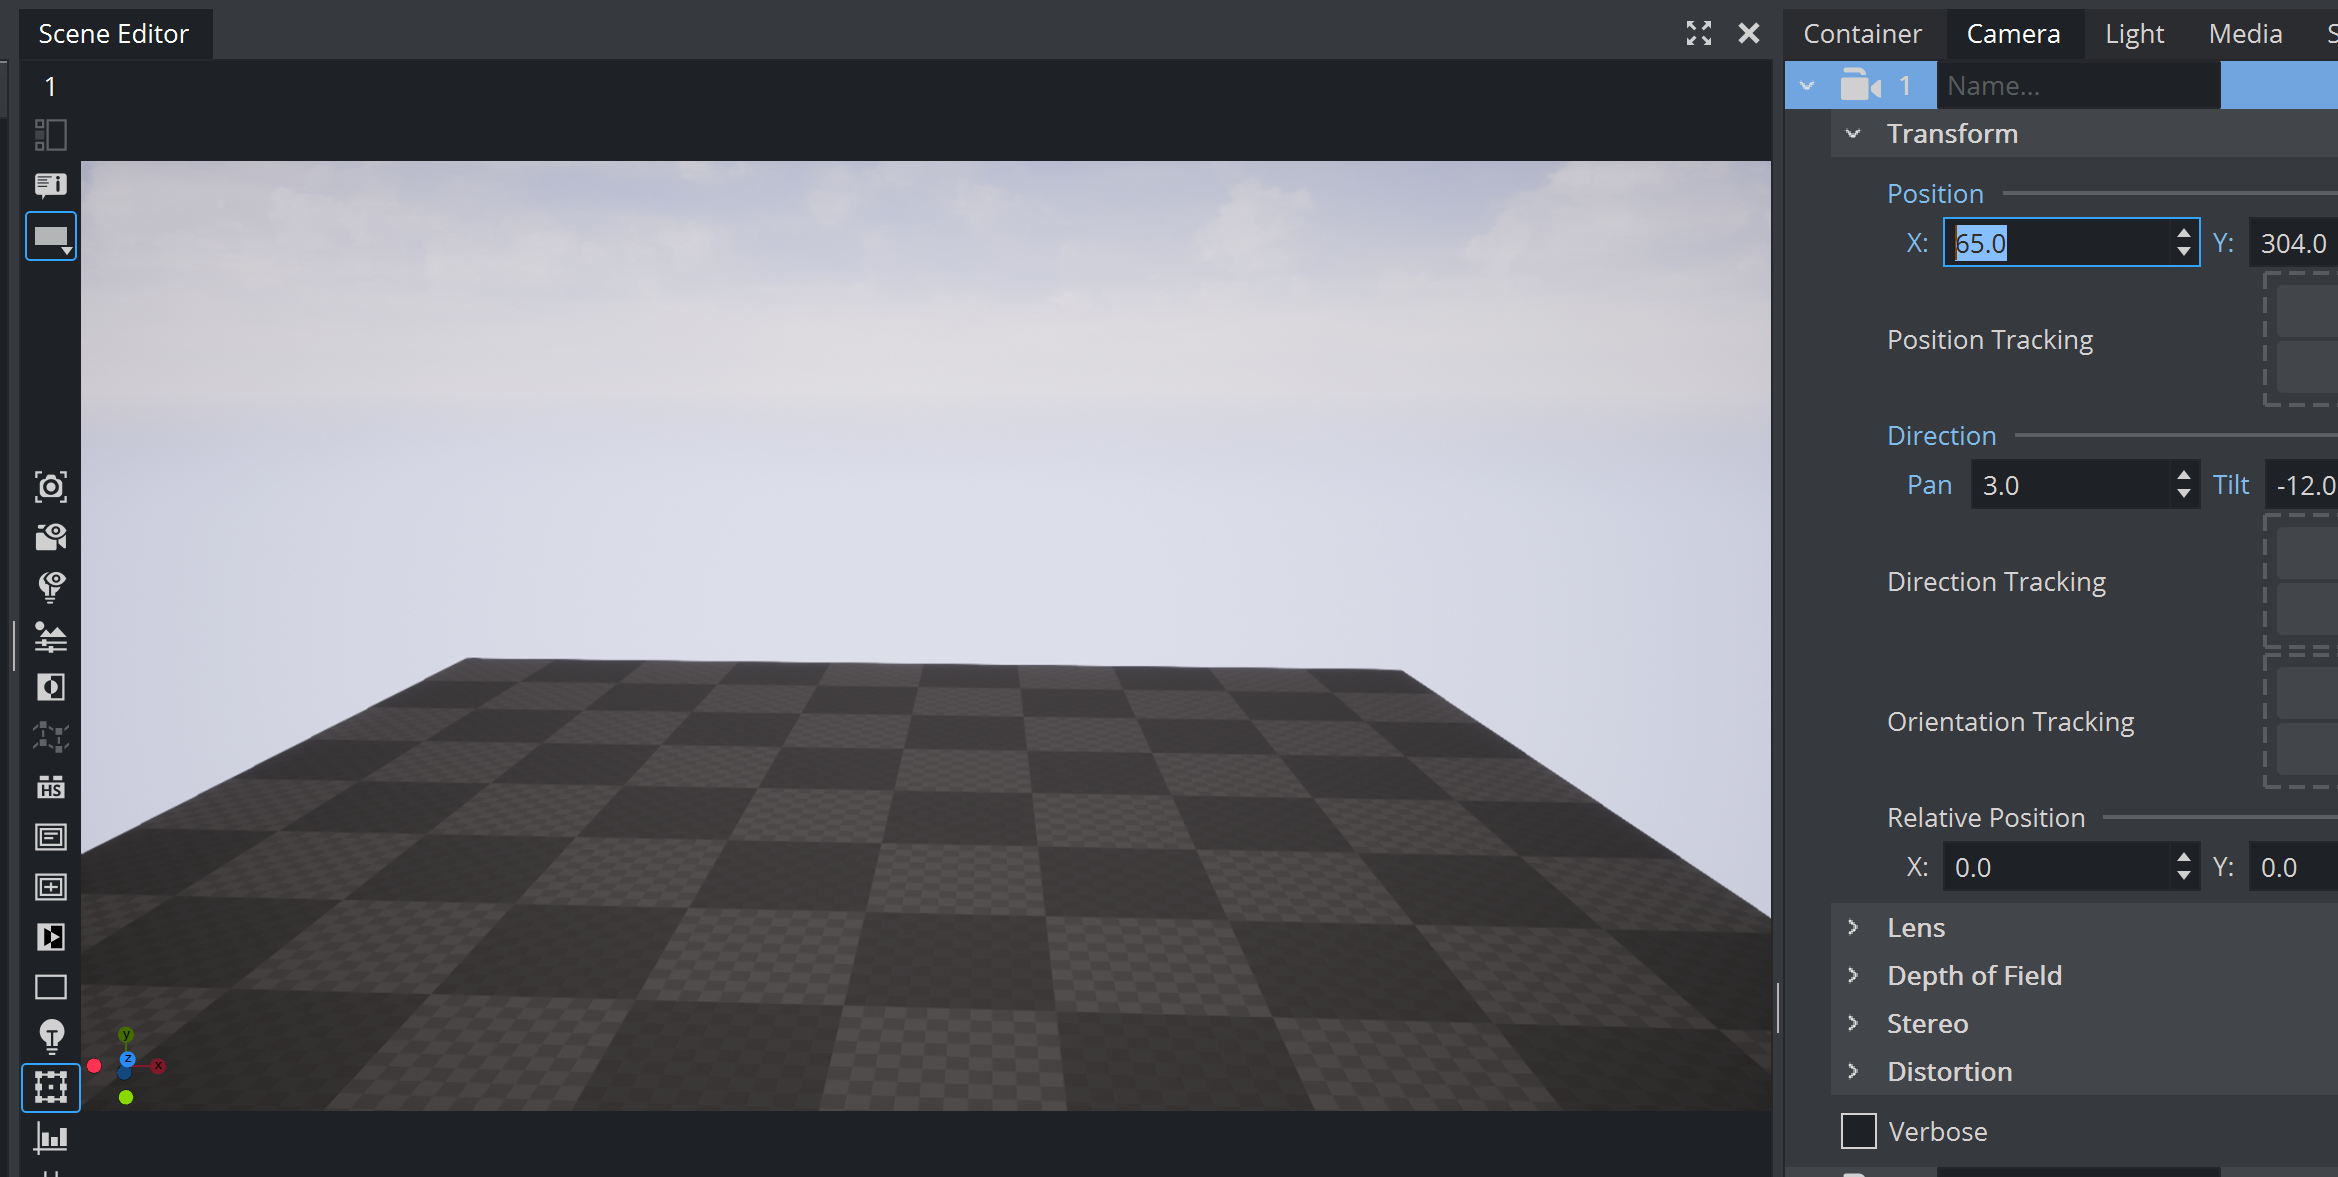
Finally you need to add the pawn controlling the camera. In the Place Actors tab, select All Classes. Find the Vizrt Pawn actor and drag it to the world and set Location to (0, 0, 0), Rotation to (0, 0, 0) and Scale to (1, 1, 1).
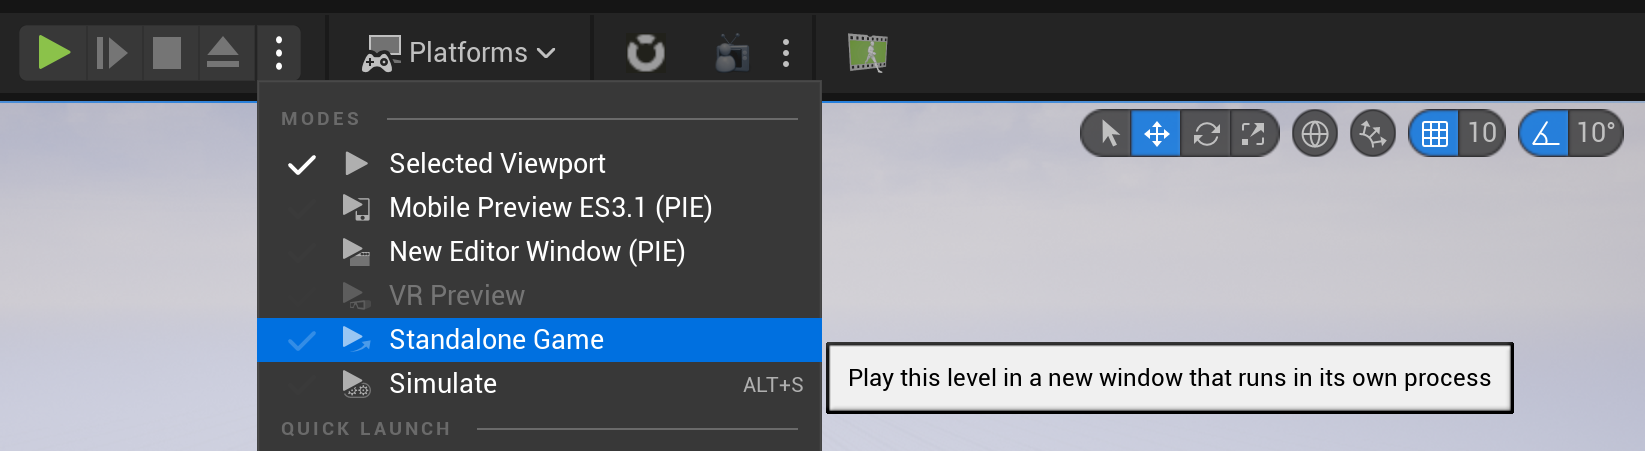
You can now test your setup by playing the game. To do so, select Play Standalone Game. This is the recommended mode for productions, but the other play modes can also be used while designing the scene.
Viz Engine now shows output from Unreal as background (or how the scene is designed). To verify your correct setup, move the camera. The Unreal camera must move accordingly.
Tip: To adjust the delay between Viz Camera and Unreal camera, please adjust the render camera delay in Viz Engine going to Config > Unreal Engine.

Adding Media Assets from Viz Engine in Unreal Scenes
If your design requires to have input sources from Viz Engine shared with Unreal Engine, this can also be achieved (for example, if a Live Feed needs to reflect on your Virtual Studio floor). It's possible to send to Unreal clip channels, graphics channels and live channels. In our example, we use a clip as texture to be shared with Unreal Engine.
-
Drag Clip1 as texture to Media Assets in Viz Engine, load a clip and set it to Autoplay.
-
Now switch to the SHM Aux Mode in Media Asset properties.
-
Select Unreal as SHM Aux Mode.

-
Switch to Unreal Engine and stop the current Playmode if necessary.
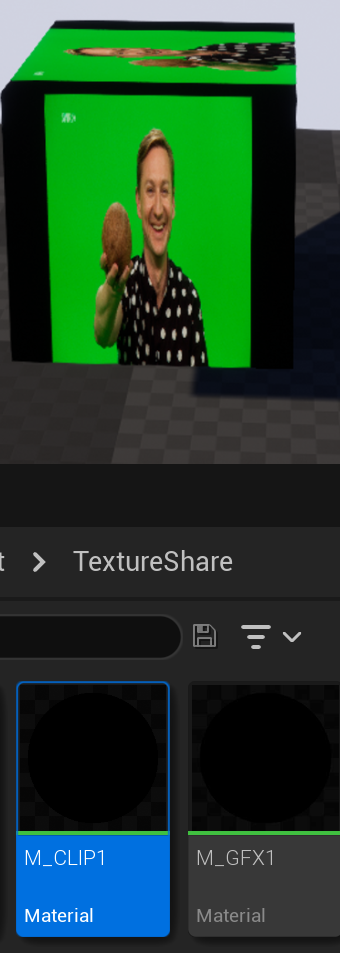
Now on the Unreal side, we need to drag the CLIP1 material to an object.
-
Switch to Content Browser.
-
Drag the Clip1 material to an Unreal actor, for instance a cube.
-
Play the game in Unreal.
Tip: If you search for the material but it does not show up, make sure you have both Show Engine Content and Show Plugin Content enabled.
Information: All the texture sharing assets are located in Plugins > VizrtMedia Content > Texture Share in the Content Browser
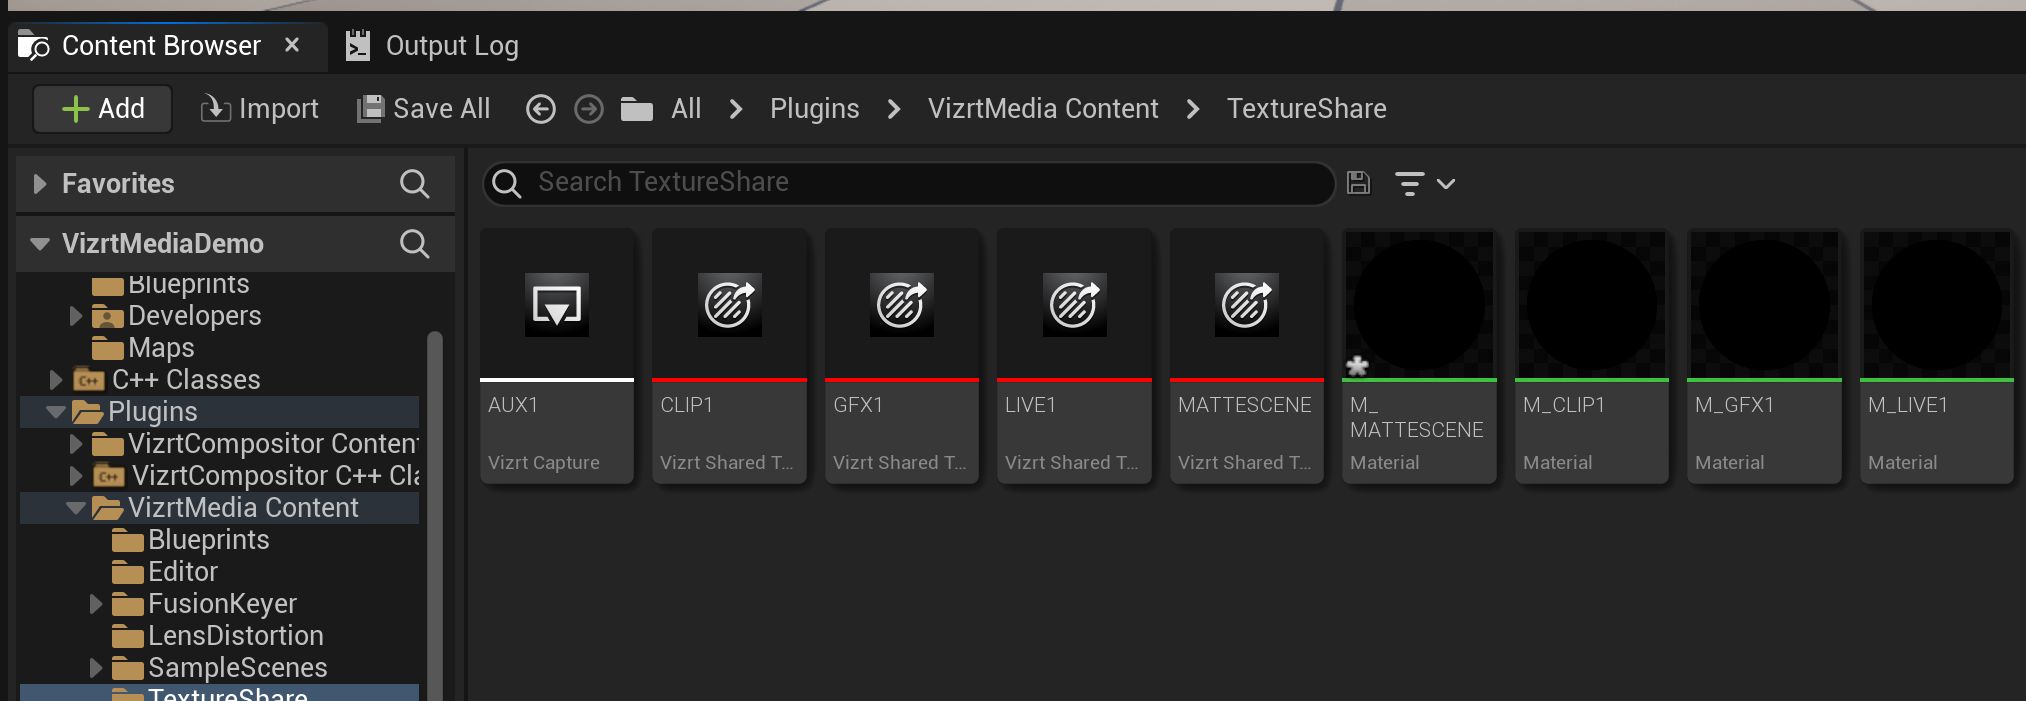
-
Vizrt Capture assets capture Render Targets or the Viewport and send them to Viz Engine.
-
Vizrt Shared Texture assets receive clips, gfx, lives and the matte scene from Viz Engine.
The remaining texture share content materials can be applied to an Unreal object to show the corresponding textures.
The Vizrt Shared Texture can be configured by double clicking the asset. Check if the SHM channel key clip number matches the clip number used in Viz Engine.
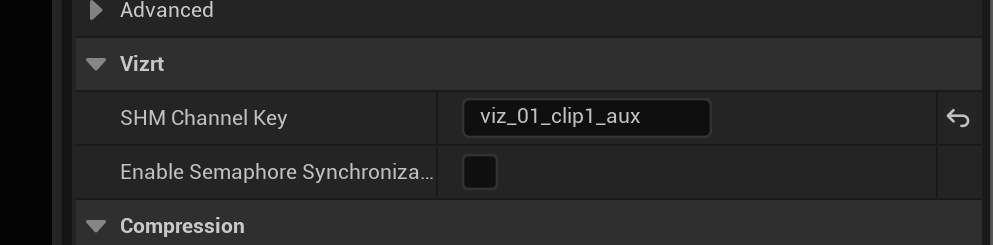
Note: The texture share assets should be seen as a template. Please do not modify them. If one of these assets need to be changed please create a copy.
Keying and Compositing in Unreal
All the previous information assumes that the graphics keying and compositing is done in Viz Engine. Starting from version 5.0 of the VizrtMedia plug-in, chroma keying and compositing can be done in Unreal Engine.
-
For a guide on how to setup keying using the implementation of the Precision Keyer for Unreal refer to Precision Keyer + Compositing on Unreal Engine 5.
-
For a guide on how to setup compositing with reflections and shadows using the Vizrt Compositor plug-in please refer to Reflections and Shadows Compositing in UE5.
Syncing Unreal Project with Graphic Hub
Starting from version 5.0 of Viz Engine and the VizrtMedia plug-in, it's possible to sync the Unreal project with Graphic Hub using a file collection, and link that file collection to a Viz scene. Please refer to Working with File Collections for more information.
Using Viz Engine Control Objects
Starting from version 5.0 of Viz Engine and the VizrtMedia plug-in, Viz Engine can update actor parameters in Unreal. Please refer to Control Objects on Unreal Engine.
Troubleshooting
In case of any trouble, please crosscheck the following:
-
Do you have a valid license?
-
Is the Engine configuration correct?
-
Does the output size match your resolution Viz Engine?
-
Are the keys for shared memory set correct?
-
Does Unreal receive a correct timecode if the Engine is running?
-
Do you see a preview if you start the capture in Unreal (when using Capture Device)?
-
Is Unreal in Play mode?
In case the key signal is not correct, you can manually invert the signal in the settings for the used AUX asset.
Unreal has several profiling tools built in to identify performance bottlenecks. Please refer to the Unreal documentation about details.
General
Keep in mind that both Viz Engine and Unreal Engine require their resources and capacities to deliver a stable and correct output. Make sure both applications have enough resources available. For Example, if the Unreal Scene already occupies 70% of the GPU power, Viz Engine is not able to perform its operations which results in jittering. The whole setup needs to be profiled and optimized on the final hardware with the final setup. If the Unreal project performs correctly on the designers desk, there is no guarantee if the whole project will then run correctly if everything is combined together. This involves a Matrox videoboard, the Unreal running in Game Mode, Viz Engine with its compositing scene and correct Chroma Keyer setup and Tracking Data coming in.
When profiling the unreal scene, check the following:
-
Use Lights only where needed. If lights are static, check if they can be baked. Spot Lights are very compute intense, try to minimize as much as possible.
-
Unreal Engine needs to run at at least 60-70fps in real time.
-
Try to keep the Light map size low, especially when using dynamic lights.
-
Try to optimize the Texture sizes. The GPU memory is limited and Viz Engine also needs to allocate memory within this space. If Texture Memory is getting low, the GPU driver needs to free up or swap and this results in jittering.
-
Scene Capture 2D and Cube capture requires performance.,
-
Make sure the Unreal Engine is running at least in Game mode and the Editor is closed.
-
Make sure that Unreal's Garbage Collector does not become active during production. Try the settings below:
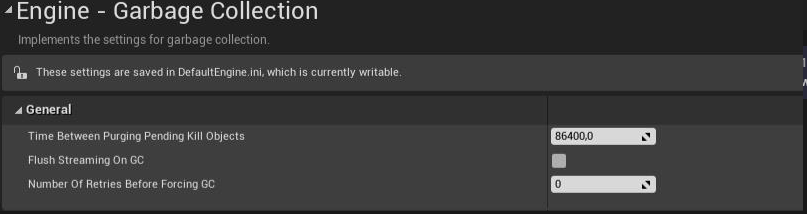
An overview of all available Profiling Tools can be found in the Unreal Engine Documentation.
See Also