
Viz Artist User Guide
Version 5.0 | Published December 20, 2022 ©
Working with PBR Materials

The Viz Engine Render Pipeline uses the physically-based rendering (PBR) approach to bring photo realism alive. PBR describes the shading of a geometry using realistic shading/lighting models. PBR materials attempt to render surfaces as accurately as possible using modern shader technologies, ensuring your objects look great under every lighting condition.
To start using PBR materials, make sure you are running in the Viz Engine Render Pipeline, your scene has a light defined and you are using a correct environment map for proper lighting.
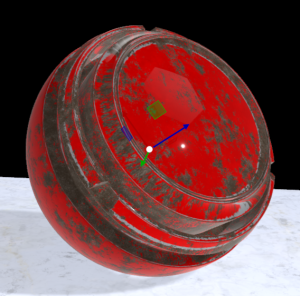
In our example, we use the default Preview Sphere from Allegorithmic Substance Painter samples. Import your geometry (or use a built-in geometry) and add it to your scene. Drag any Material Definition from the server view to a container or right-click and select Add Material (Viz Engine Pipeline).... This adds a default material to your object.
Material Definitions can easily be saved or re-used by dragging them to or from Graphic Hub.
The traditional material in the Classic Render Pipeline has a diffuse setting, describing the the color of diffused light. Working with PBR materials, the same setting is now represented by the color (or sometimes called albedo component). This can be a color only or a texture, typically mapped using UV coordinates.
Color or Albedo Map
Defines the basic color of any diffuse light hitting the geometry. As the Viz Engine Render Pipeline renders in linear space, the sRGB flag defines whether a sRGB texture is in use. If you are not using a UV mapped image, you can change the wrapping method. Additional filter settings for scaling can be applied (linear filtering and nearest filtering algorithms). Usually, those settings do not need to be changed unless you see some jaggy artifacts.
The anisotropic filtering value defines how pixels that need to be stretched, are filtered in z-order. A higher filtering reduces blurriness in the back and adds more detail.
If a texture is going to be used, the base color can be kept white, unless you want to recolor your image. In addition, an alpha value can make the object transparent (without any special transparency effects). Albedo maps should not include any kind of lighting information.
Emissive Color
The emissive component defines the areas and color of any light hit by the object and reflected again. Substance Painter can also export an additional emissive texture. If you want to add some blooming effects afterwards, the emissive map can define these highlight areas.
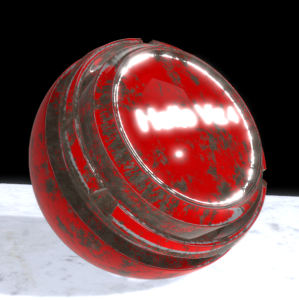
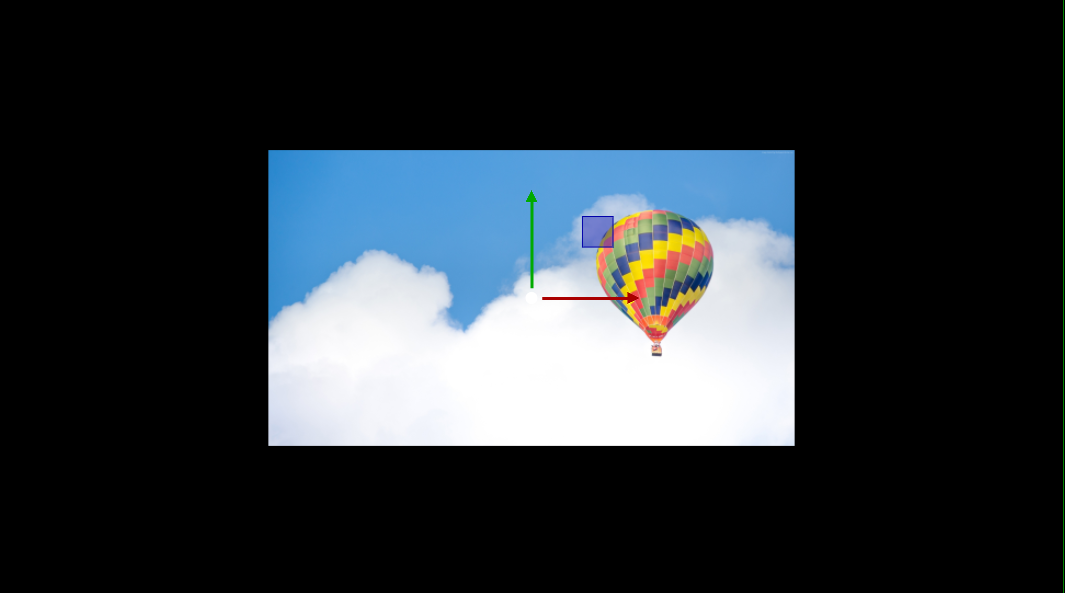
In the given example, we added some highlight effects on the top surface. This is done using an emissive map, the intensity factor and the blooming post-processing step. The base color should be kept black, otherwise your geometry emits all light.
Specular Anti-aliasing
In some conditions, if your light source hits a beveled surface, the lighting effects on the edges can be over sampled, as in the following image:
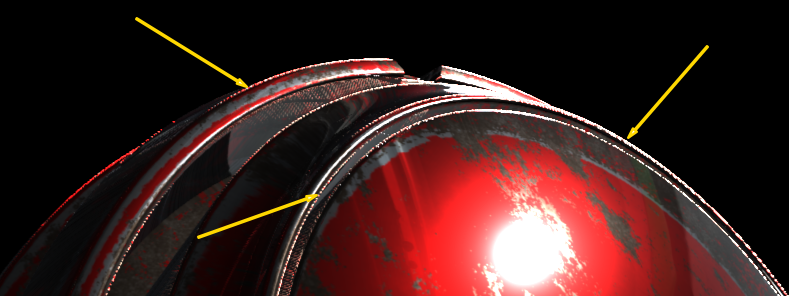
To correct these unwanted artifacts, use the Specular Anti-aliasing settings in the Material Settings.
Normal Maps
A normal map is used to add details to your surface without adding additional polygons. Normal maps do respect any light source, however they do NOT take any global illumination effects into account. Normal maps are exported by any common 3D paint program and can easily identified by theirs blueish/pink color range. These colors define if a certain pixel appears lowered or raised on the surface.
|
No Normal Map (left) vs Normal Map applied (right) |
|
|
Tip: The Viz Engine Renderer uses the OpenGL normal map format. If only the DirectX format is available, you need to invert the green channel in an external image editing program like Adobe Photoshop, resave it and reimport the normal map into Viz Engine.
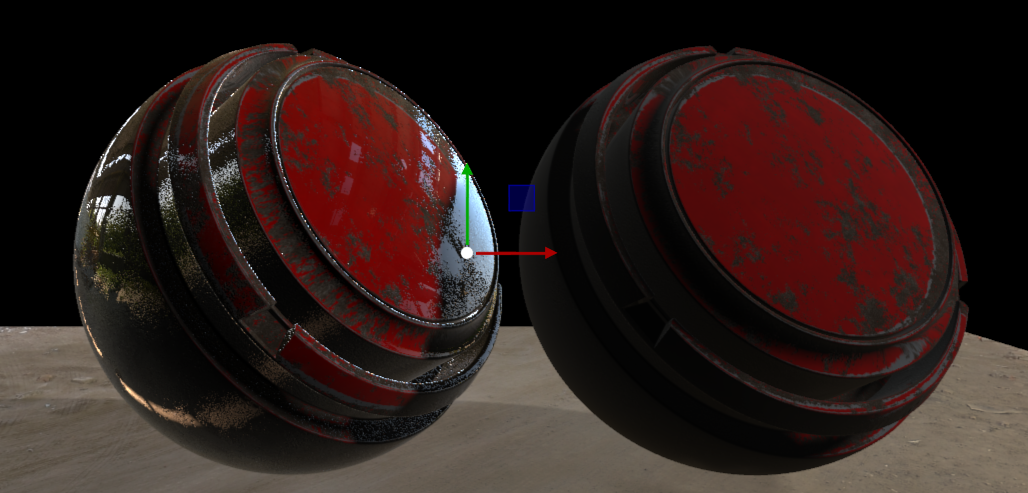
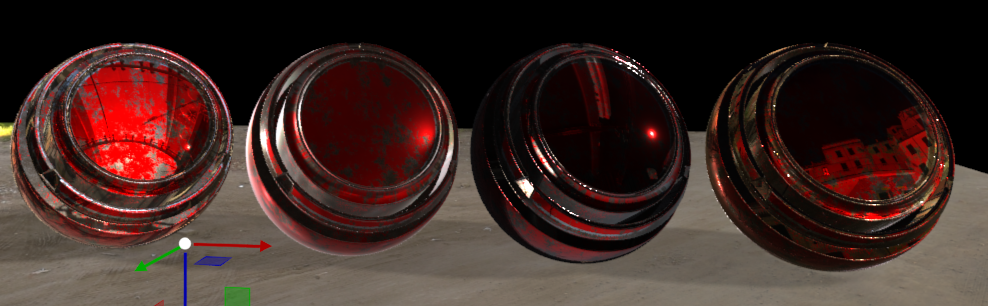
Roughness
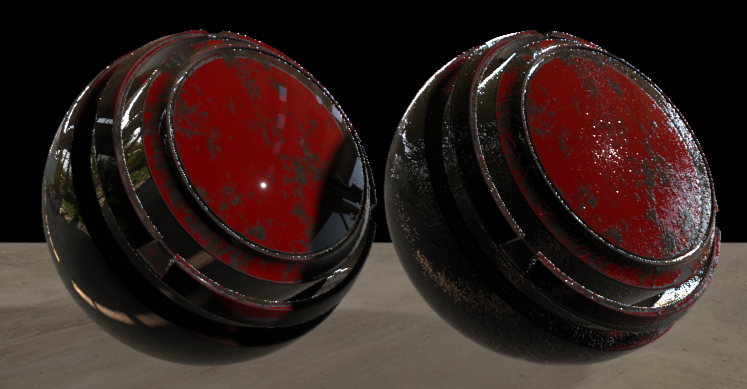
Roughness maps (or microsurfaces) defines how rough or smooth the surface of a material is. Rougher surfaces show wider but dimmer specular reflections, whereas smoother surfaces show more brighter but sharper reflections.
In the Viz Engine Render Pipeline, a roughness factor of -1 defines a very smooth surface, +1 the opposite. If you play with surface reflective settings, the roughness factor is very important.
|
Roughness Factor to -1 (left) vs Roughness Factor +1 (right) |
|
|
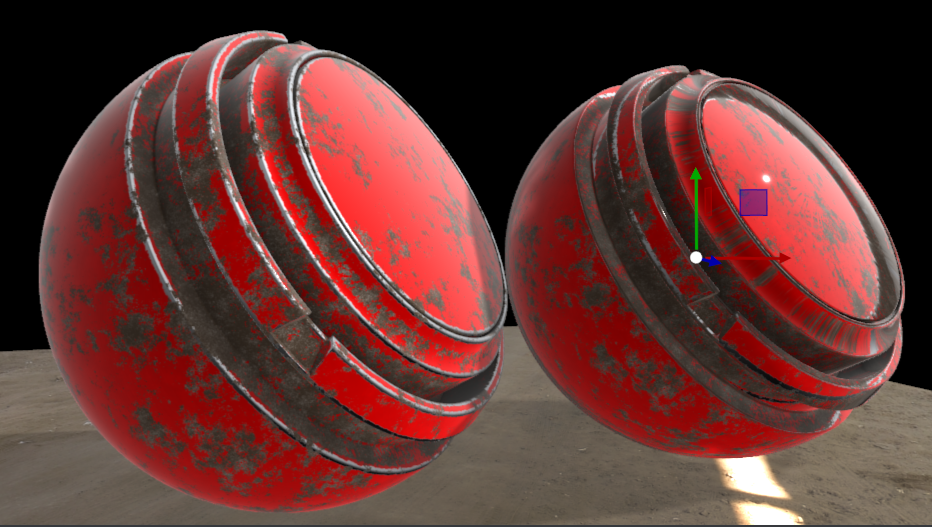
Metallic
The metallic map defines how reflective the surface of a material is. Insulative surfaces (black pixels) use the albedo map for the diffuse value. Metallic surfaces (white pixels) use the specular color and the intensive from the albedo map, the diffuse part is set to 0. The roughness factor and the metallic map influence each other. A factor of -1 means the surface is not reflective at all (can be used to represent rubber or a similar surface), whereas a high positive number (+1) is used for polished metals.
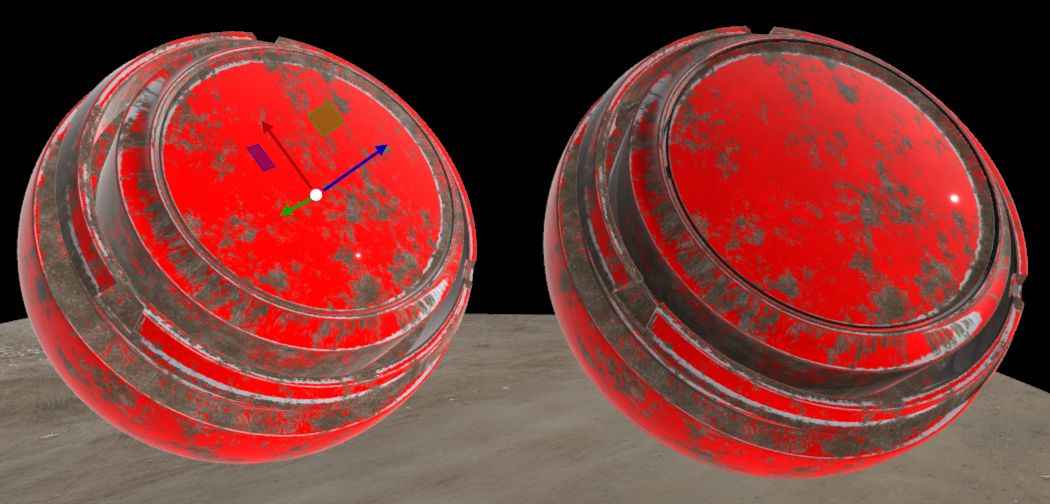
Ambient Occlusion
Ambient occlusion is a part of a baking process like the Global Illumination effects. It adds all those tiny little shadow effects in the certain areas of your geometry. When using ambient occlusion as an additional map, the shader can only apply it on ambient diffuse lit areas and not on specular parts.
|
Without (left) and with ambient occlusion applied (right) |
|
|
Height Maps
A height map (parallax mapping) is similar to normal mapping, but it requires way more complex calculations. Normal mapping modifies the light across the surface, whereas height mapping shifts the geometry to achieve a surface level occlusion effect. This applies to the surface only, the outline (silhouette) is not touched. This, of course, requires a high resolution polygon.
Warning: Be careful when using height maps, especially on large geometries. They consume a lot of render time.
|
No height map (left) vs height map applied (right) |
|
|
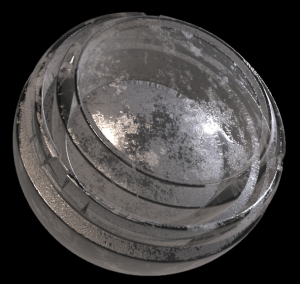
Environment Maps
By default, each geometry uses the default scene environment map. Under certain circumstances (for example, when simulating glass effects), it might be useful to apply another environment map than the default one.
|
Various Environment Maps |
|
|
For more information, see Environment Maps.
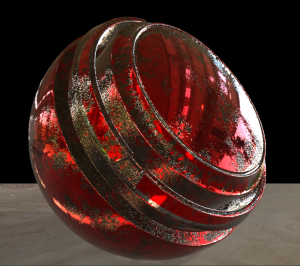
Using Transparency Effects
Creating photo-realistic glass effects have always been a challenge. This is now much more easier using the new PBR material editor. The refractive index in combination with the Alpha Fresnel Power makes your object transparent and adds some refraction effects. The refractive index is the deflection of light when it pass trough your surface to another surface with different density.
Tip: Turn down the roughness factor and increase the metallic factor a bit to achieve nice reflection effects.
Texture Manipulation
Non-UV mapped textures can be modified on PBR and Phong Materials. This can be Rotation, Offset and Scaling. Rotation and Scaling are based on a Pivot position.
Example: Rotation a texture on a Pivot point: The coordinates of a textures are 0,0 in the lower left (U) and 1,1 in the upper right (V), therefore if the pivot is set (as in the example below) to 0.14 in U and 0.32 in V, the rotation would look like this:
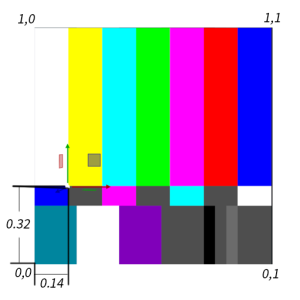
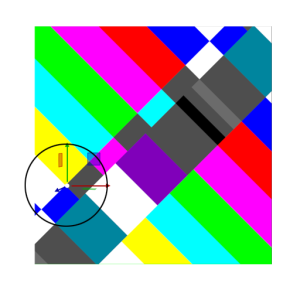
The same applies to the Scaling.
Clamping
Textures can be set to clamp to a border color. This means instead of repeating the last pixels, they can be overridden by a border color. This can be set by using the Wrapping mode in U and/or V:
|
Repeat Mode |
|
|
Clamp Mode |
|
|
Clamp to |
|


Information: The Alpha mode of the border currently only works for RGBA images.
Working with Material Definitions on Graphic Hub
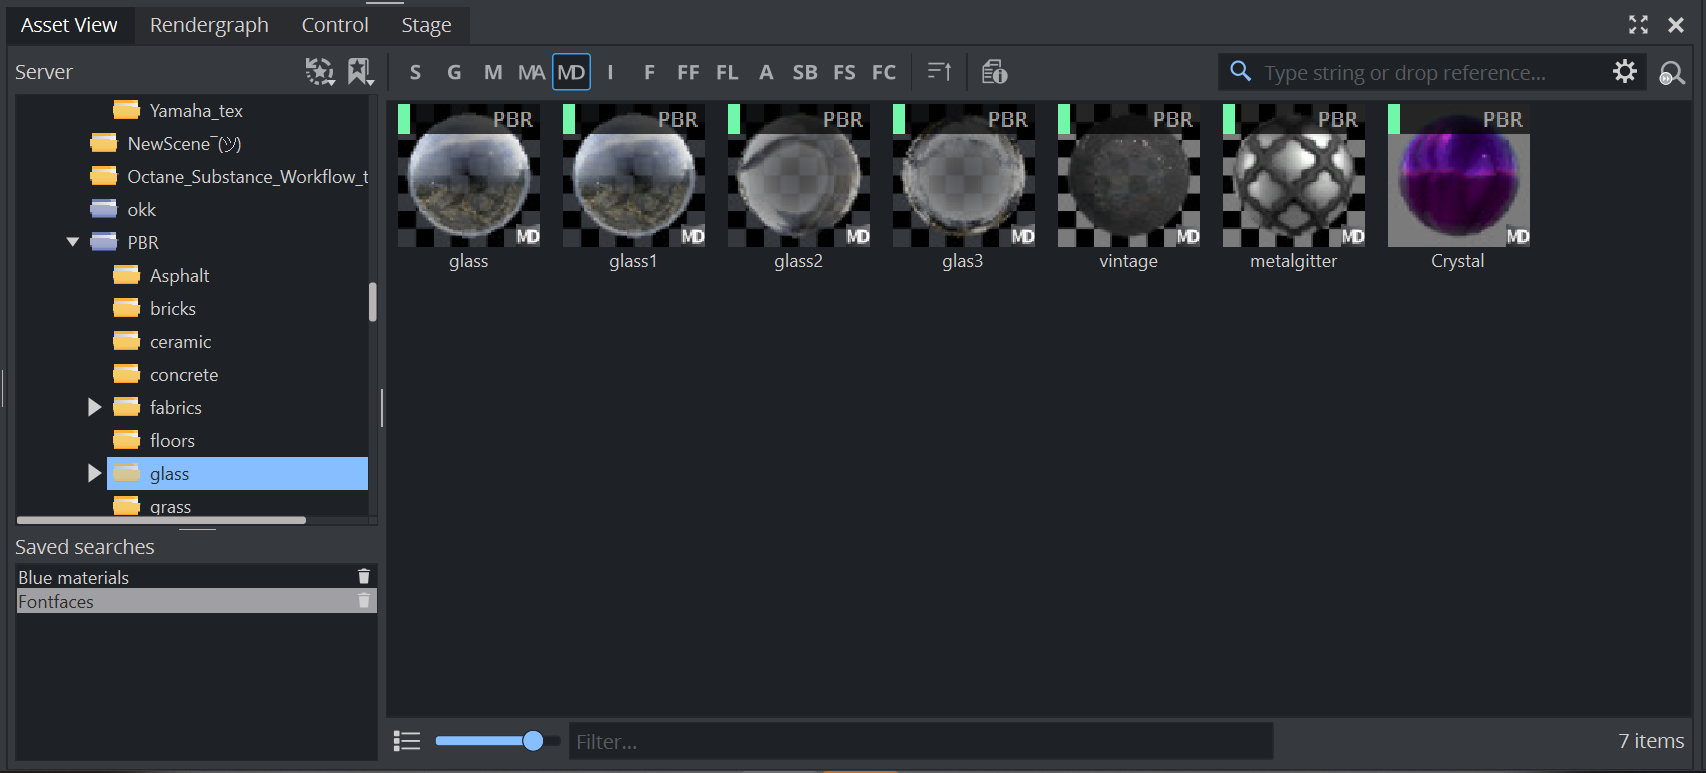
PBR Materials can be stored as Material Definitions on Graphic Hub. This means you can build your own library of pre-defined PBR Materials on your Graphic Hub. To store PBR Materials as Material Definitions, drag and drop them from the Scene Tree to your Server view and give them a proper name. PBR materials are labeled with PBR on top:
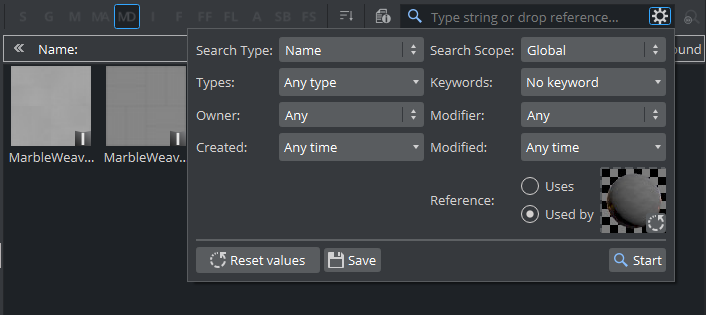
You can also search which texture you have used within this Material by using the search widget in the Asset View. Make sure you select used by:
Be careful if you use these Material Definitions in other scenes and modify them, this also modifies the reference and affects all referenced scenes.
If you need to modify your parameters, it is recommended to break the reference to Graphic Hub. Then the Material becomes part of your scene and is no longer referenced in Graphic Hub. To break the reference, click on your Material and choose Deactivate Reference in the Material Settings.
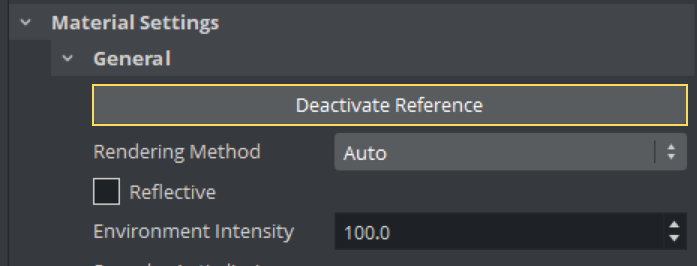
Note: This button is only available for referenced Materials.
See Also