
Viz Artist User Guide
Version 5.0 | Published December 20, 2022 ©
Shadow Maps
Shadow maps in Viz Artist produce more realistic images, but shadows can be resource intensive to render in real-time so care should be taken to consider the effects of using shadows on various graphics hardware.
The concept of shadows in a scene is closely related to how you see shadows in real life: When lights are applied to an object, the object casts a shadow, and the intensity and direction of the light source as well as the distance from the light source to the object that the lights hit affect the shadow. The darkness, intensity and smoothness of the shadow affect the quality of the rendered scene.
This section contains information on the following topics:
About Shadow Maps
There are two principal methods to show shadows in Viz Artist:
-
Shadow Maps: More advanced and better looking shadows, but uses more graphic resources. Often called soft shadows. Uses cascaded shadow maps.
-
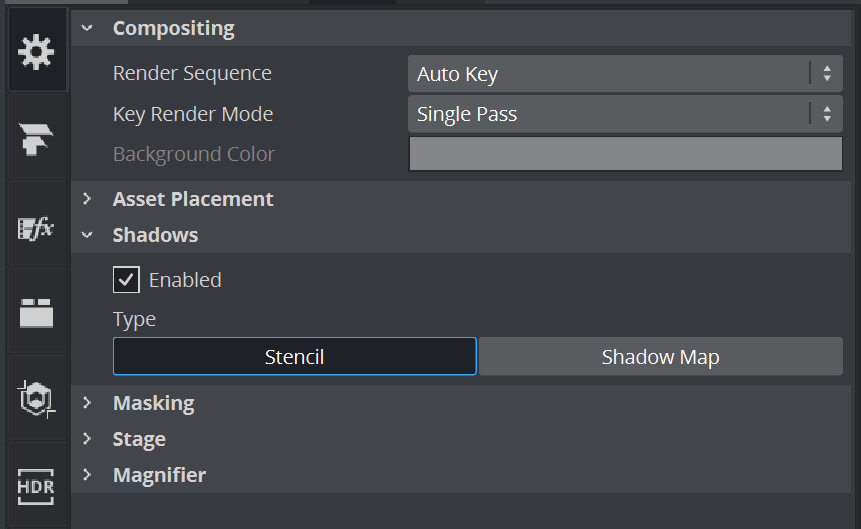
Stencils: Simpler, not so photo-realistic, but uses fewer graphic resources. You enable shadow maps and select type in Scene Settings > Global Settings:
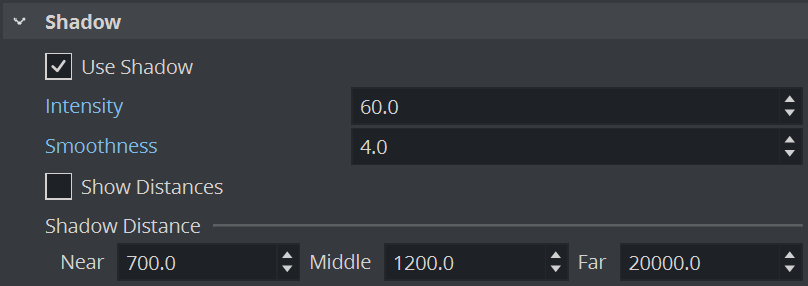
Select Light from the menu to show and change the shadow map properties:
-
Intensity: Sets the intensity of the shadow effect, in percent. Controls the alpha value, simply said it makes the shadows darker.
-
Smoothness: Determines how smooth the edges and the shadow itself blend with the surroundings given a light-source. Makes shadows smoother the farther away a receiver is from the shadow caster. Possible values: 1 to 10.
-
Show Distances: Shows a color-map of the "slices" (areas) affected by the shadow maps. When designing a scene, use the on/off switch to see a color-visualization of how the shadow map affects each slice of the shadow map. Areas affected by Near are shown in green, Middle in red and Far in magenta as indicated in the image below. The different layers of the shadow map are grouped into Near, Middle and Far slices or areas. The default values for near, middle and far would normally be fine to use as is, but if required you can change them:
-
Near Distance: Determines the distance, in viz units, of the near layer of the shadow map.
-
Middle Distance: Determines the distance, in viz units, of the middle layer of the shadow map.
-
Far Distance: Determines the distance, in viz units, of the far layer of the shadow map.
-
To Use Shadows in a Scene
-
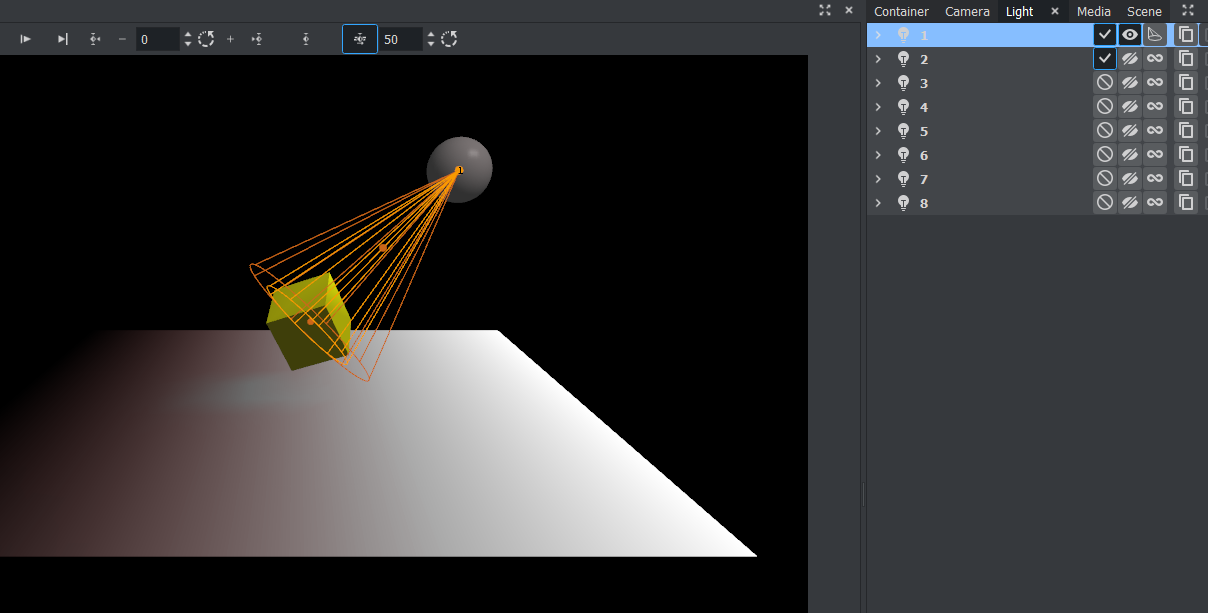
Go to Light and select the light source that should cast a shadow. More than one caster is possible but this comes with a noticeable performance hit for every additional shadow casting light. After selecting the light, on the property panel click the button that says Shadow to change property values for shadows, if required.
-
From Plugins > Container Plugins select the Caster and Receiver plug-ins and drop them on containers to show shadows. The layer parameters correspond to light sources, so you can have two lights cast shadows but containers can only cast or receive shadows from one of the light sources.
Note: The shadow mapping technique can be used together with lens-deformation as well, see Rendering Panel.