
Viz Artist User Guide
Version 5.0 | Published December 20, 2022 ©
Working with Materials, Substances and Viz Engine Shaders
Depending on the selected Render Pipeline, you are able to work with various materials.
-
Classic Render Pipeline:
-
Viz Engine Render Pipeline:
A designer can work with various types of materials. This section contains information on the following:
Material Definitions
Material Definitions represent the new materials for the Viz Engine Render Pipeline. These can be either PBR-based materials, Phong shaded materials, Reflections, Invisibles or Material Definitions created by plug-ins. The PBR approach defines the surface of an object by a physical correct description. PBR materials usually consist of various maps like a base color, normal map, roughness etc. Phong materials provide a modern approach as replacement of the materials in the Classic Render Pipeline.
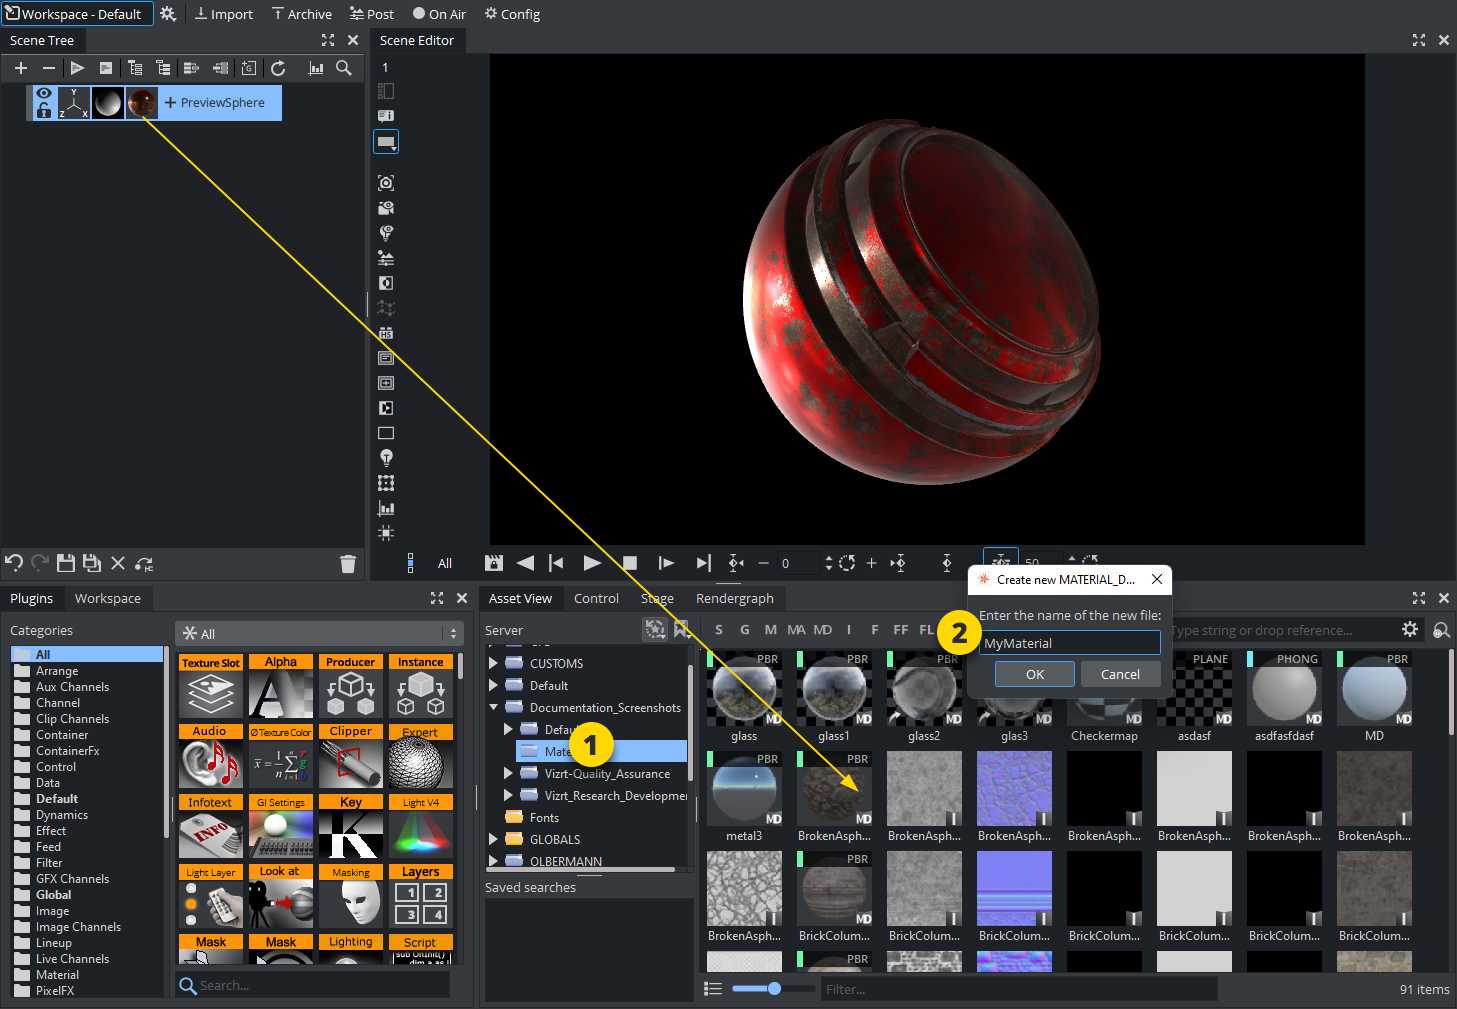
To Create a Material Definition
Once you've assigned textures and adjusted parameters for your Material Definitions, you can save it to Graphic Hub, by dragging and dropping it from the Texture Settings panel to the Server view:
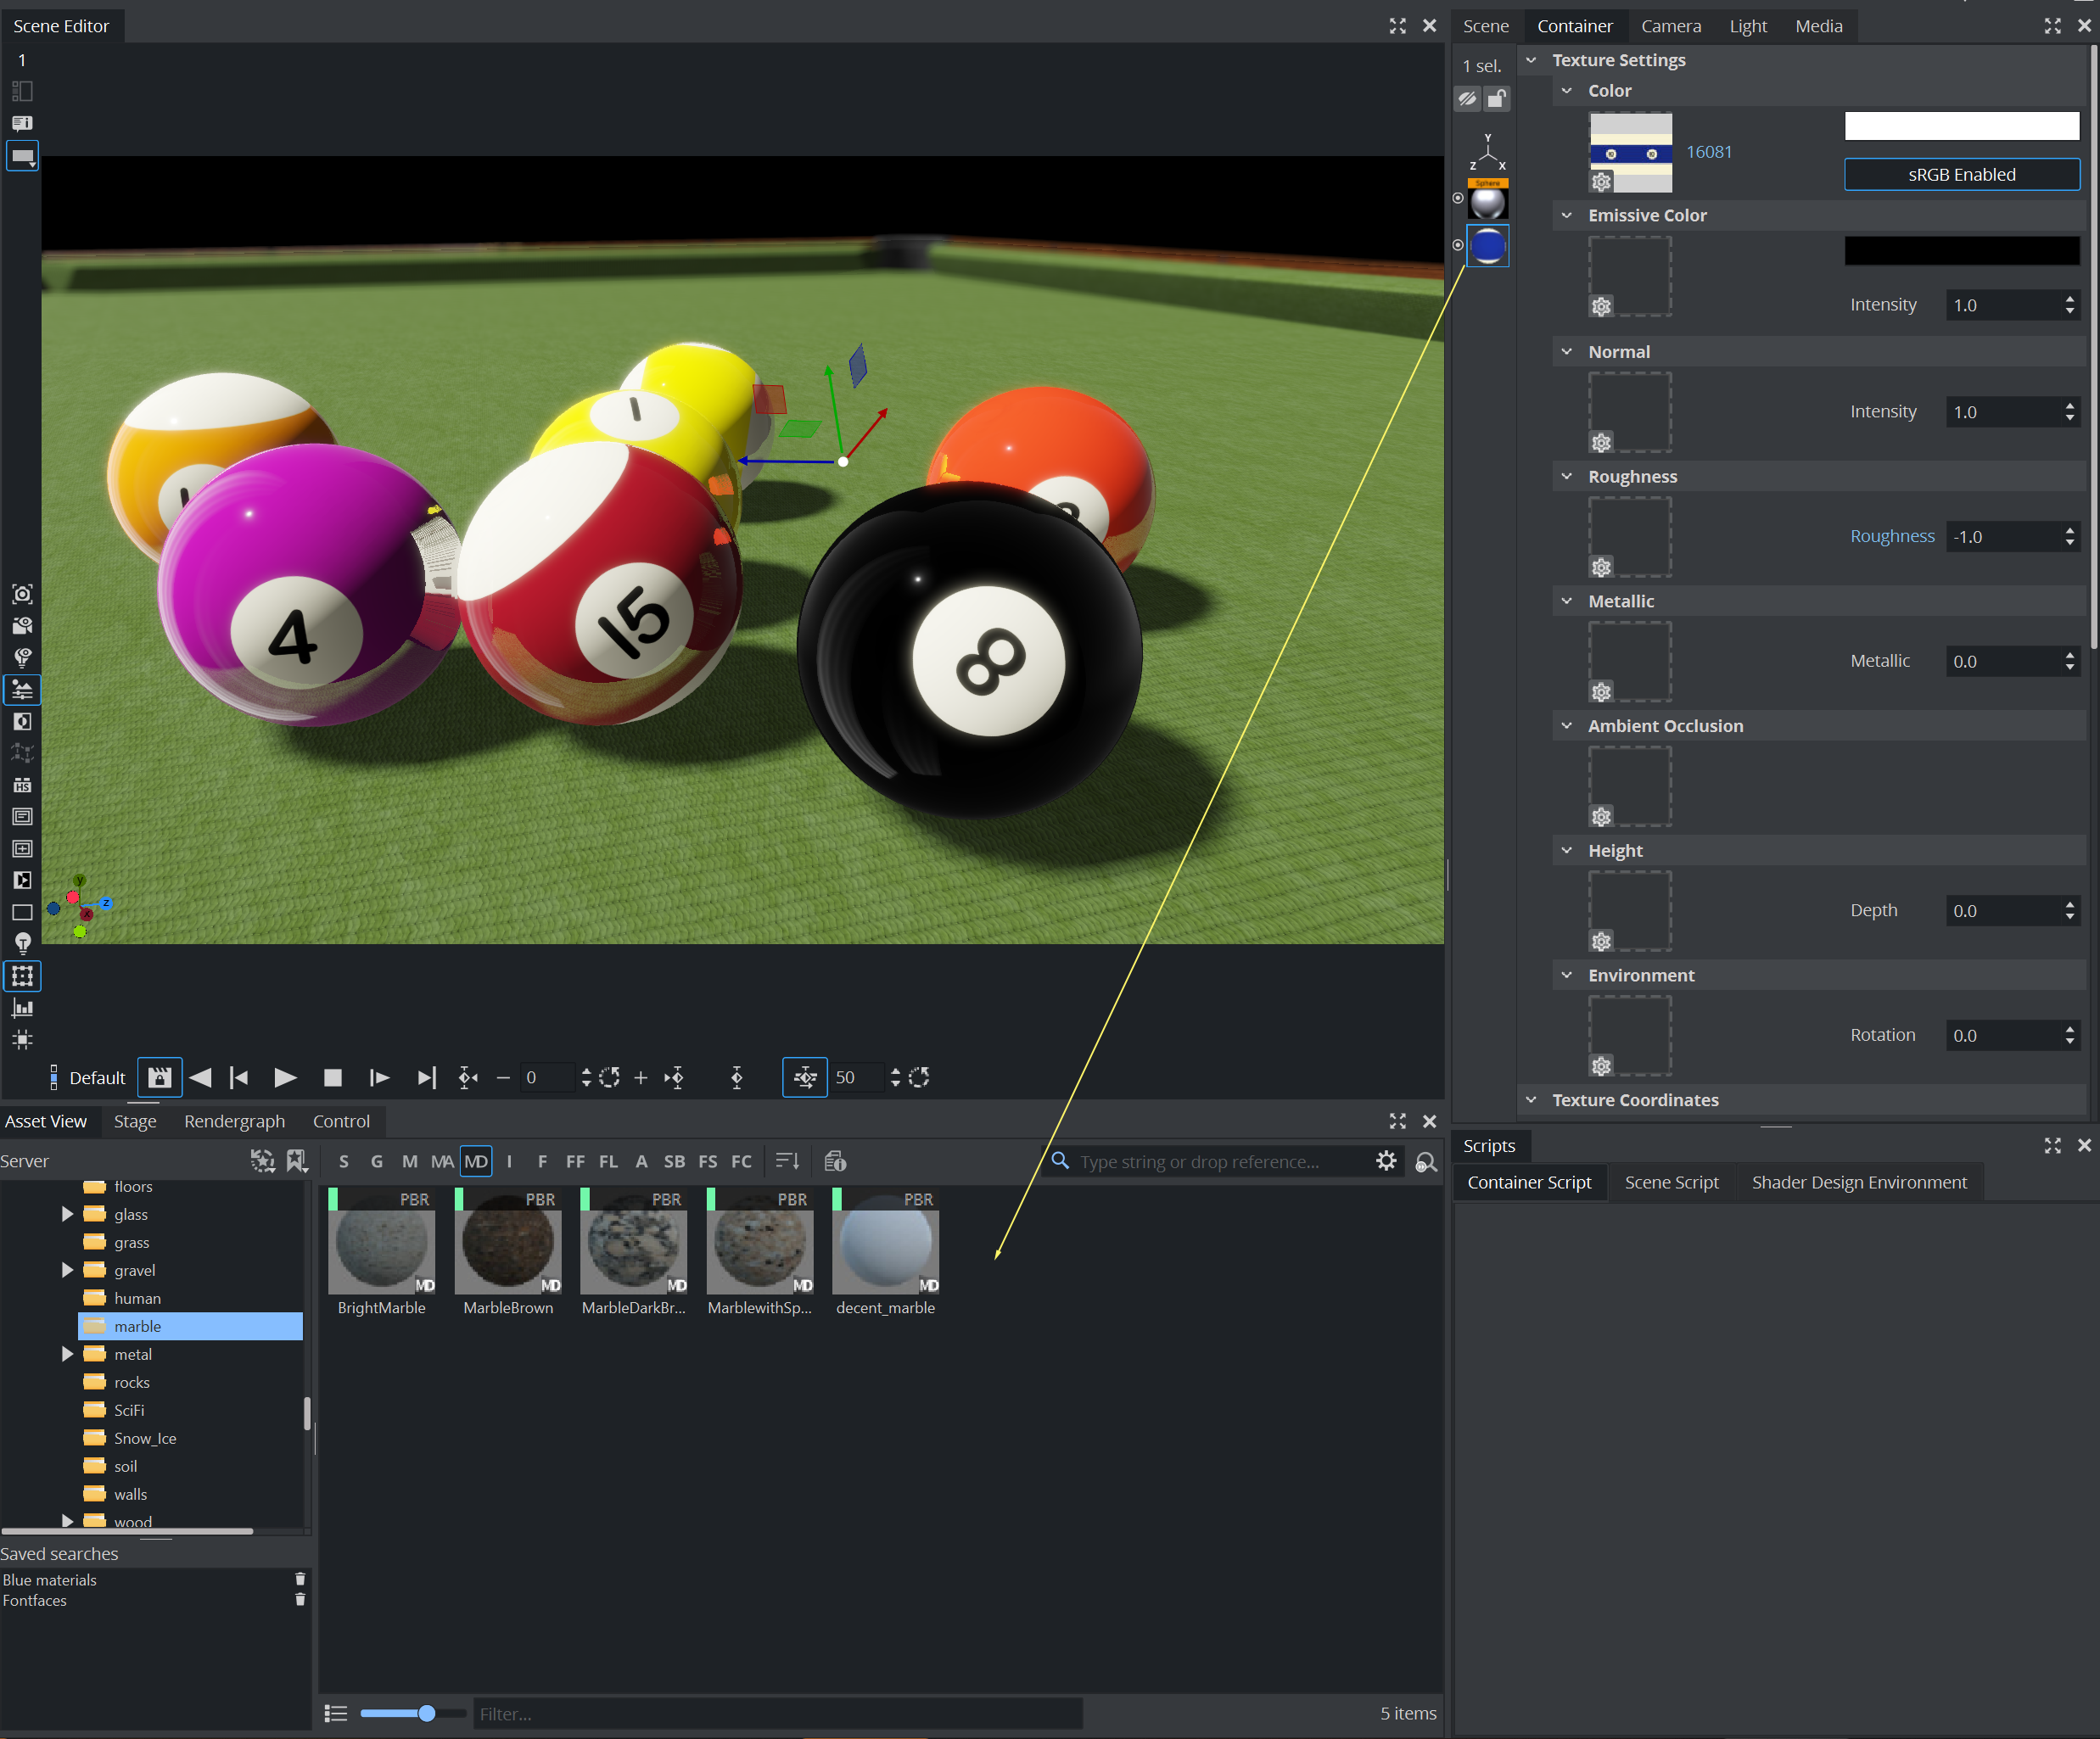
Material Definitions stored on Graphic Hub can be used the same way as other items. Drag and drop them from the Server View to your geometry and the Material Definition is applied.
Important: If a material from the Database is used in multiple scenes and this materials is modifies, it affects ALL scenes using this material. To allow modification of references materials without affecting any other instance, you first have to break the reference and un-link it from the database. Do this by clicking the Deactivate Reference Button in the Material Settings:
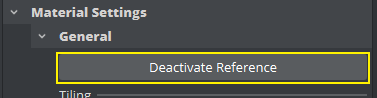
This option is only available on referenced Material Definitions.
Viz Engine Shaders
Viz Engine Shaders are special types of material definitions. They can be either Vertex Shaders or a combined Vertex- and Fragment Shader.
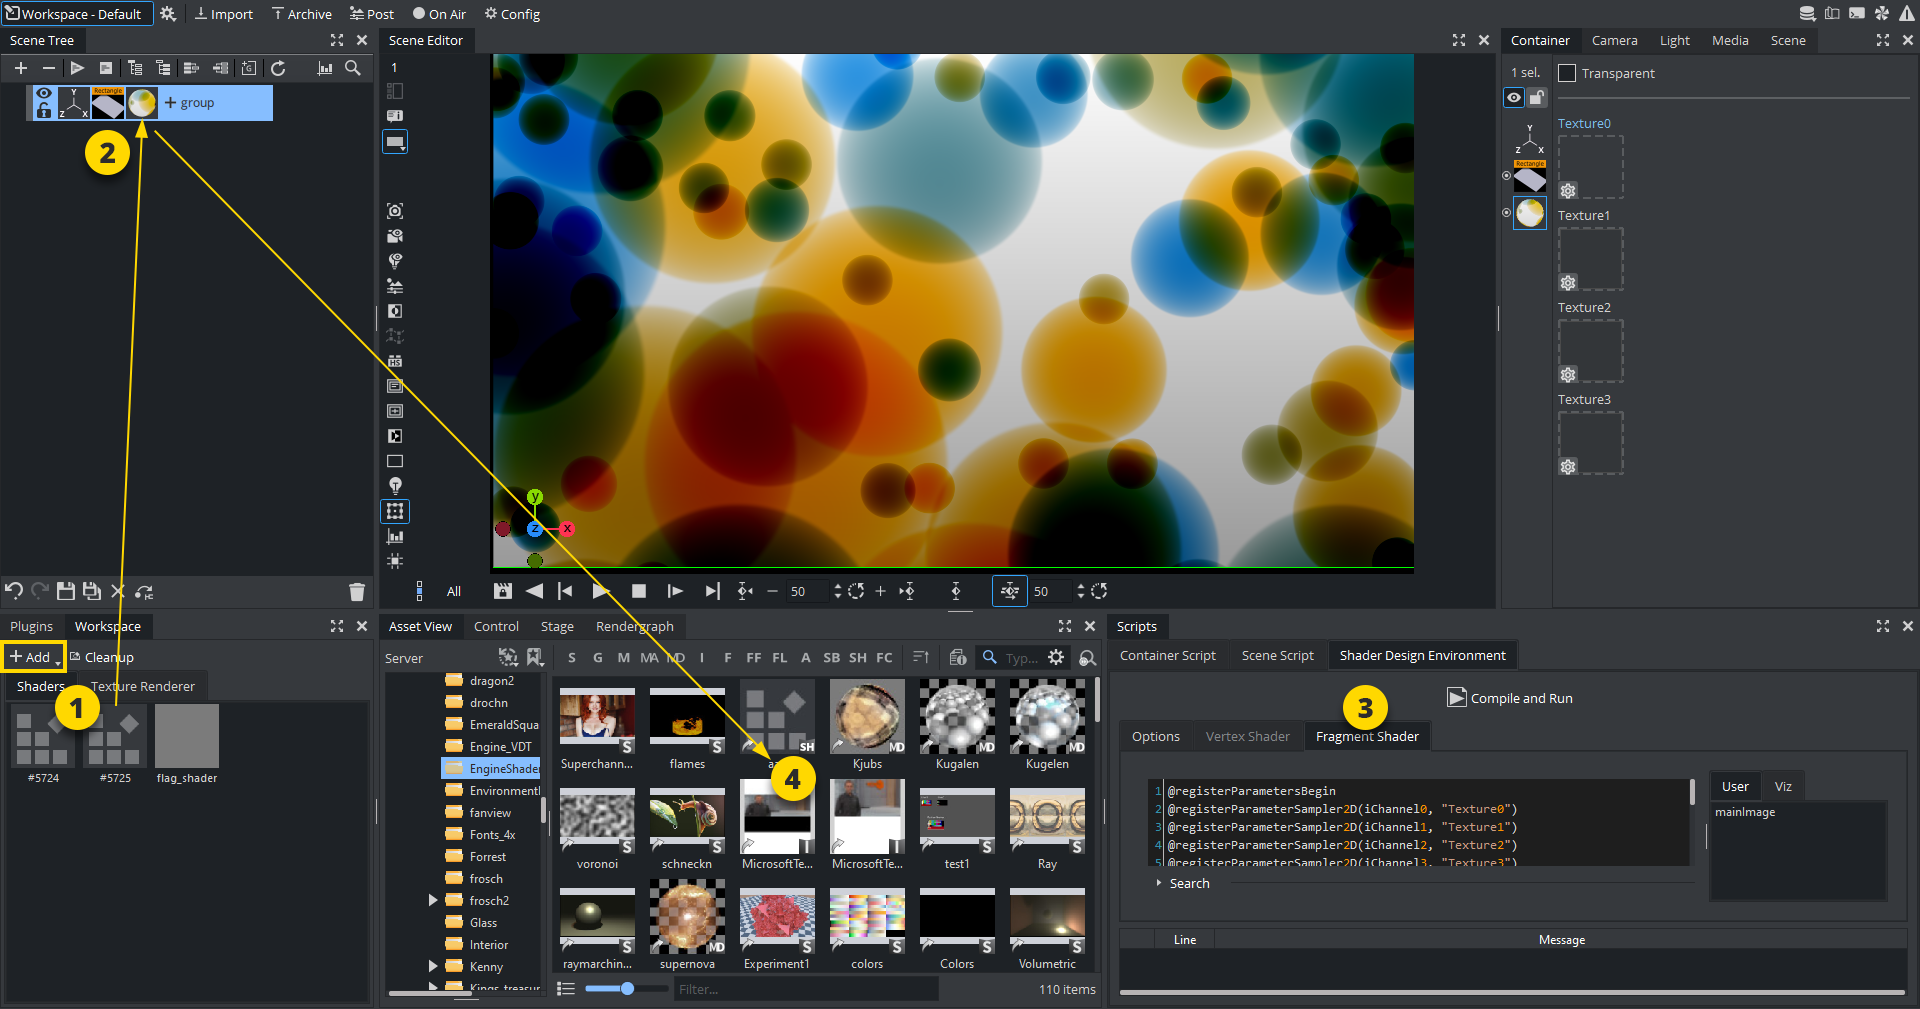
To create a new Viz Engine Shader,
-
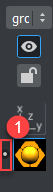
Open the Workspace Panel (1).
-
Click
 .
. -
Choose Fragment Viz Engine Shader or Vertex Fragment Viz Engine Shader. A new shader is added to your workspace.
-
Assign this shader to a container as Material Definition. (2).
-
Add Shader code using the Shader Design Environment (3).
-
Save your Viz Engine Shader to Graphic Hub by dragging it from the container (2) into the Asset view (4).
For detailed information how to work with Viz Engine Shaders, please see Viz Engine Shader Techniques
Basic Materials
Basic Materials are needed to a three-dimensional impression to any geometry. Without a material, each geometry appears flat:

-
Left: Face shape without any material, appears flat.
-
Right: Same geometry with material applied.
If the Material icon in the Property area is disabled it causes the object’s base color to be shown (left picture). This is a color without any shading and it is not influenced by light, which means that it is visible even if there are no active light sources. Its initial color is created through a conversion of the material RGB components, but the values can be modified afterwards.
To Create a New Material
-
Click Asset View.
-
Click the M (Material) tab.
-
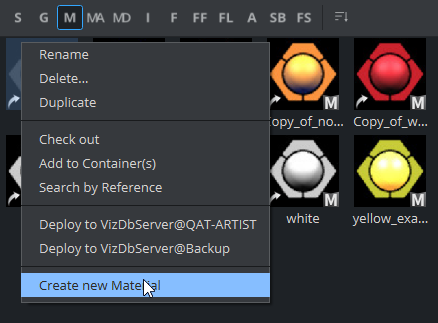
Right-click and select Create new Material.
-
Enter a name for the new Material.
-
Click OK.
To Modify a Material
Materials define how a geometry appears in 3D space. It allows light to be added as well as information about the base color, specularity and more. When a Material has been added to a Container, the Container specific Material can be modified in a Material Editor that opens in the Properties Panel. The Material Editor is used to create and modify materials with customized colors and Lights effects.
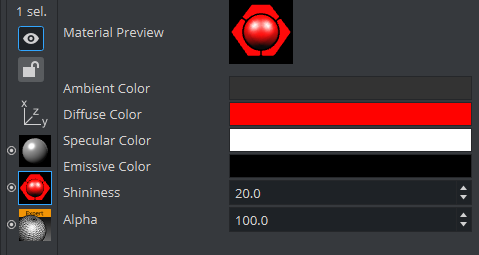
The icon in the upper right corner of the Material Editor shows the current state of the Material. The color for a lit object is shown on the sphere within the icon, while the three parts around the sphere show the plain color for an object that is not lit.
-
Ambient: The area which is not directly lit by any light source. Ambient light surrounds the object and the color looks the same on every side. Since the light does not come from any direction, but instead from all directions, the color/light spreads evenly over the object.
-
Diffuse: The object’s core color observed under normal lighting conditions. Shows the color of an object when illuminated by a directional light source. It spreads evenly over the object. Light normally has some level of diffusion.
-
Specular: Shows the color that shows when light comes from a particular direction and bounces back from the surface in a mirrored direction. The specular color is in fact the direct reflection of a directional light source. This is the typical effect of shiny metal and plastic. Specular color can be understood as a kind of shininess of color.
-
Emission: Emissive color is produced by an object’s natural glow. The object itself is the light source illuminating the color. The emissive color is unaffected by any other light sources and does not produce any light for other objects in the scene.
-
Shininess: The shininess defines how spread out the highlighted area is. The lower the value, the more spread out the shine; the higher the value, the more focused the shine on a single point. However, if specular is black (all values 0) then shininess does not have any visible effect.
-
Alpha: The alpha value can be set directly on a material to adjust the level of transparency. Viz Artist uses schemes to describe the colors of a material.
To Change a Material Color
-
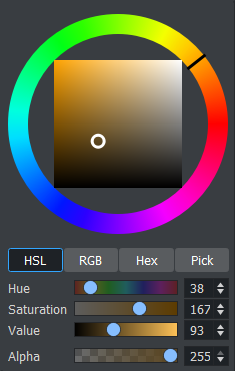
In the color selection area (1) select RGB or HSV.
-
In the color selection area, click a color bar, or the color circle, and drag to change the color.
Tip: For RGB only: Right-click on the color sliders and drag to lock all three sliders, so that all values can be changed at once.
or
-
Click on the eye dropper icon in the color field.
-
Move the cursor to pick a color from anywhere on the screen.
-
Click to accept the new color.
or
-
Click a numeric input box and enter a color numeric value.
Important: Materials are always stored within the scenes and are NOT referenced by Graphic Hub. Therefore, you are not able to search for referenced materials.
Material Advanced
Material Advanced consist of at least one basic material, a texture and usually some shader plug-in.
To Create a Material Advanced
-
From the Item List, drag a Material and/or an Image to a Container in the Scene Tree.
-
From the Plugins, drag a Shader to the same Container in the Scene Tree (if required).
Note: A combination of at least two items (Material, Shader or Image) must be applied to create a Material Advanced.
-
Right-click the Container in the Scene Tree.
-
Click Merge to Material Advanced. The Material, Shader, and Image icons in the Container are then merged into one combined Material Advanced icon.
-
Select the project or folder where the Material Advanced should be placed (1).
-
Drag the Material Advanced icon from the Container in the Scene Tree to the Item List (2).
-
In the dialog box that opens, type a descriptive name for the Material Advanced and click the Ok button.
To Edit a Material Advanced
-
Select the project or folder where the existing Material Advanced is placed.
-
Drag the Material Advanced to a Container in the Scene Tree.
-
Right-click the Material Advanced icon on the Container.
-
In the context menu click Split Material Advanced. The Material Advanced icon on the Container is then replaced by separate icons for any Material, Shader or Image that the Material Advanced consists of.
-
Apply new items or modify the Material, Shader or Image settings.
-
Right-click the Container in the Scene Tree.
-
In the context menu, click Merge to Material Advanced. The Material, Shader and Image icons in the Container are merged into one combined Material Advanced icon.
-
Select the project or folder where the Material Advanced should be placed (1).
-
Drag the Material Advanced icon from the Container in the Scene Tree to the Item List (2).
-
In the dialog box that opens, type a descriptive name for the Material Advanced and click the Ok button.
Note: Material Advanced are used in the Viz Classic Render Pipeline only!
Substances
Substances are usually created in Substance Designer and imported to be used within Viz Engine.
Substances use two different file extensions, .sbs and .sbsar:
-
.sbs files are editable substance source files. Use Substance Designer with these files.
-
.sbsar files are performance optimized, published substances. You can import these files to Viz Artist. You cannot edit these files. To create a .sbsar file, first create a shader with Substance Designer, and then publish this shader.
After importing a substance to Viz Artist, they can be used within the Substance Shader. Drag and drop the Substance Shader (Plugins > Shader > Texture) onto a geometry. Then locate your imported substance assets in Graphic Hub and drag it to the Substance Field.
For details about the various options, please refer to the Substance plug-in Description.
Tip: The import and use of Substances in Viz requires a separate license. You can obtain this license from your local Vizrt representative.
See Also