Viz Artist User Guide
Version 5.0 | Published December 20, 2022 ©
Grid Tool-bar
The Grid tool-bar can be shown in the lower part of the Scene Editor. Grids are used to align containers. If the Grid Editor is closed while a grid is still active, the Grid button turns orange. This is especially useful when the grid is active, but hidden in the Scene Editor using Show/Hide Grid. All grid settings are saved with the scene; thus any such settings are reloaded the next time the scene is loaded.
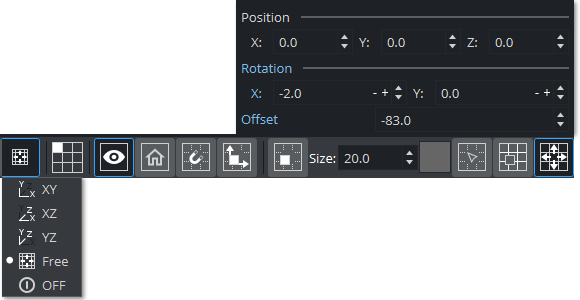
Click the Scene Editor’s Grid ![]() button to open the Grid Toolbar:
button to open the Grid Toolbar:

-
 Plane Type: Shows which plane the grid should lie in:
 -
Align X/Y: Aligns the grid to the X/Y-plane.
-
Align X/Z: Aligns the grid to the X/Z-plane.
-
Align Y/Z: Aligns the grid to the Y/Z-plane.
-
Free Grid: Makes it possible to use a free grid, aligned for example to an object.
-
Off: Shows that the grid is set to OFF.
-
-
 Select Grid: Sets a predefined grid. Nine grids can be selected and manually configured as presets for the scene.
 -
 Show/Hide Grid: Shows or hides the grid in the Scene Editor.
 -
 Home: Sets the grid back to its default position.
 -
 Snap to Grid: If this button is enabled and the position of a container is modified by dragging it around in the Scene Editor, the position of the object snaps to the grid based on the Axis Center defined for the object’s container.
 -
 Align Object on Plane: To align the axes of a container to the corresponding axes of the grid, first enable this option and next left-click the container you want to align and drag it around. As long as this option is switched on, the container moves only along the plane if you drag it around in the Scene Editor.
 -
 Move Object to Plane: If you select a container and next click this icon, the container is moved so its center is on the plane.
 -
Size: Defines the raster size of the grid.
-
Change Color of Grid: Changes the color of the grid. The three buttons detailed below are only available if the grid type is set to Free Grid:
-
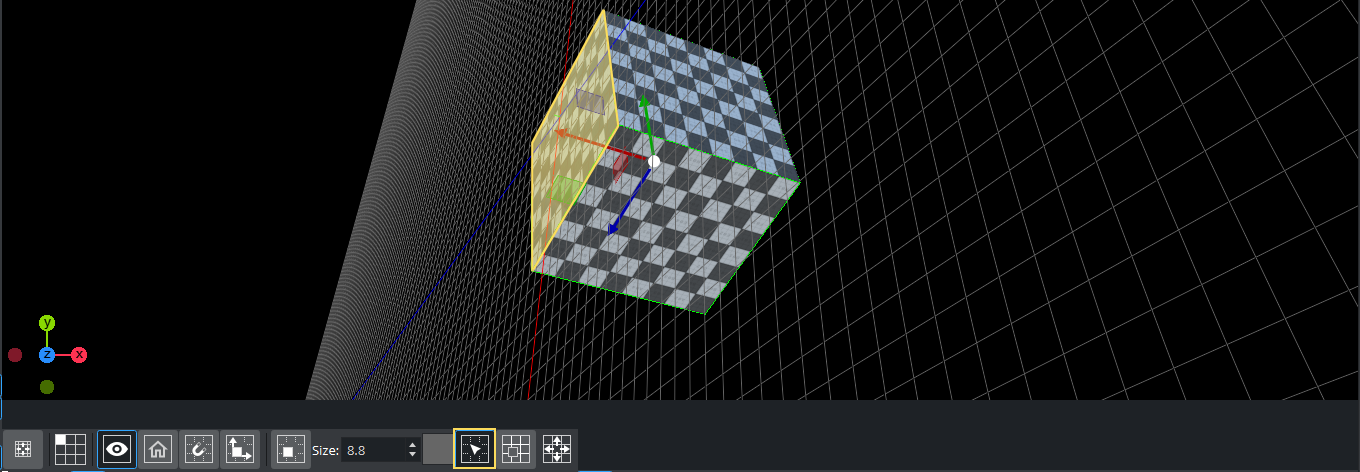
 Picking On/Off: Aligns the grid to the object. Enable picking and click the object to align the grid. The grid is aligned to the vertex you click on.
 -
 Move Grid to Object: Moves the grid so the center of the selected container is on it.
 -
 Free Plane Value Editor: Switches the free plane value editor on and off. In this editor you can adjust the grid’s plane as illustrated in the image of the Free Plane Editor options below:
Adjusting the Position or Rotation in the Free Plane Editor changes the grid’s own Position (x, y, z) or Rotation (x, y). Changing the Offset adjusts the grid’s location along the normal vector of the grid XY plane (Z position).Tip: The offset of the grid can be adjusted by pressing ALT + G + Left Mouse.
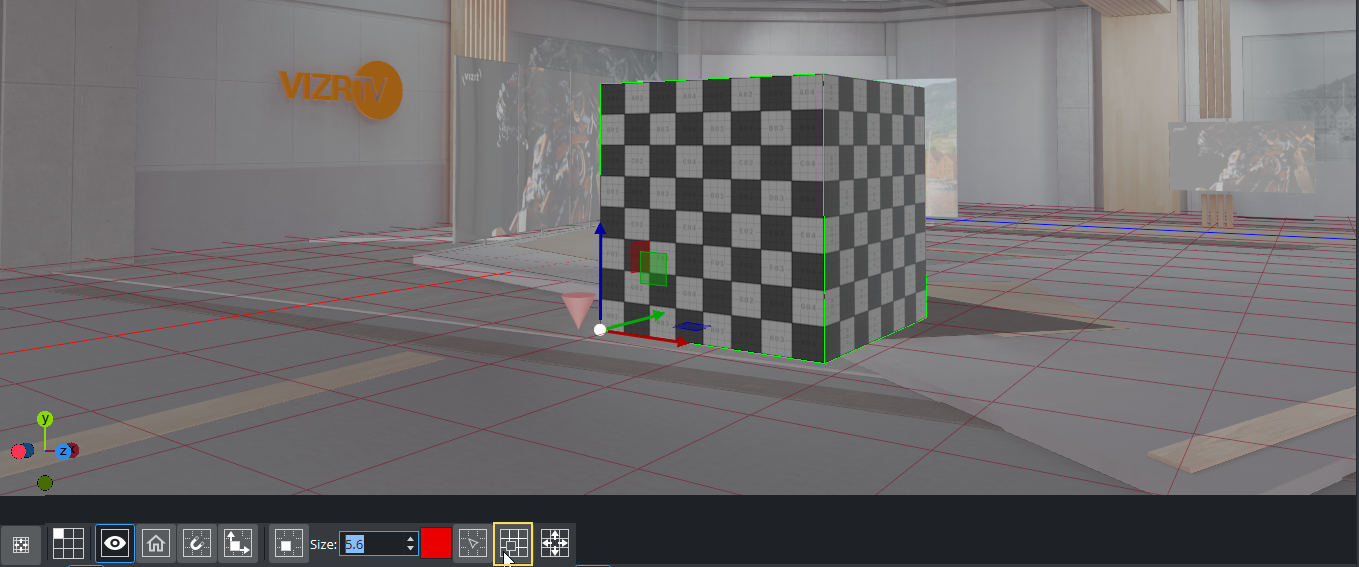
The grid can be used to align objects in a virtual set to the floor. Select your floor in your scene, open the grid and click on Move Grid to Object.
This aligns grid 1 to your floor object. If you now add new objects to your scene, you can click on Align Object on Plane and your object is aligned to the floor. If you also set a proper grid size and turn on Snap to Grid your object can be aligned very precisely.

You can add up to nine grids, one can be floor, the second one the wall, etc.
You can also align your grid to the side of an object (for example, a Cube). Create a new Free Grid, Turn on Picking and click on one of the side of your Cube.

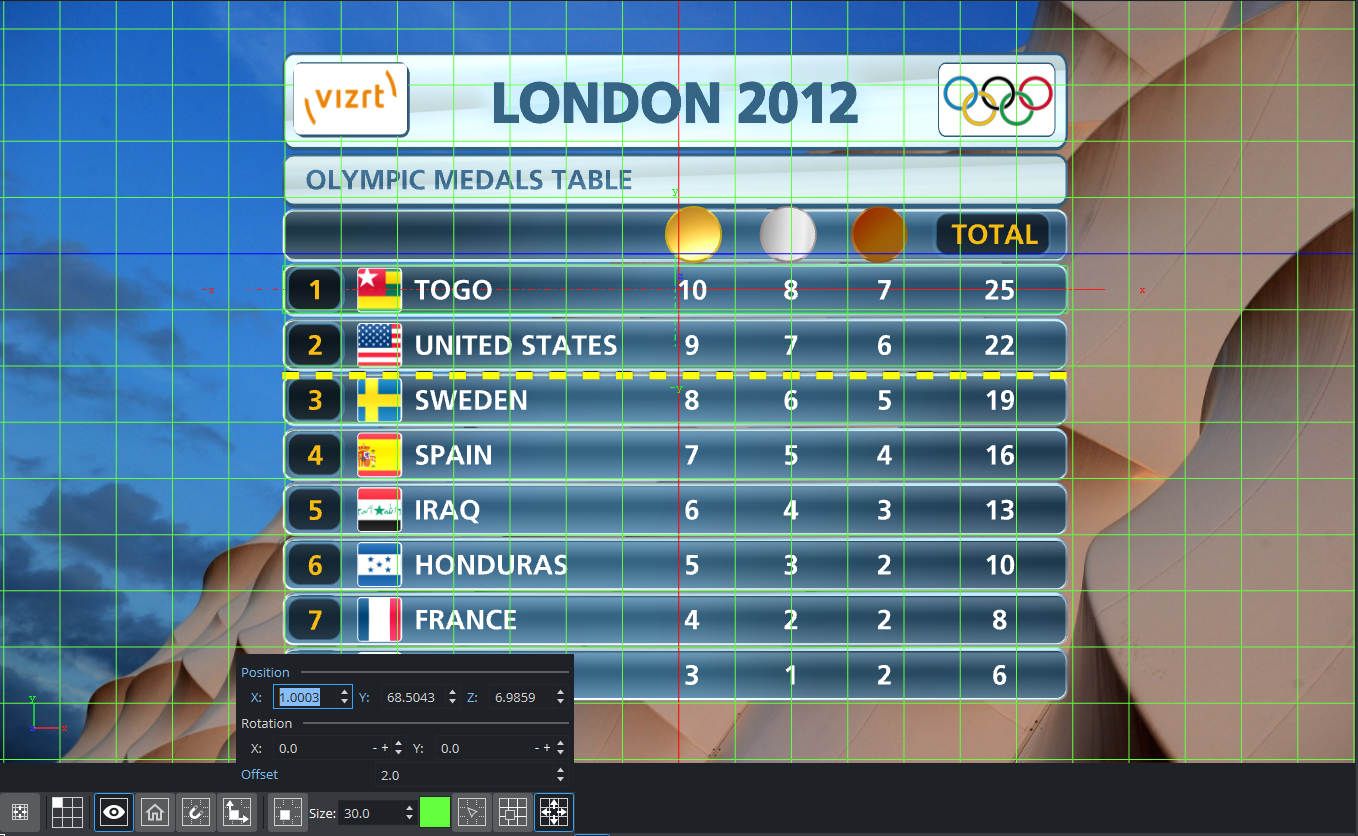
Grids can also be very useful when creating tables. Set your grid size accordingly to you row height and all your objects are aligned correctly.

See Also