
Viz Artist User Guide
Version 5.0 | Published December 20, 2022 ©
Text Editor
Text Input
Enter the content of the text here.
Note: The selection of the text can influence your look. If you want to change only a single word to be underline, you need to select it and then apply the style you want.
Characters
Shows a grouped list of all available glyphs in the selected font.
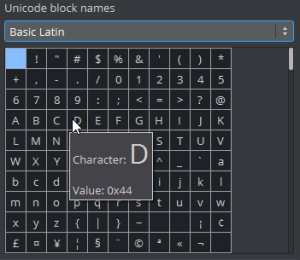
This can be useful if, for example, the Euro € is not mapped correctly in the font map.
Basic Styling
Font Family / Font Style
Selects the font family and style to apply to the selected text. The list of the font shows all of the font faces currently stored in the connected Graphic Hub.
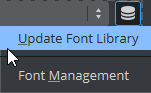
The list may not be up to date if another user on your network imported a new font from a different machine to the same Graphic Hub. In which case, click on the database icon next to the combo box and choose Update Font Library.
Font Size
Adjusts the size of the selected text. The font size determine how 1EM unit font is mapped in to the size of the text in the scene.
Note: The resulting size may not exactly match this parameter, however, due to additional interference from the font's internal parameters.
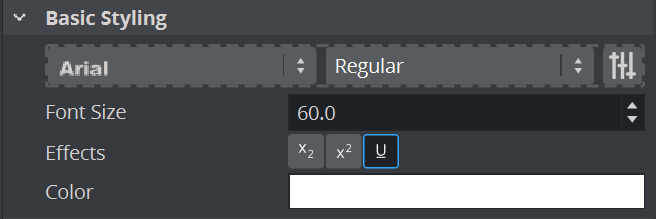
Effects
Applies additional effects or decorations to the selected text.
![]()
-
Subscript: Applies a subscript effect to the selected text.
-
Superscript: Applies a superscript effect to the selected text.
-
Underline: Decorates the selected text with underline.
Color
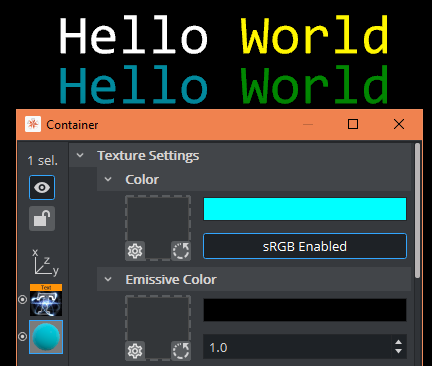
Applies a color and alpha to the selected text. Without any material, the text is rendered with solid color chosen from this option. When using text with a PBR material or a Phong material, the base color of the material and the text color are multiplied by their RGBA values.
Tip: It is recommended to set either the text color or material color to white, such that the multiplied base color always match the other. This does not determine the final color resulting from lighting and other material's properties, however.
Example of text color interacting with material color, both texts are the exact copies, but the upper one does not have material assigned to its container:
Layout
The alignment depends on how you set your orientation:
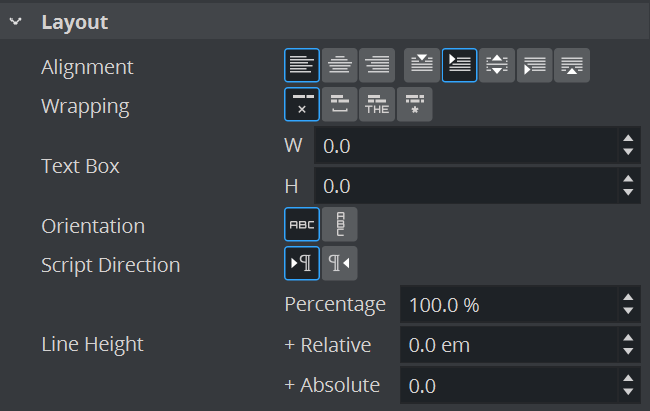
Alignment (Horizontal Orientation)
Sets how the text align in relative to the text box defined in the Layout section.
![]()
Horizontal Alignment
-
Left: Aligns the text to the left of the text box.
-
Center: Centers the text in text box horizontally.
-
Right: Aligns the text to the right of the text box.
Vertical Alignment
-
Top: Aligns the text to the tallest element.
-
Middle: Centers the text vertically.
-
Baseline: Sets the text to the baseline of the last entry in the textbox.
-
Bottom: Aligns the text to the lowest element.
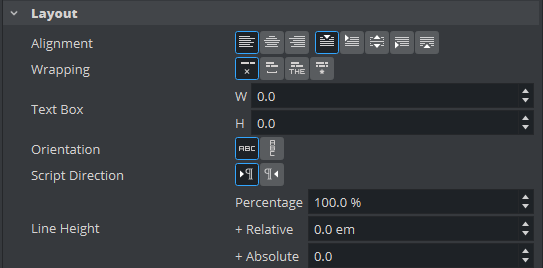
Alignment (Vertical Orientation)
Vertical Alignment
-
Top: Aligns the top of the tallest element to the top of the textbox.
-
Middle: Centers the text vertically
-
Bottom: Aligns the bottom of the lowest element to the bottom of the textbox.
Horizontal Alignment
-
Left: Aligns the text to the left of the text box
-
Center: Centers the text in text box horizontally
-
Right: Aligns the text to the right of the text box
Wrapping
Sets how to wrap text content in the text box.
![]()
-
No wrapping: Disables wrapping.
-
Wrap by space: Wraps text using only spaces. Works best with languages that separate words by spaces.
-
Wrap by word: Wraps text based on lexical words. Works best with languages that does not separate words by spaces.
-
Wrap any: Wraps text at any given point that overflow the text box.
Text Box
Sets size of text box for wrapping and alignment boundary.
Tip: By default, with the text box size of zero, and wrapping disabled, text alignment is working based on the position of the container.
Orientation
Sets which orientation the text is written in.
![]()
Switching the orientation also changes the behavior for the Alignment, Script direction/Column settings and distance options:
|
Horizontal |
|
Writes text horizontally, with each new line started below the previous one. |
|
Vertical |
|
Writes text vertically from top to bottom. |
Script Direction
Sets the primary writing direction of the script used in the text so that the words are ordered linguistically correct. This option only available when Horizontal Orientation is selected.
![]()
-
Left to right: The primary direction of the script is written from left to right. Language using this script direction includes, but not limited to, English, German, Chinese, Thai, etc.
-
Right to left: The primary direction of the script is written from right to left. Languages using this script direction includes, but not limited to, Arabic, Persian, Hebrew, Yiddish, etc.
Note: Entering text of different script direction from the setting does not automatically make the text written in reverse direction, this only make the text become bi-directional.
Line Height

Defines the distances between lines in percentage, relative to the font size (em) or in absolute unit. The values are added.
Example: 50% of the default lineheight + 5em + 10 absolute units.
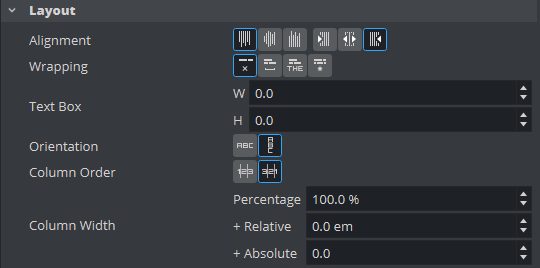
Column Order
Sets where each new line is appended compared to the previous line. This option only available when Vertical Orientation is selected.
![]()
-
Left to right: Appends each new line to the right of previous line.
-
Right to left: Appends each new line to the left of previous line.
Column Width

Defines the distances between columns in percentage, relative to the font size (em) or in absolute units. The values are added.
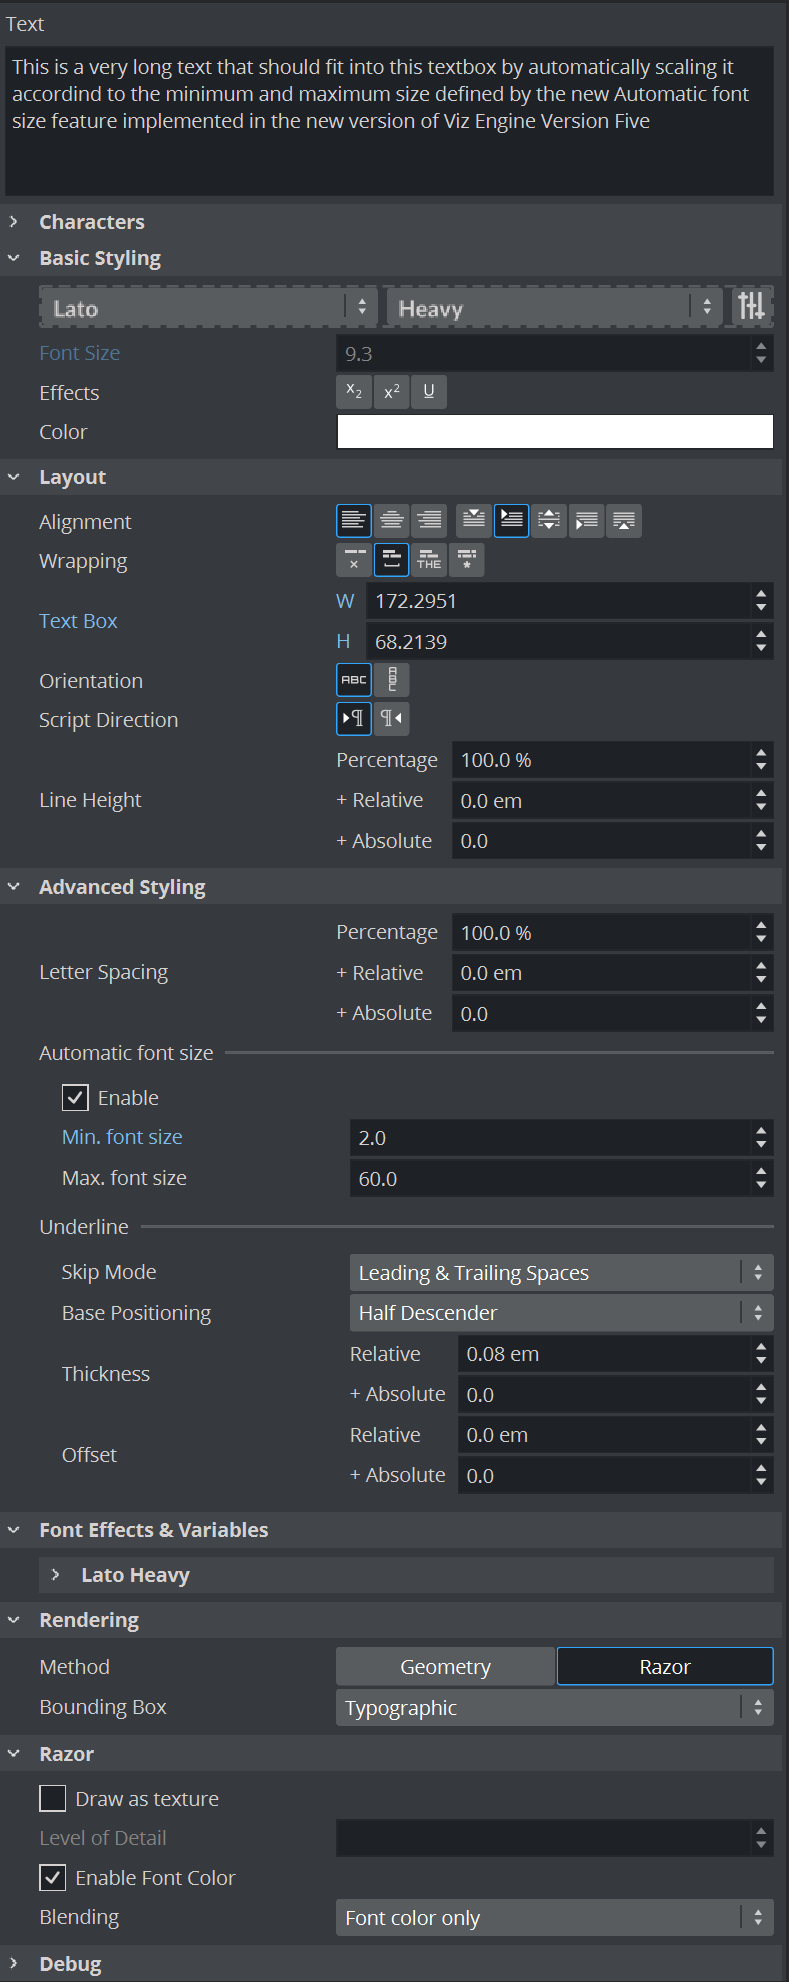
Advanced Styling
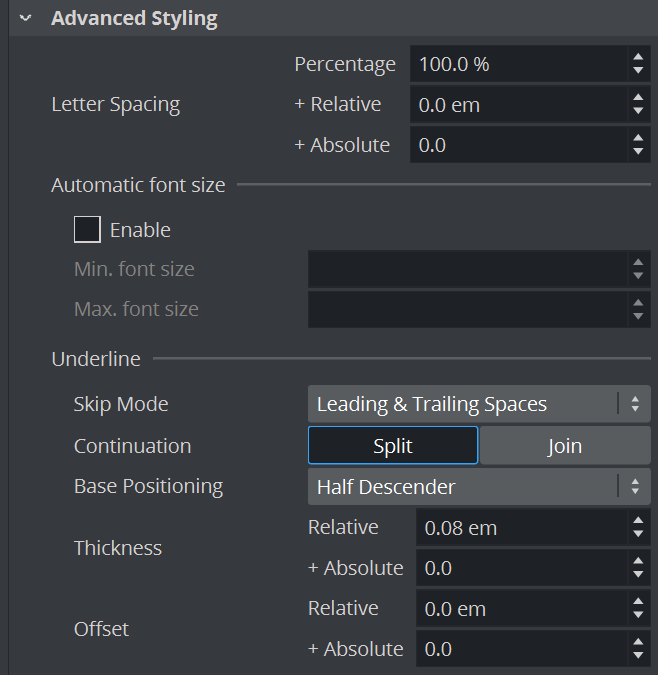
Letter Spacing
Allows to add additional spacing between characters by either percentage relative in (units) or in absolute values.
Automatic Font Size
Allows to scale a text into the Textbox, similar to the TextAutoScale in the Classic Render Pipeline.
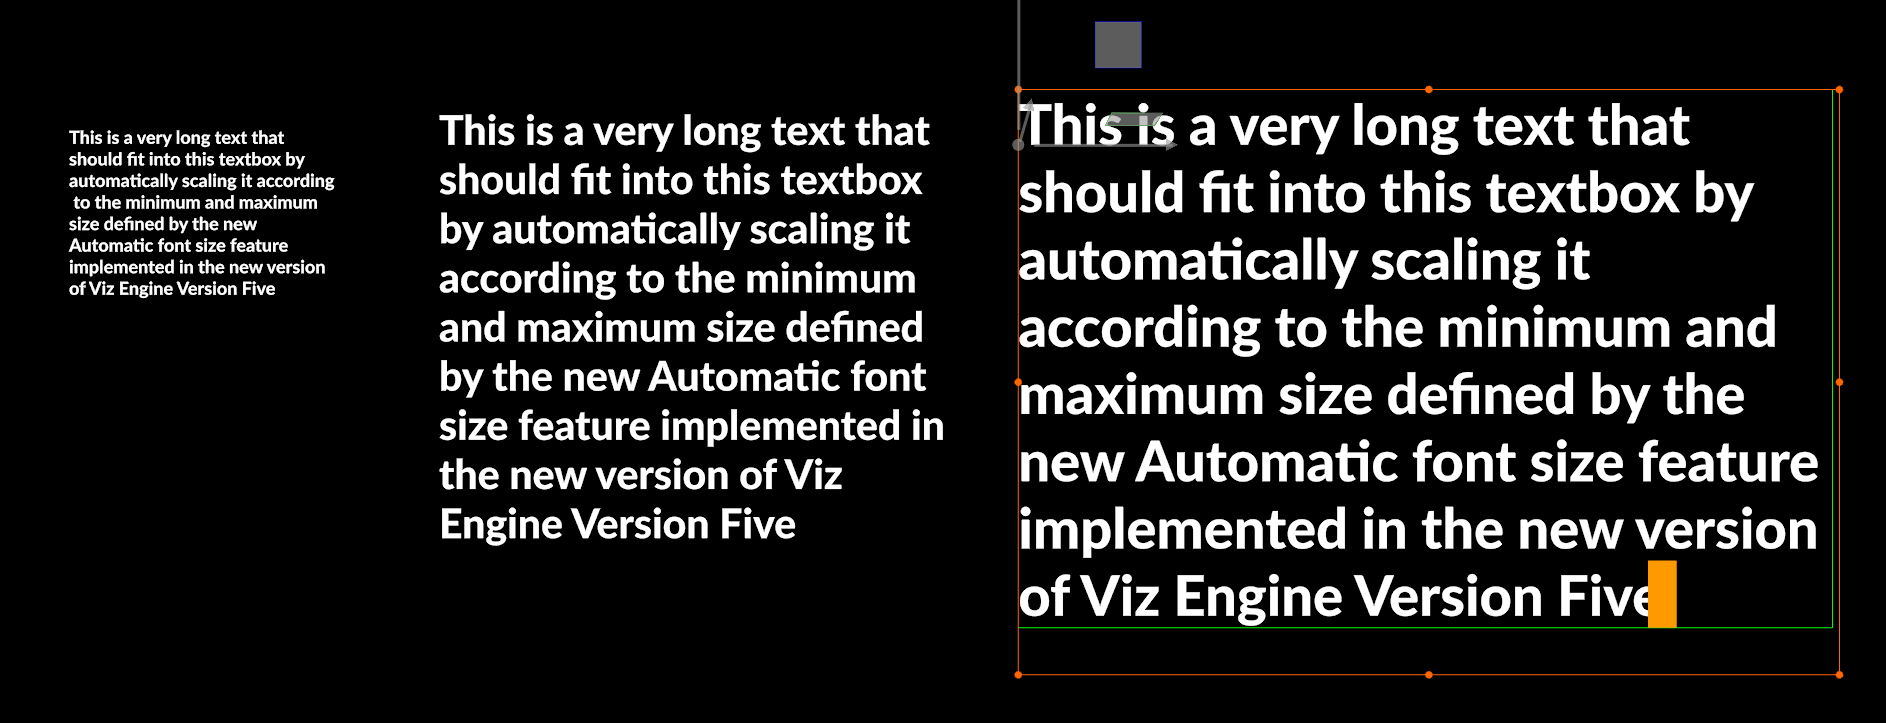
Minimum and Maximum size can be defined.
Underline
Skip Mode
Sets whether underline should be skipped for spaces, even if the space is marked to be underlined.
-
None: Underlines everything.
-
Leading and Trailing Spaces: Spaces at the start and at the end of a line are not underlined.
-
All Spaces: All space characters are not underlined.
Continuation
-
Skip: Generates separated rectangular geometries for every glyph that is marked to have the underline.
-
Join: Generates a single rectangular geometry, regardless of the glyph for any consecutive underline with the same width, offset and color (default).
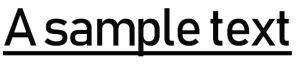
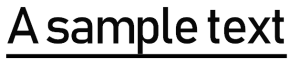
Base Positioning
The underline is drawn based on the following settings:
|
Setting |
Sample |
|
Baseline |
|
|
Half Descender |
|
|
Descender |
|

The position of the underline can also be changed by using the Offset setting. Thickness allows to set the strength of the underline in either relative (em) or absolute units.
Font Effects & Variables

Allows to modify fonts if they for example missing a bold or italic variant. When using variable fonts, some additional properties are shown here. These settings are unique for every single font.
Rendering

-
Method: Selects how to render the text.
-
Geometry: Renders the text as standard geometry with polygons. Selecting this option enables Geometry tab.
-
Razor: Renders the text as vector graphics on flat plane. Selecting this option enables Razor tab.
-
Bounding Box
Selects how bounding box should be calculated.
-
Typographic: Calculates bounding box based on logical metrics of the fonts used in the text.
-
Geometric: Calculates bounding box based on visually visible geometry of the glyphs.
-
Text Box: Uses the text box as the bounding box.
Razor
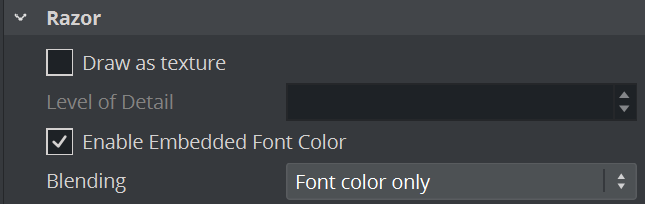
This tab is accessible only when the rendering method is set to Razor.
Draw as Texture
Draws the text with Razor method on a temporary offscreen texture before drawing it back into the scene. This option helps increase performance, in exchange for lower rendering quality of the text. The Level of Details option can be used to control how detailed the texture should be.
Enable Font Color
This option allows the usage of font color if the font being used in the text contain the OpenType CPAL and COLR table. The Blending option can be used to control how the font color interacts with the text color (set in the Basic Styling tab).
-
Font color only: Uses the color from the font only and ignores the text color.
-
Multiply: Uses the result of multiplication of RGBA value between the font color and the text color.
-
Text color only: Ignores the font color and use only the text color.
Tip: The Text color only option may not sound useful. However, when enabling font color, the shape of the glyph may change. You can use it when you want to the text as a shadow of another text with font color enabled, for example.
Geometry

This tab is accessible only when the rendering method is set to Geometry.
Extrusion
To use Extrusion with the Geometry text, Enable Extrusion. Choose how your Extrusion should look like and tweak it by setting the Depth, Size and the Shading Angle.
Visualise Backface also applies the Bevel on the usually hidden Backface of your text.
Debug
Helps us to track down issues with Text objects. Only used internally.