
Viz Artist
Version 3.10 | Published May 03, 2018 ©
Archive of Graphical Resources
The archive function exports graphical resources, such as one or several Scenes including fonts, images and so on to a file (archive) on disk. The archive will by convention have a ’.via’ filename extension.
The archive can be use for the safekeeping and/or for transferring of data to another Graphics Hub.
This section contains the following topics and procedures:
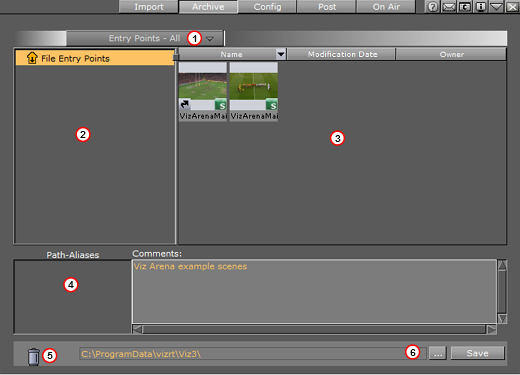
Archive Properties
-
Entry-Points (1): A pull-down menu is located just below the main menu and allows the selection of data types.
-
File Entry Points panel (2): The target area for the folders to archive.
-
Data Panel (3): The target area for resources to archive. Drag items such as Scenes, Fonts, Images etc. to this area to include them in the archive.
-
Use Path-Aliases (4): Select aliases that represent actual directories or paths. Path-Aliases must be defined in advanced (see Viz Configuration in the Viz Engine Administrator Guide). Aliases are typically short and descriptive names used as a convenient shortcut to directories which could have long or cumbersome names.
Use the Comments area to add descriptive comments about the archive. -
Trash-can (5): Remove items not needed to be archived.
-
Browse and select a file or specify an archive name (6) before pressing Save. The extension .via will be attached to the file name if not specified.
Entry points represent the main items in an archive. Other items in the archive are referenced and attached automatically to the archive.
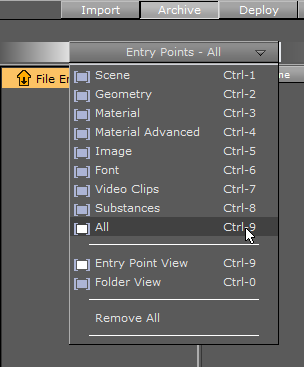
Entry-Points Menu
At the top of the archive view there is a pull-down menu enabling you to switch the way the content of your archive is displayed:
-
Scene to Video Clips: Only shows the items of the selected file type.
-
All: Shows items of all file types.
-
Entry Point View: Shows only entry points.
-
Folder View: Shows the folder hierarchy.
-
Remove All: Removes all items from the archive.
To Create an Archive
-
In the main menu, click Archive.
The Archive view is shown.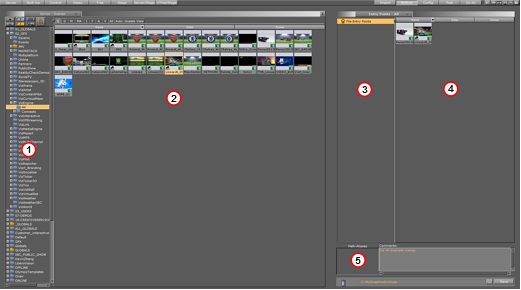
-
From the Server side (1), drag folders into the Archive view’s left panel (3) and files into the right panel (4).
-
If required, enter a comment in the comments area (5).
Note: Comments can be a maximum of 255 characters.
-
Either manually or by clicking the ellipsis button (
 ), enter a file path for the archive.
 -
After the file path, enter a file name for the archive.
-
Click the Save button.
Note: If navigating to a preferred location before adding the file name for the archive, Viz Artist will suggest DEFAULT.via.

IMPORTANT! When archiving a set of transition logic scenes in Viz Artist, the archive will not include the Geometries that are generated by Viz Template Wizard when creating a template for the control applications. It is therefore recommended to archive scenes intended for Viz Pilot by using Viz Pilot or Viz Template Wizard. If Viz Artist is used, the Geometries can be added manually.