Viz Artist
Version 3.10 | Published May 03, 2018 ©
Media Asset Manager
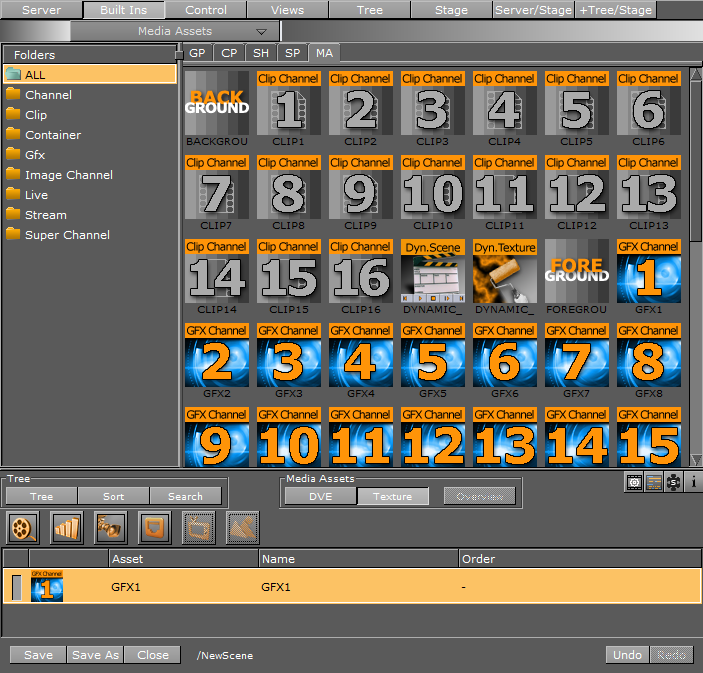
The Media Asset Manager is used to add and manipulate Media Assets. Media Assets can easily be added to a scene as either DVE or Texture (1) asset types, depending on the scene’s requirements. The asset type can also be changed through the Manager interface, from DVE to Texture or vice versa. The Media Assets panel also provides an overview of the different media assets in the scene. The media assets can be renamed within the scene according to your preferred naming convention, ideal for consistent identification.
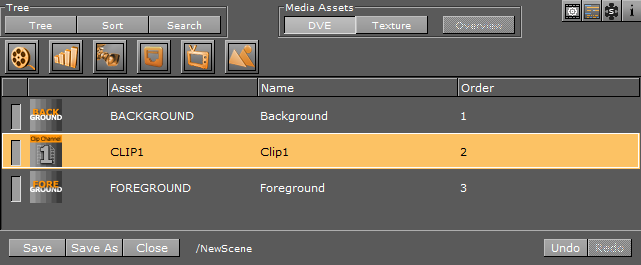
The Media Manager lets you set the rendering priority of Media Assets, by the way they are ordered. To change an asset's priority, drag it to a higher or lower position. The asset with the highest Order value is rendered on top, with declining Order values below it.
Tip: Hover the mouse pointer over any Clip, Live or Stream channel asset in the Media Asset Manager to display a tool-tip with the resolution for that asset. If the channel is set to inactive in the configuration, the tool-top displays INACTIVE.
This section contains the following topics:
Media Asset Overview
Use the Media Asset Overview to manage and access all the different types of media assets in use within your current scene. The Media Asset Overview shows if a media asset is in use in other scenes. When multiple scenes use the same media asset, the Media Asset Overview provides access to these scenes from within your current scene. This way, you can change properties of a media asset or scene that you load within the scene you are working on, without closing the current scene. The Media Asset Overview is not for container or hierarchy manipulation, it presents the media assets in your scene, and lets you to load these scenes. Switch back to the scene tree/hierarchy view by clicking the Tree button.
Tip: The Media Asset Overview window does not highlight containers when they are selected. Double click on a child node to load the respective scene.
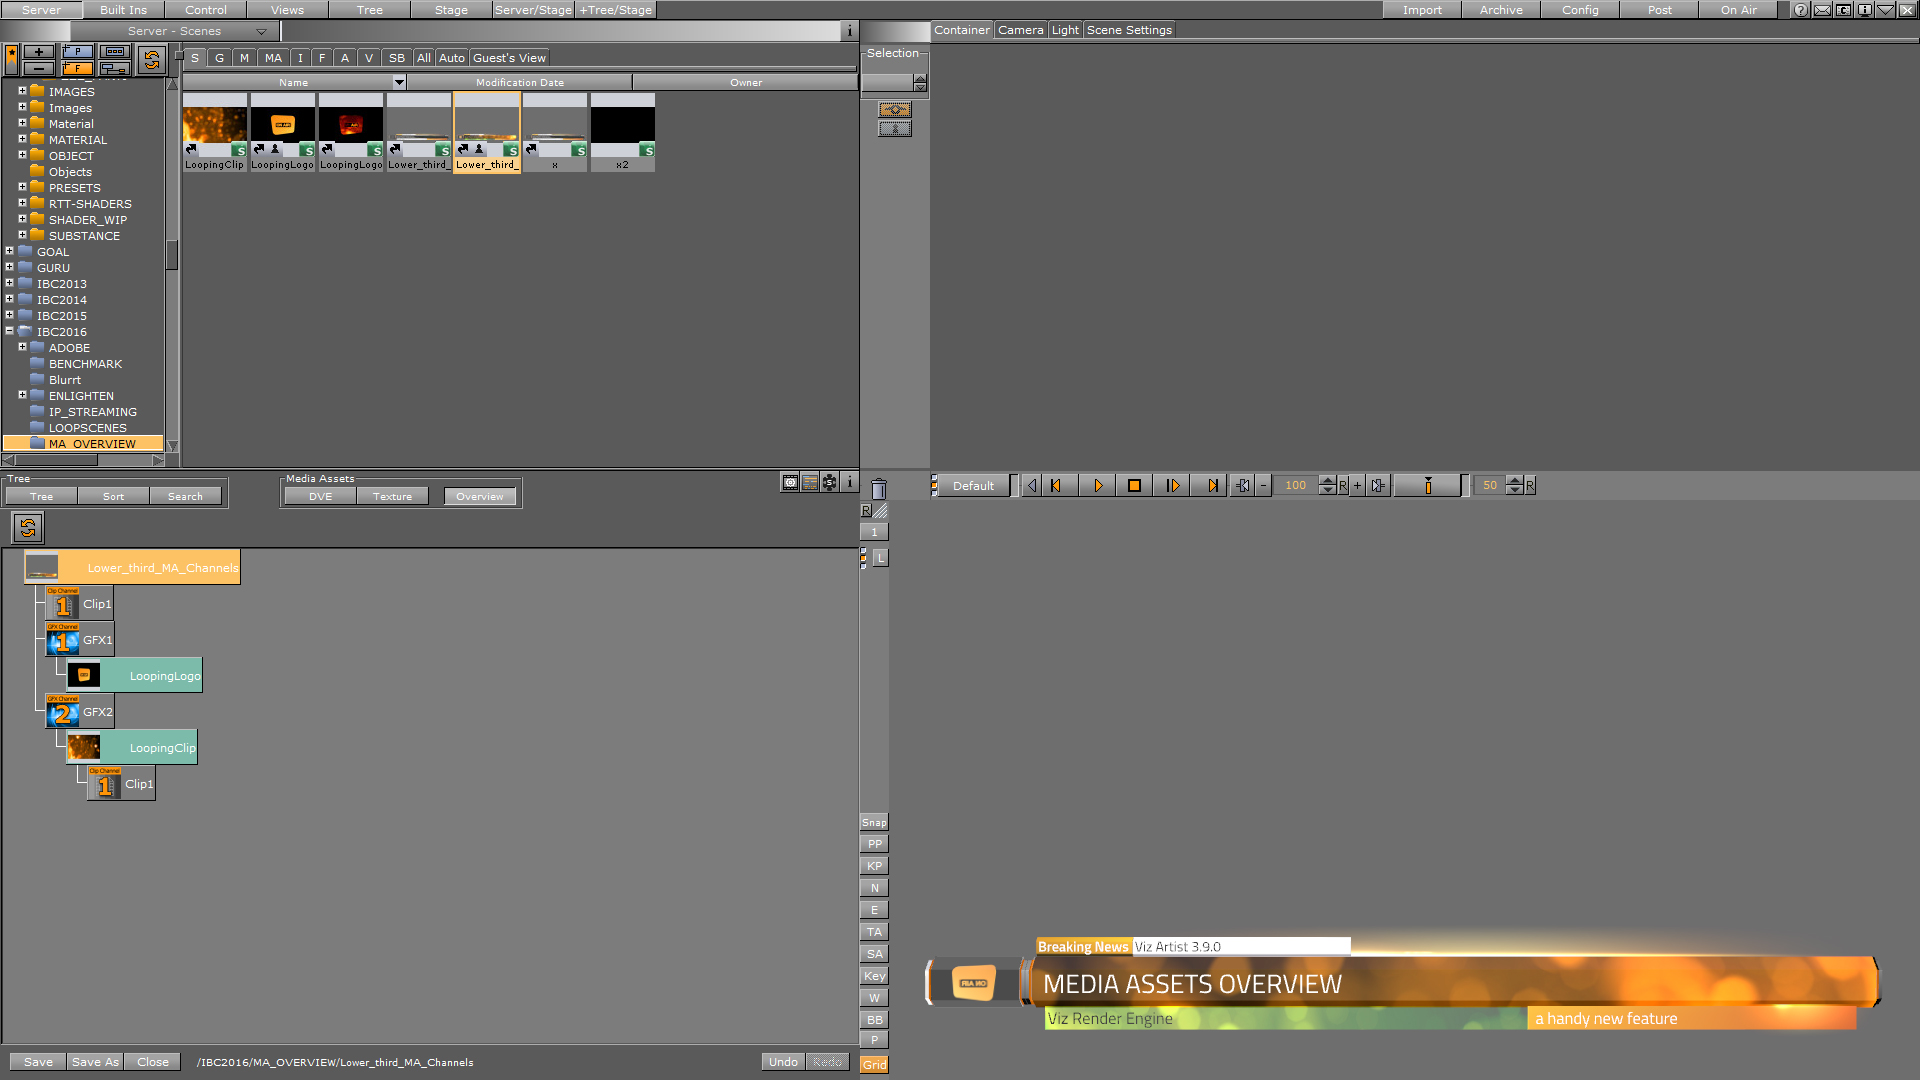
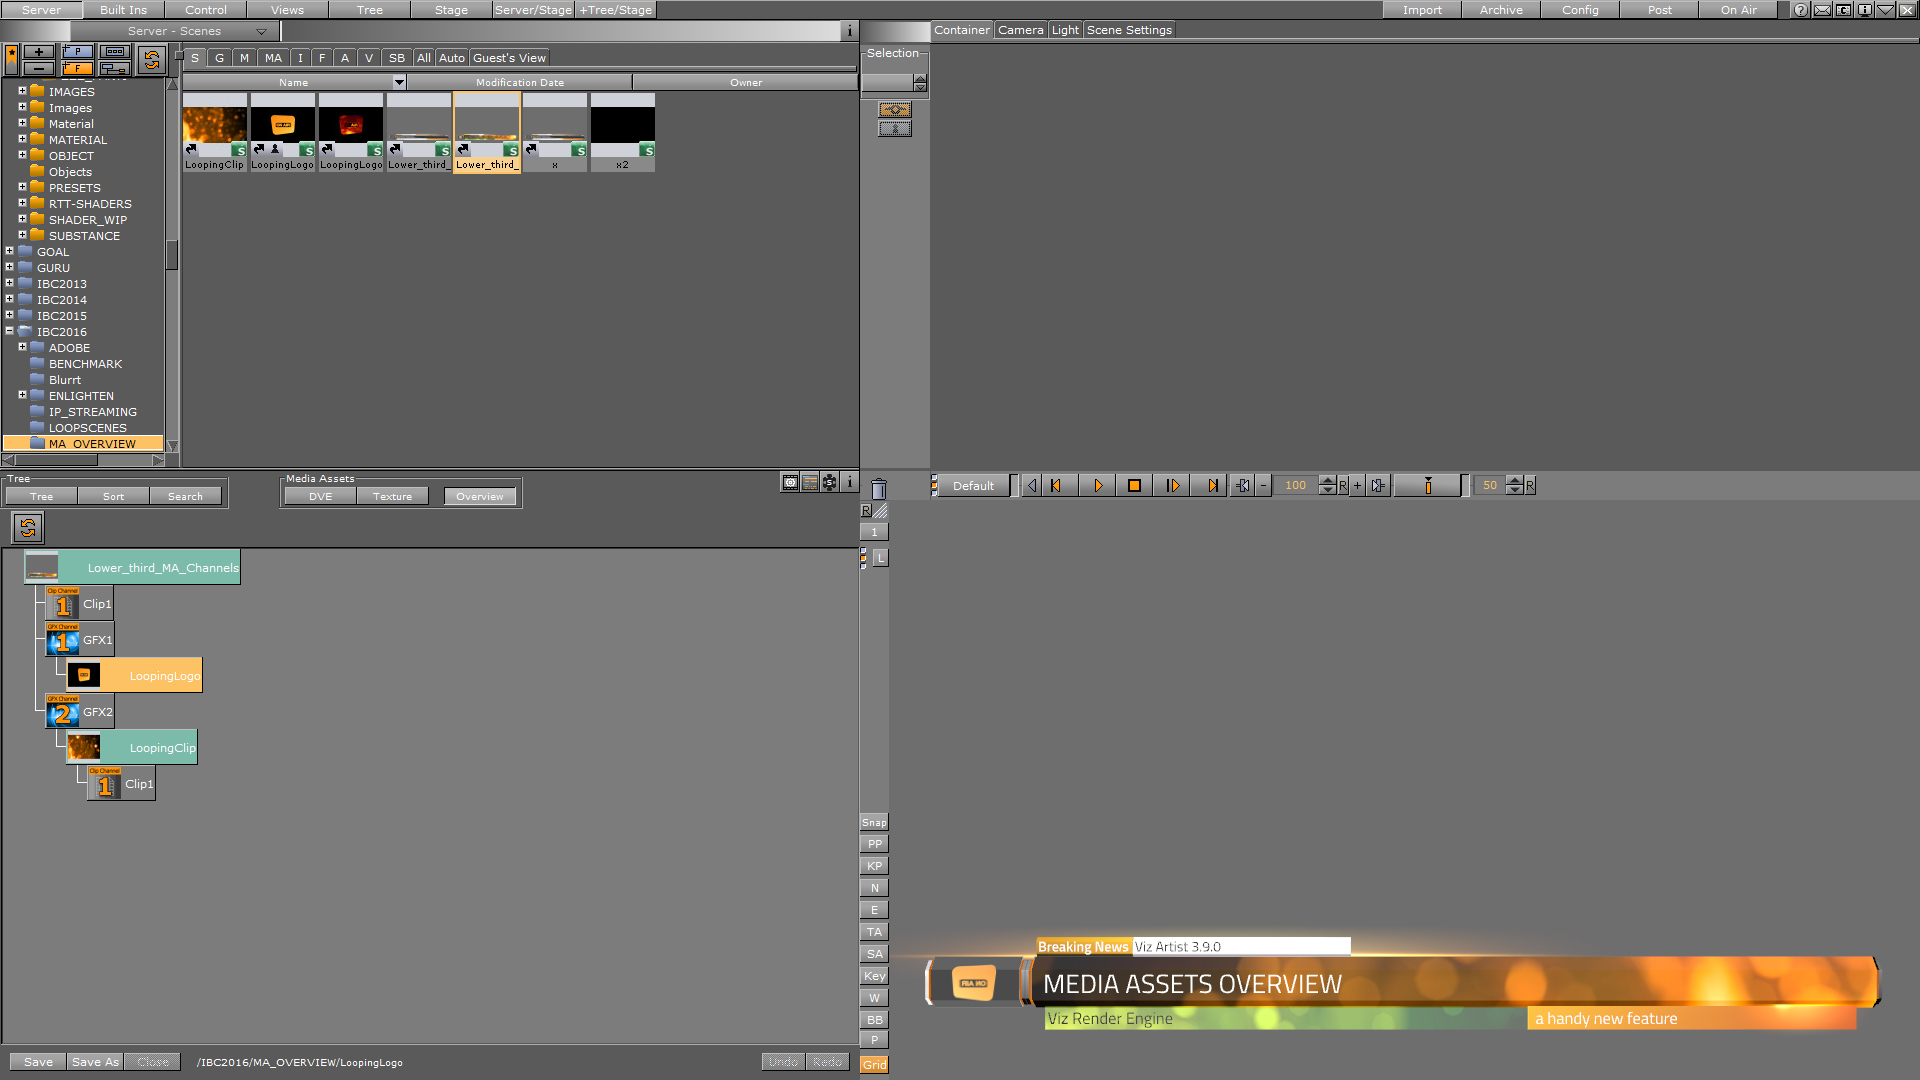
In the following example, a main scene containing a lower third uses multiple media assets. Within this main scene, we use media assets to load two other scenes: One with a looping clip, the other with a looping logo.
-
Click Overview to open the Media Asset Overview. Notice how the scene tree display changes, and provides an overview of which scenes are loaded. Here, the scene is using one clip channel and two GFX Channels. The child nodes of the GFX Channels shows the scene loaded in the respective GFX Channel:
-
Double click the child node of one of the GFX Channels to open the scene in the GFX Channel. A dialog lets you save the changes or close the scene without saving. The Overview button turns orange to indicate that you have loaded a different scene for manipulation.
-
This updates the Tree view of the scene, which now shows the scene tree of the scene inside the GFX Channel. However, the preview window still contains the main scene. This provides a convenient way to edit the content of different media assets, without closing the main scene.
-
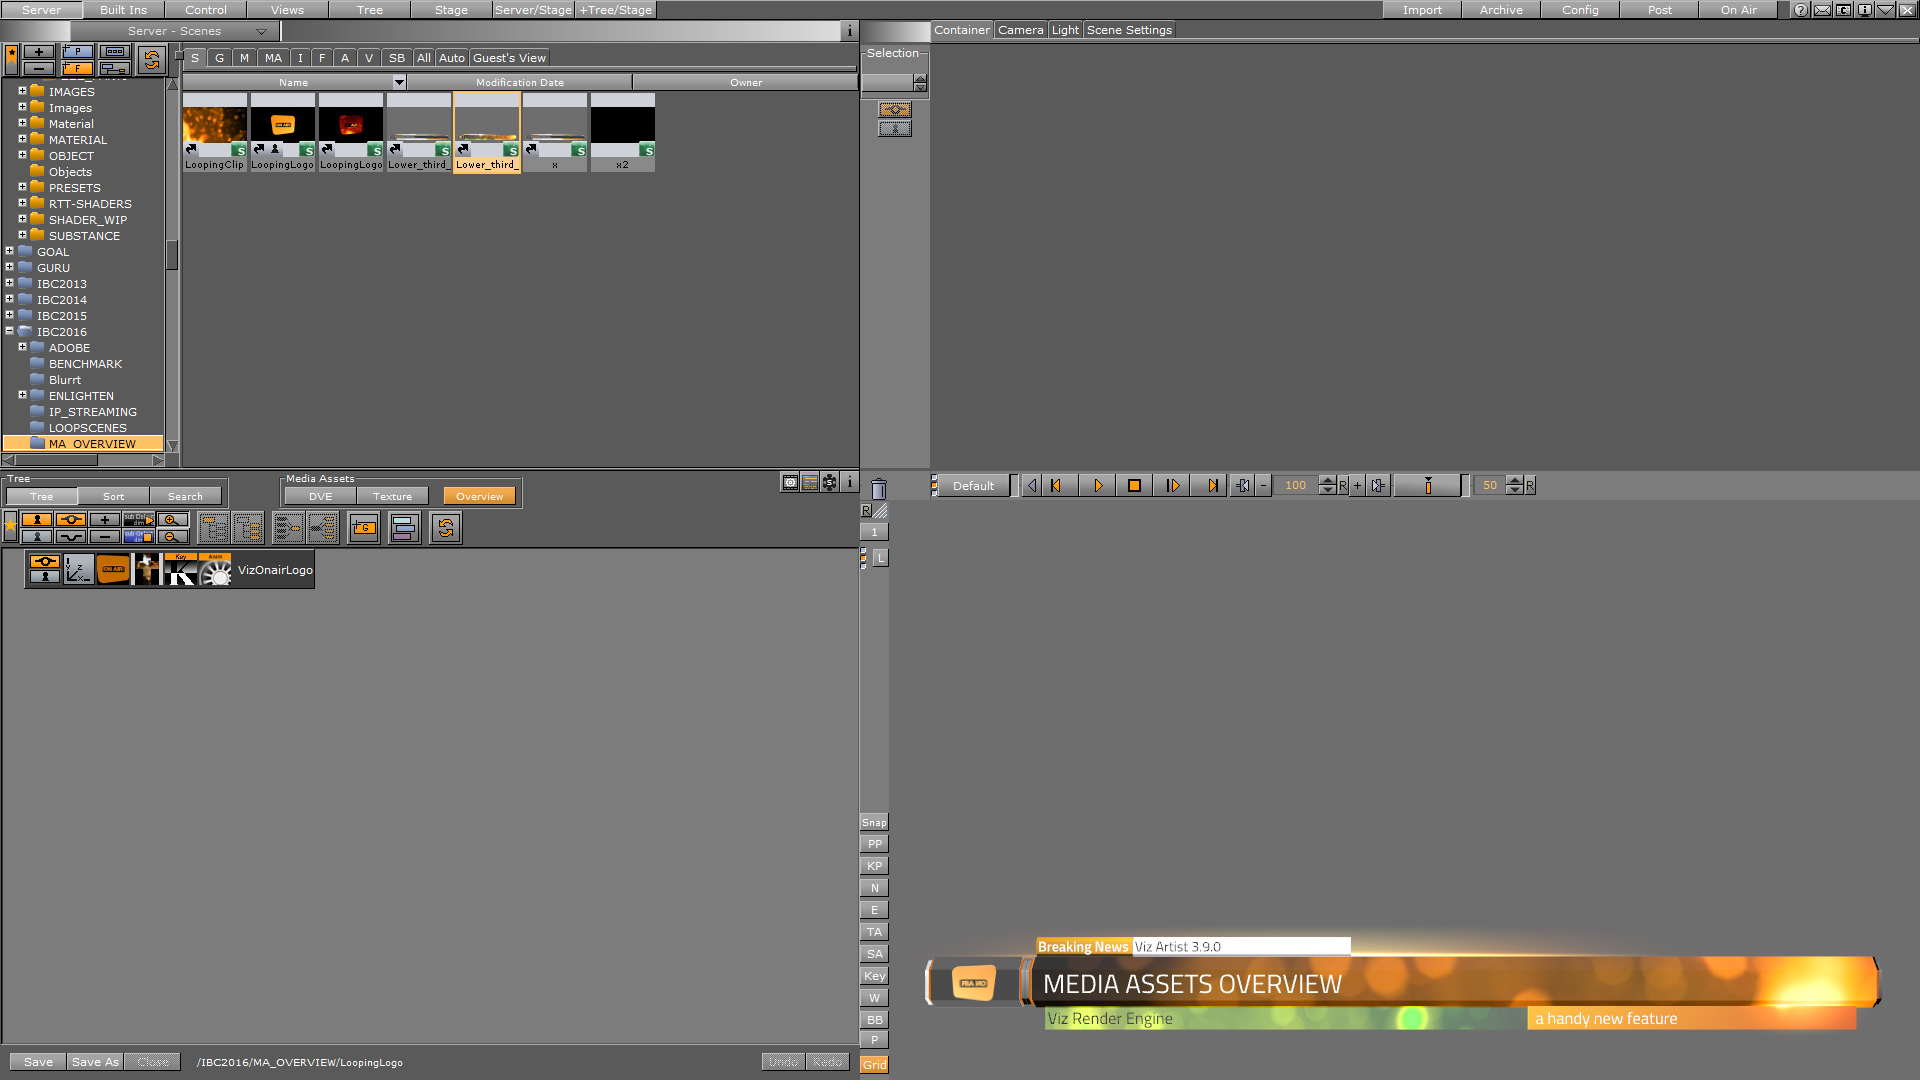
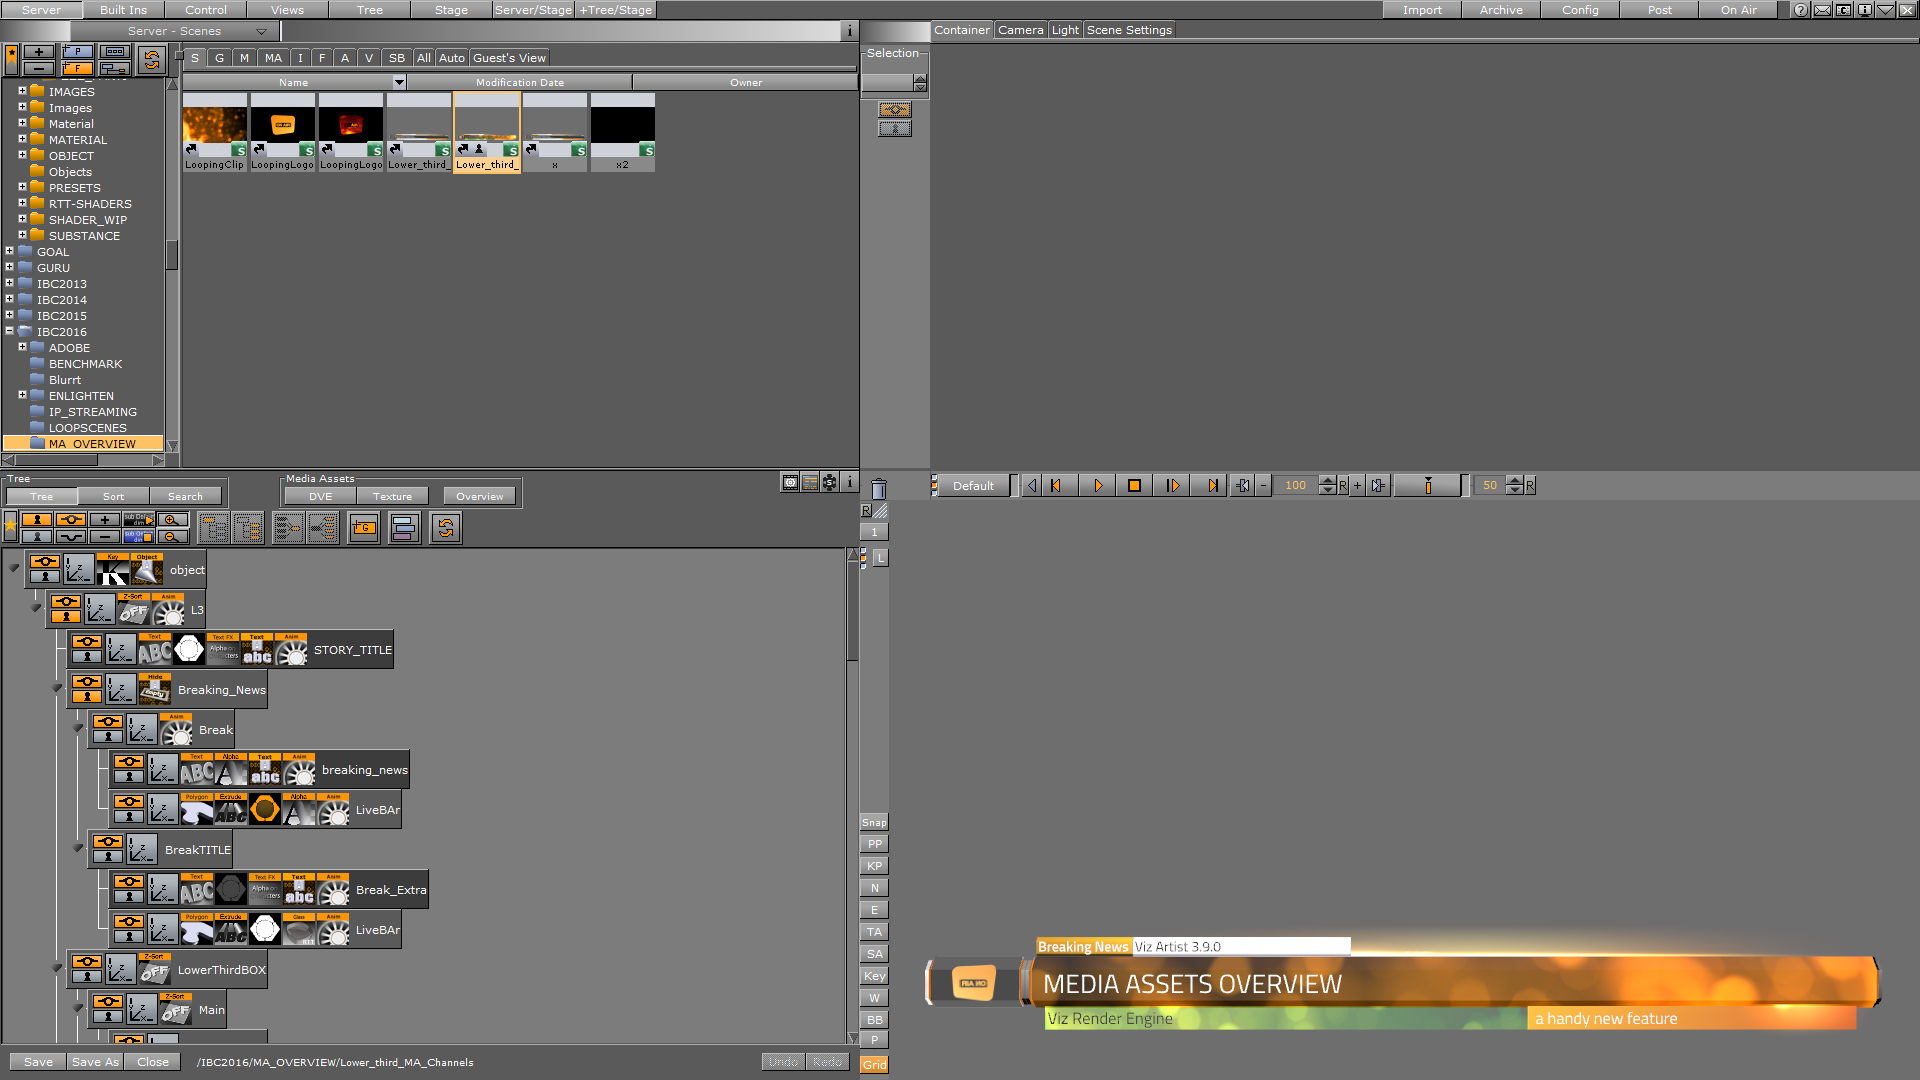
Going back to the Media Assets Overview, notice that the child node of the GFX Channel is orange. This indicates that this is the scene in your Tree view. Now, you can edit the contents of this scene through the Tree view, without closing the main scene.
-
Return to the main scene again by double clicking the root container (here: Lower_third_MA_Channels) at the top of the Media Assets Overview. This opens the main scene in the Tree view.
Media Assets Added as DVE
For detailed information see Media Asset Workflow.
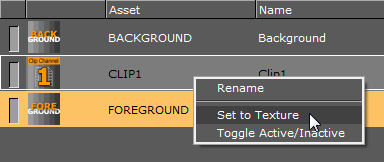
Right-click the Media Asset to open its context menu:
-
Rename: When a Scene contains multiple Media Assets, create a name for each Media Asset to make it easier to identify Media Assets.
-
Set to Texture: Set the Media Asset to Texture.
-
Toggle Active/Inactive: Set the Media Asset to Active or Inactive:
Tip: Media Assets can also be multi selected and set to Texture or made Active / Inactive.
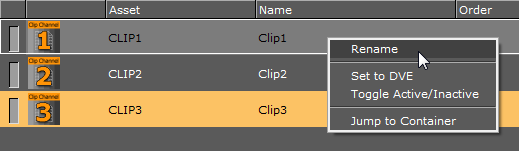
Media Assets Added as Texture
For detailed information see Media Asset Workflow.

Right-click the Media Asset to open its context menu:
-
Rename: When a Scene contains multiple Media Assets, create a name for each Media Asset to make it easier to identify Media Assets.
-
Set to DVE: Set the Media Asset to DVE.
-
Toggle Active/Inactive: Set the Media Asset to Active or Inactive.
-
Jump to Container: If the Media Asset has been added to a container, this switches to Tree View and selects the container holding the asset.
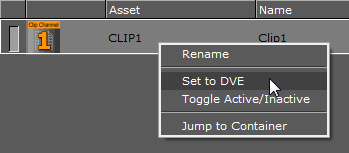
Tip: Media Assets can also be multi selected and set to DVE or made Active/Inactive.
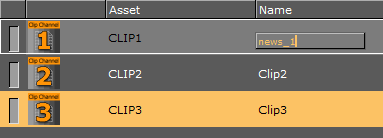
To Create a Name for a Media Asset
-
In the Media Asset Manager, either select the Media Asset and press F2, or right-click the asset and select Rename.
-
Enter the desired name for the Media Asset, and press Enter or click away from the asset to store the new name.