
Viz Artist
Version 3.10 | Published May 03, 2018 ©
Scene Editor Views
To get a better overview of an object, or objects, in a Scene, and to visualize their position in relation to lights and cameras, open the Scene Editor Views function.
To open the views panes, click on the Views button in the main menu.
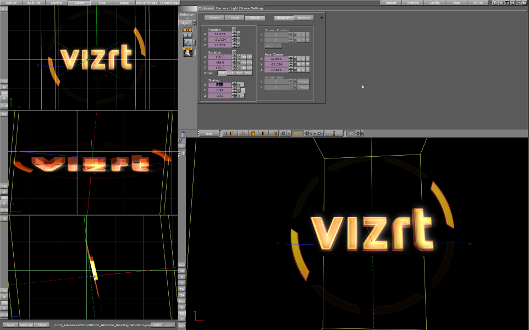
In principle, each of the three views has the same functionality, and lets you do the same operations on objects as is possible in the Scene Editor.
As well as the Scene Editor, the three side views can be set to view through one of the 16 editable cameras or through one of the six predefined orthogonal views (see Camera Selection). When set to one of the predefined orthogonal views this allows the position and direction of lights and cameras, to be modified.
If the Scene Editor is set to show one of the predefined orthogonal side views, there are some special shortcuts that may be used to pan and zoom:
-
Pan: Left-click, hold and drag in the background (not the objects).
-
Zoom: Hold down Z (zoom in) or X (zoom out) and draw a rectangle with the left button pressed, or position the cursor over a panel and press the Z or X keys multiple times to zoom in or out in a stationary position.
In the six predefined orthogonal views, the currently selected camera, and in addition all cameras that have been given the status Vis or inf, will show as symbols.
Click on a camera in the side views and that cameras focus is set in the Scene Editor, and handles to edit the position and direction will show (drag the handles to change position and direction).
The same functionality is available for lights (see Lights). The light currently selected and those lights which have their Vis status set to On, will be visible, as symbols. Their position and direction can be edited with the cursor.
See Also