
Viz Artist
Version 3.10 | Published May 03, 2018 ©
Control Pie
![]()
The Control Pie plug-in is able to bind a tab-field to values from PieSlice plug-ins.
Note: This plug-in is located in: Built Ins -> Container plug-ins -> Control
This section contains information on the following topics:
Control Pie Properties
-
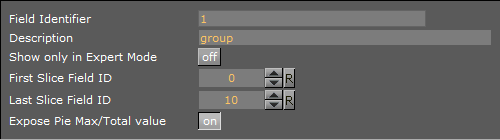
First slice ID: Sets the tab-field number for the first slice (the first container below the group that holds the ControlPie plug-in).
-
Last Slice ID: Sets the tab-field number for the last slice (the difference between Last and First should correspond to the total number of slices in the pie chart).
-
Expose Pie Max/Total Value: When enabled, the Viz Trio user can set Max value for a pie slice and Max/Total value for the whole pie chart.
See Also
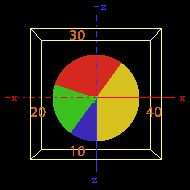
To Build a Pie Chart
-
Add a group container and name it, for instance “pie”. Add the presenter plug-in Pie Values and the control plug-in Control Pie to the group.
-
Add a Cylinder object as a Sub-Container to the group. Add material and the presenter plug-in Pie Slice to the new container. Name the container “slice” or similar.
-
The Cylinder object is not visible.
-
-
Open the Pie Values editor and increase the Value0 property a bit. The cylinder becomes visible and its size changes.
-
Open the Cylinder editor and set Centre to “Top”.
-
Open the Transformation Editor for the pie group, and rotate the pie group around 90 degrees on the X-axis to make the cylinder top face the camera.
-
Add a font as Sub-Container to the slice container, and add a material to make it visible against the background.
-
Open the Text Editor and set the horizontal justification to Centre. Open the Transformation Editor and rotate the font around the X-axis to -90 degrees and set Y position to 1.0.
-
Scale the font down a bit so it fits over the slice (for example 0.2).
-
On the slice container, open the PieSlice editor and set Control Text Values to a data type, e.g. None, Integer, Float or Formatted. By choosing Integer or Float the slice text will change, which shows the value for the slice.
-
In the pie slice editor, adjust the Text Offset to position the value label relative to the center of the pie (for example 70.0).
-
A single pie slice should be ready. Make the number of slices needed by making copies of the slice container and change their material so they can be differentiated from each other.
-
Set the different values in the PieValues editor to test.
See Also