
Viz Artist
Version 3.10 | Published May 03, 2018 ©
Fontstyle Editor
The Fontstyle Editor makes it possible to modify Fontstyle items in the Graphic Hub database. Individual editors are also available for Materials (Material Editor) and Images (Image Editor).
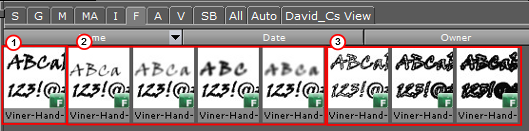
Viz Artist uses Fontstyles to show text in Scenes. When a Font is imported into the Graphic Hub database, Viz Artist imports the base font and creates up to eight different Fontstyles:
-
One Fontstyle which looks like the base font (1)
-
Up to four Fontstyles in different blur levels (2)
-
Up to three Fontstyles using only the outline of the base font (3)
The number of blur levels and outlines for each Fontstyle can be defined in the Font/Text Options section of the Viz Configuration (see the Viz Engine Administrator Guide). The Outline and Blurred Fontstyles can be hidden or shown in the Server Panel. Fontstyles can be modified through the use of Modifiers in the Fontstyle Editor. A Fontstyle can be modified to reflect a corporate identity, for example.
As Viz Artist uses an open interface for the plug-ins used as modifiers, almost any modifications can be applied to a Fontstyle. New Fontstyles can be created based on existing Fontstyles through the Save As... operation.

The Fontstyle Editor consists of:
-
Available Modifiers (1)
-
Properties of previewed text (2)
-
Fontstyle Viewer: Preview of the modifications (3)
-
Modifier parameters (4) (see Work with Modifiers)
Note: The properties help to illustrate how the modifications will look like in a Scene. Changes made on the right side of the editor, for example kerning and material, will not be saved with the Fontstyle. However, there is one exception from this rule. If the kerning between two fixed characters are modified, this is saved with the Fontstyle. To create a kerning between two fixed characters, use the keyboard shortcuts <Alt+Left Arrow>/<Alt+Right Arrow>.
Double-click the Fontstyle in the Server Panel to open it in the Fontstyle Editor. If a Fontstyle is referenced in a Scene, a dialog box will show to confirm the action or not.
Note: An item that is opened in an editor, is locked in the database.
This section contains information on the following topics:
Modifiers
Modifiers are used to change either the texture or the geometry of a Fontstyle, or both. A fixed set of modifiers come with a standard Viz Artist installation, but the system provides an open connection, so that additional modifiers can be obtained or created and added as plug-ins.
A modifier that is applied to a Fontstyle is automatically enabled. An enabled modifier implies that modifications will be reflected in the preview area. When adding multiple modifiers, the overview in the preview area can get confusing, and it may be necessary to disable one or more modifiers.
Available Modifiers
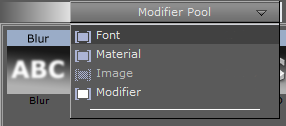
The available modifiers selected in from the Pool menu, which is positioned at the top left of the Fontstyle Editor.
-
Font: Show all the Fontstyles in the database.
-
Material: Show all the Materials in the database.
-
Image: Not available
-
Modifier: Show all available modifiers that can be applied to the Fontstyle.
Modifier Parameters
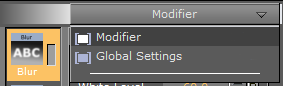
The Modifier parameters menu is positioned in the middle left part of the Fontstyle Editor.

-
Modifier: Shows the properties for the modifier that is selected.
Global settings in Fontstyle Editor
-
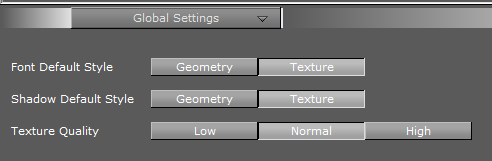
Global Settings: Shows various properties for the Fontstyle.
-
Font Default Style: Defines the font default style. Options are Geometry or Texture.
-
Shadow Default Style: Defines the shadow default style. Options are Geometry or Texture.
-
Texture Quality: Defines the quality of the texture. Options are Low, Normal, or High.
Note: The texture quality cannot be changed in a Text Editor.
-
Working with Modifiers
This section contains information on the following procedures and topics:
To Add a Modifier to a Fontstyle
-
Select Modifier from the Available Modifiers.
-
Drag the modifier from the list of available modifiers (top left) to the Modifier bar (bottom left, above the Trash Can).
-
Click the Save button.
To Edit a Modifier
-
Select the modifier in the Modifier bar (bottom left, above the Trash Can).
-
Define the values for the modifier.
-
Click the Save button.
To Enable/Disable a Modifier
-
Click the property switch next to the modifier icon in the Modifier bar.

To Remove a Modifier from a Fontstyle
-
Drag the modifier from the Modifier bar to the Trash Can.
-
Click the Save button.
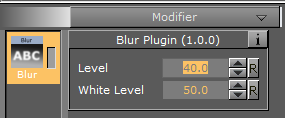
Blur

Use the Blur modifier to blur a Fontstyle in texture mode.
-
Level: Sets the blur level
-
White Level: Sets the white level in the blur effect
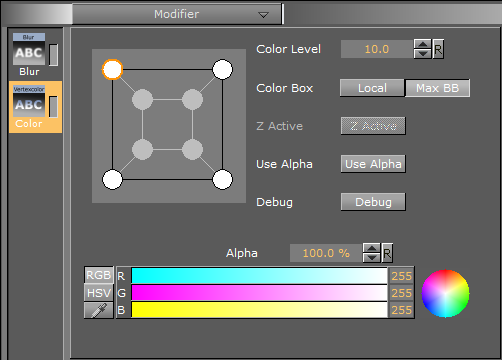
Color Per Vertex

Use the Color Per Vertex modifier to change the color of Fontstyles by applying it to the vertices.
The circles in the Color Per Vertex modifier represent the four corners of the Fontstyle text:
-
Click a circle to edit its color values
-
Click on a line that connects two circles to select both circles
-
Hold <Ctrl> and click to select multiple circles
-
Colors can also be dragged from one circle to another
-
Color Level: Defines how much color should be applied
-
Color Box:
-
Local: Applies the color to the vertices of every single character
-
Max BB: Applies the color to the vertices of the bounding box
-
-
Z Active: If the Extrude modifier is used in addition to Color Per Vertex, the colors can be changed both in the front and back. If no such modifier is applied, only the colors in the front can be edited
-
Use Alpha: Show where the color should include. For example if Alpha is enabled and the bottom right alpha is set to 0 the characters will fade out the bottom right
-
Debug: Draws the actual color points to see and understand how color changes effect the characters
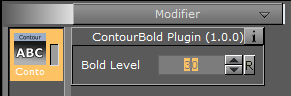
Contour Bold

Use the Contour Bold modifier to change the bold level of Fontstyles, which makes it show thicker or thinner.
-
Bold Level: Defines the bold level of a Fontstyle. The higher the value, the bolder the Fontstyle
Extrude

Use the Extrude modifier to extrude a 2D Fontstyle in the Z-axis, resulting in a 3D Fontstyle with front, back, and sides.
An extrusion can be explained simply as sweeping the 2D Fontstyle through space along its Z-axis. The sweeping path the outline of the Fontstyle follows during this process is used to create a surface.
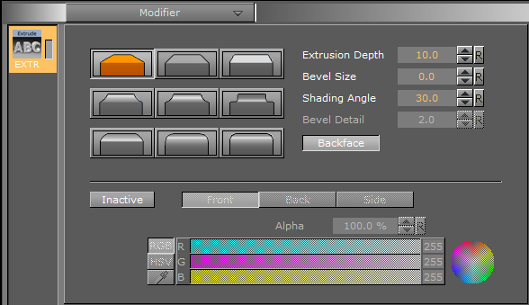
The nine icons marked with different bevel types are used to set the type of bevel on the Fontstyle.
-
Extrusion Depth: Defines the depth of the extrusion along the Z-axis.
-
Bevel Size: Defines the size of the bevel.
-
Shading Angle: Defines the angle of the shading function. To remove unevenness, increase the shading angle.
-
Bevel Detail: Defines the degree of bevel detail. The lower the value, the more detailed the bevel is constructed and the smaller tilings it is constructed from
Note: The Bevel Detail option is only available for certain bevel types.
-
Backface: Enables or disables visualization of the back face
-
Active/Inactive: If colors are set to Active, the front, back, and side colors of the Fontstyle can be applied
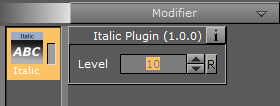
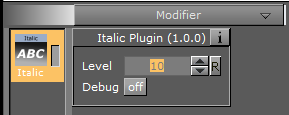
Italic

Use the Italic modifier to create a cursive appearance of a Fontstyle.
-
Level: Defines the cursive level of a Fontstyle. The higher the value, the more tilted is the text
Outline

Use the Outline modifier to create an outline of a Fontstyle.
-
Outline Level: Defines the width of the outline level. The higher the value, the bolder the outline of a Fontstyle.
-
Debug: Draws the actual color points to see and understand how color changes effect the characters.
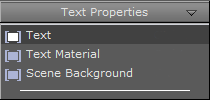
Preview Menu
The Preview menu is positioned at the top right of the Fontstyle Editor.
Note: Only the applied modifiers will be saved with the Fontstyle, not the settings described here. These settings are only used to give an overview of how the Fontstyle will look like when being used.
-
Text Properties: To preview how the Fontstyle will look like with different settings, for example kerning, orientation, and content, select Text Properties from the Preview menu and modify the properties.
-
Text Material: To preview how a Material would look if used on the Fontstyle, select Text Material from the Preview menu. In the Material Editor that opens, select a color.
Tip: To use a Material already from the database, select Material from the Available Modifiers in the Pool menu, select a Material and drag to the color icon in the Material Editor of the Fontstyle.
-
Scene Background: To preview how a background color would look like if used together with the Fontstyle, select Scene Background from the Preview menu, and then select a color. The scene background feature provides a better contrast, especially for drop shadows.
Fontstyle Viewer
To visualize how the Fontstyle will look like when being used in Scenes, the Fontstyle Viewer shows a preview of the Fontstyle.
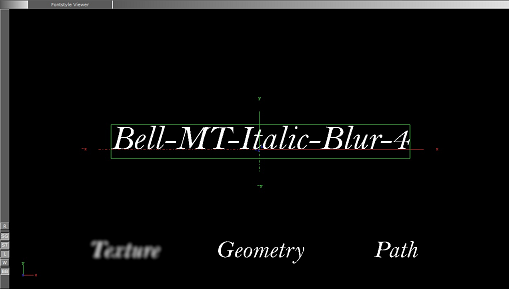
Additionally to the customizable text in the Fontstyle viewer, the words Texture, Geometry and Path will be shown. These words show the modifications performed to Texture, Geometry and/or Path, applied by the modifiers, without reflecting the changes in the properties. For example, if kerning is applied to the customizable text, this will not be reflected in the Texture, Geometry or Path texts.
The customizable text reflects either the Texture, Geometry or Path text type, which is selected in the Global Settings, available from the Modifier Parameters.
Fontstyle Viewer Menu
Right-click the Fontstyle Viewer to open a menu, similar to the menu in the Scene Editor (see Working with the Scene Editor).
Fontstyle Viewer Bar
At the left side of the Fontstyle Viewer is the Fontstyle Viewer bar. The bar contains the following icons:
-
 : Resets the position, rotation, and scaling for the three items in the Fontstyle viewer.
 -
 : Show/hide text with geometry style.
 -
 : Show/hide text with texture style.
 -
 : Enable/disable additional light.
 -
 : Switch on/off wire frame mode.
 -
 : Switch on/off the bounding box visualization.