Viz Artist
Version 3.10 | Published May 03, 2018 ©
Transformation Editor
Every Container in a Scene contains transformation properties. The transformation editor holds information about the most basic properties of a Container, such as position and rotation.
The transformation editor is also able to stick transformation properties to the container view. This feature allows Position, Rotation, Scaling and Axis Center parameters to stick to the Container view while opening other editors. This enables designers to adjust transformation properties while working on other objects (e.g. text, geometry).
This section contains information on the following topics and procedures:
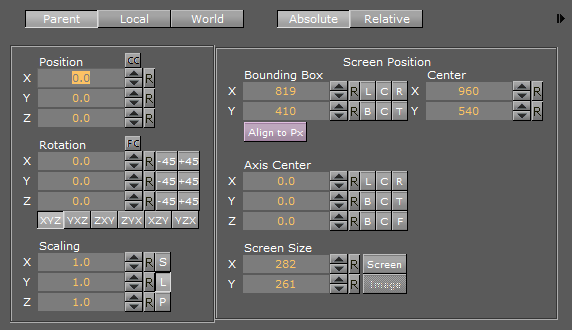
Transformation Editor Properties
-
Parent / Local / World: See Transformation Principles.
-
Absolute / Relative: See Transformation Principles.
-
Position: Sets the position of the object along the X, Y, and Z axis
-
CC (Center Camera): Clicking this button centers the Container to the camera
-
-
Rotation: Rotates the object according to the X, Y, and Z axes. With the bounding box option enabled, the rotation axes will be visible as three lines; X is red, Y is green, and Z is blue. To rotate in steps of 45 degrees, use the buttons labeled 45 and +45
-
FC (Face Camera): Clicking this button changes the rotation in such a way that the object faces the camera
-
Order: Clicking the order buttons sets the order of rotation the three angles X, Y, and Z, are applied to the Container. If multiple Containers are selected, the order buttons are disabled
-
-
Scaling: Before changing the scale values of the Container, make sure to set the preferred kind of scaling:
-
S (Single): Scales each axis by itself
-
L (Locked): Scales all axes at once, so that X, Y, and Z have the same value
-
P (Proportional): Scales all axes at once, so that the values remain proportional
-
-
Screen Position: Sets the screen position along the X and Y axis for images and some objects by specifying pixels instead of the regular positioning which do not use pixels as input values. The Screen Position option is only available if the image or object faces the camera. To achieve this, click the Face Camera button. When changing the Screen Position values, the values for the regular positioning will also change. Set the screen position to left, center, or right by clicking L, C, or R; or bottom, center, or top by clicking B, C, or T.
In Viz Artist, position calculations are always from the upper left corner and based on the current Z value for the Container and camera views. For design purposes, it may sometimes be desirable to position an objects center. Therefore, screen positioning of objects can be defined by either:-
Bounding Box: Define the position of the object upper left corner, or
-
Center: Define the position of the object center
Both are calculated from the upper left corner of the current view.Example: Setting an objects screen position Bounding Box values to X=0 and Y=0 will place the object in the upper left corner. Note however, that if the Z position changes the object will no longer align to the viewpoint corner. The pixel values must be set to zero again to reposition the image or object.
-
Align to Px (Pixel): When using the normal positioning editor to position an image/object that is facing the camera head on, it can occur that the image/object is off by fractions of a pixel. This can happen because of rounding errors in the screen size and face camera functions. This can produce visual artifacts in some cases on some graphics cards. When the image/object is not aligned to the screen pixels, Align to Px button turns red. Clicking the button adjusts the image/object to be moved to the nearest matching whole pixel.
-
-
Axis Center: Sets the axis origin of the object. The rotation axis of the object will be visible in the Scene Editor if the Bounding Box option is enabled.
-
The origin can be set to left, center, or right on the object’s X axis by clicking L, C, or R.
-
The origin can be set to bottom, center, or top on the object’s Y axis by clicking B, C, or T.
-
The origin can be set to back, center, or front on the object’s Z axis by clicking B, C, or F.
-
When a group is selected but certain Containers in it are not visible, clicking C with the middle mouse button will define the axis center only for those Containers in the group which are visible.
-
-
Screen Size: Makes it possible to scale an object/image based on pixels. The Screen Size option is only available if the object/image faces the camera. To achieve this, click the Face Camera button.
-
Screen: Scales the object/image to the size of the output format.
-
Image: Scales the image to the original pixel value.
-
-
Additional Information on the Selected Container
Click the Expand button to show this information to the right of the transformation editor. This information includes parent Containers plus all visible child Containers.-
Width, Height, and Depth: Shows the real size of the object in units (not pixels).
-
Containers: Shows the number of Containers that are selected. If the selected Container holds Sub-Containers, all Sub-Containers are counted in addition to the main Container. A Container that holds geometry is counted as two.
-
Vertices: Shows the number of vertices that are rendered within the selected Container, including the vertices in all Sub-Containers.
-
Primitives: Shows the number of primitives in the Container including the primitives in all Sub-Containers.
-
To Open the Transformation Editor
-
Click the Transformation icon on the Container, or
-
Select the Container from the Scene Tree, and then click the icon located on the left side of the Property panel.
To Stick Transformation Properties to the Container View
-
Click the button (1) next to the transformation editor button in the Container view.
Transformation Principles
Containers can be manipulated in several contexts:
-
Parent/Group: Refers to changes that can be made to the Container or Containers in its Parent or Group coordinate system.
Note: Multi selected objects: When more than one object is selected Group will show and a bounding box will cover all selected objects.
-
Local: Refers to changes that can be made to the Container in its local coordinate system.
-
World: Refers to changes that can be made to Containers in their world coordinate system.
-
Absolute: Refers to changes that can be made to Containers in absolute values.
-
Relative: Refers to changes that can be made to Containers relative to current values.
Multiple Select Transformation
With multiple select transformation, a group of Containers can be moved to a new position, which is determined by parameters of one selected Container in the selection. All Containers keep their relative position to the selected Container.
All changes made in the Transformation Editor will be on each selected Container:
-
Group is selected and M (multi) will show with the mouse pointer when inside the Transformation editor.
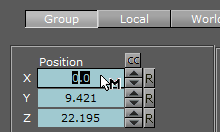
The selected Container and its position in the group is shown in the Selection panel (i.e. 1/6, 3/6).
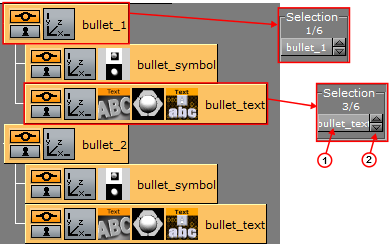
In the Container Editor use the up and down arrows (2) to scroll through the selected Containers, or click on the Container name (1) to show a context menu. Change the parameters, as required, for the selected Container.
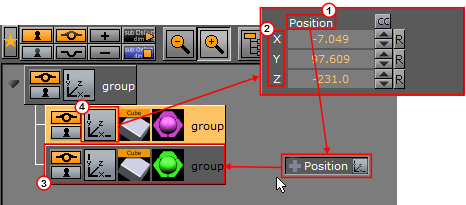
Copy Transformation Properties to Another Container
If a Container has certain settings, for example position or rotation, and another Container in the Scene should have identical settings, it is possible to drag transformation properties from one Container to the other.
All transformation properties can be copied to another Container, either the whole property (for example, Screen Size), or just one axis of a property (for example, X of Screen Position).
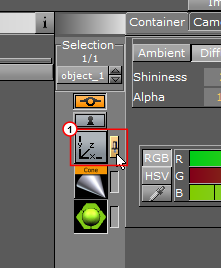
To Copy Transformation Properties to Another Container
-
Open the Transformation Editor of the source Container (4).
-
Drag the required property to the target Container (3):
-
Drag the whole property (1), or
-
Drag a sub-property (2 (X, Y, or Z))
Tip: Transformation properties can also be dropped on multiple Containers. Drag a selected property to the Scene Tree (aligned with a target Container). Hold the left-click and right-click to add the property to the target Container. Keep the left-click and repeat as required.
-
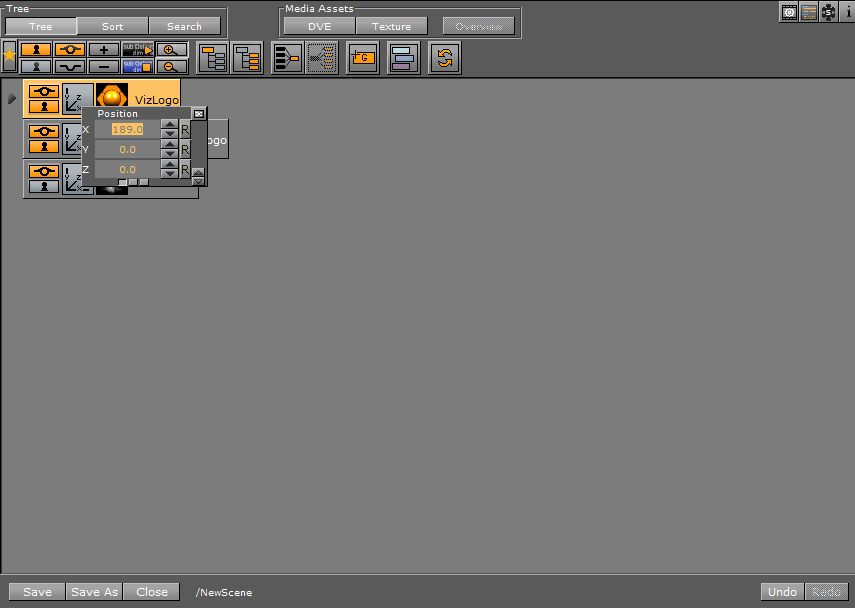
Quick Editor
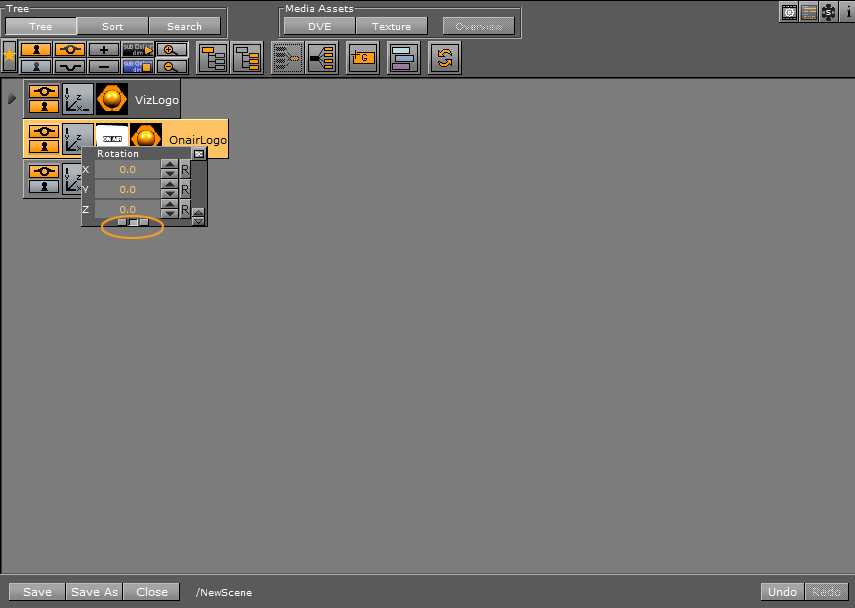
The Quick Edit menu lets you edit the transformation and material settings of a container within the scene tree, instead of in the Transformation Editor. Click the middle mouse button on the container's transformation or material icon to open the Quick Editor. When using the Quick Editor, you can still have the Transformation Editor open and an active object selected. The Quick Editor activates for the object you click on in the scene tree. When you select an object's transformation icon with the middle mouse button, the Quick Editor opens and overlays half your object, to indicate which object is selected.
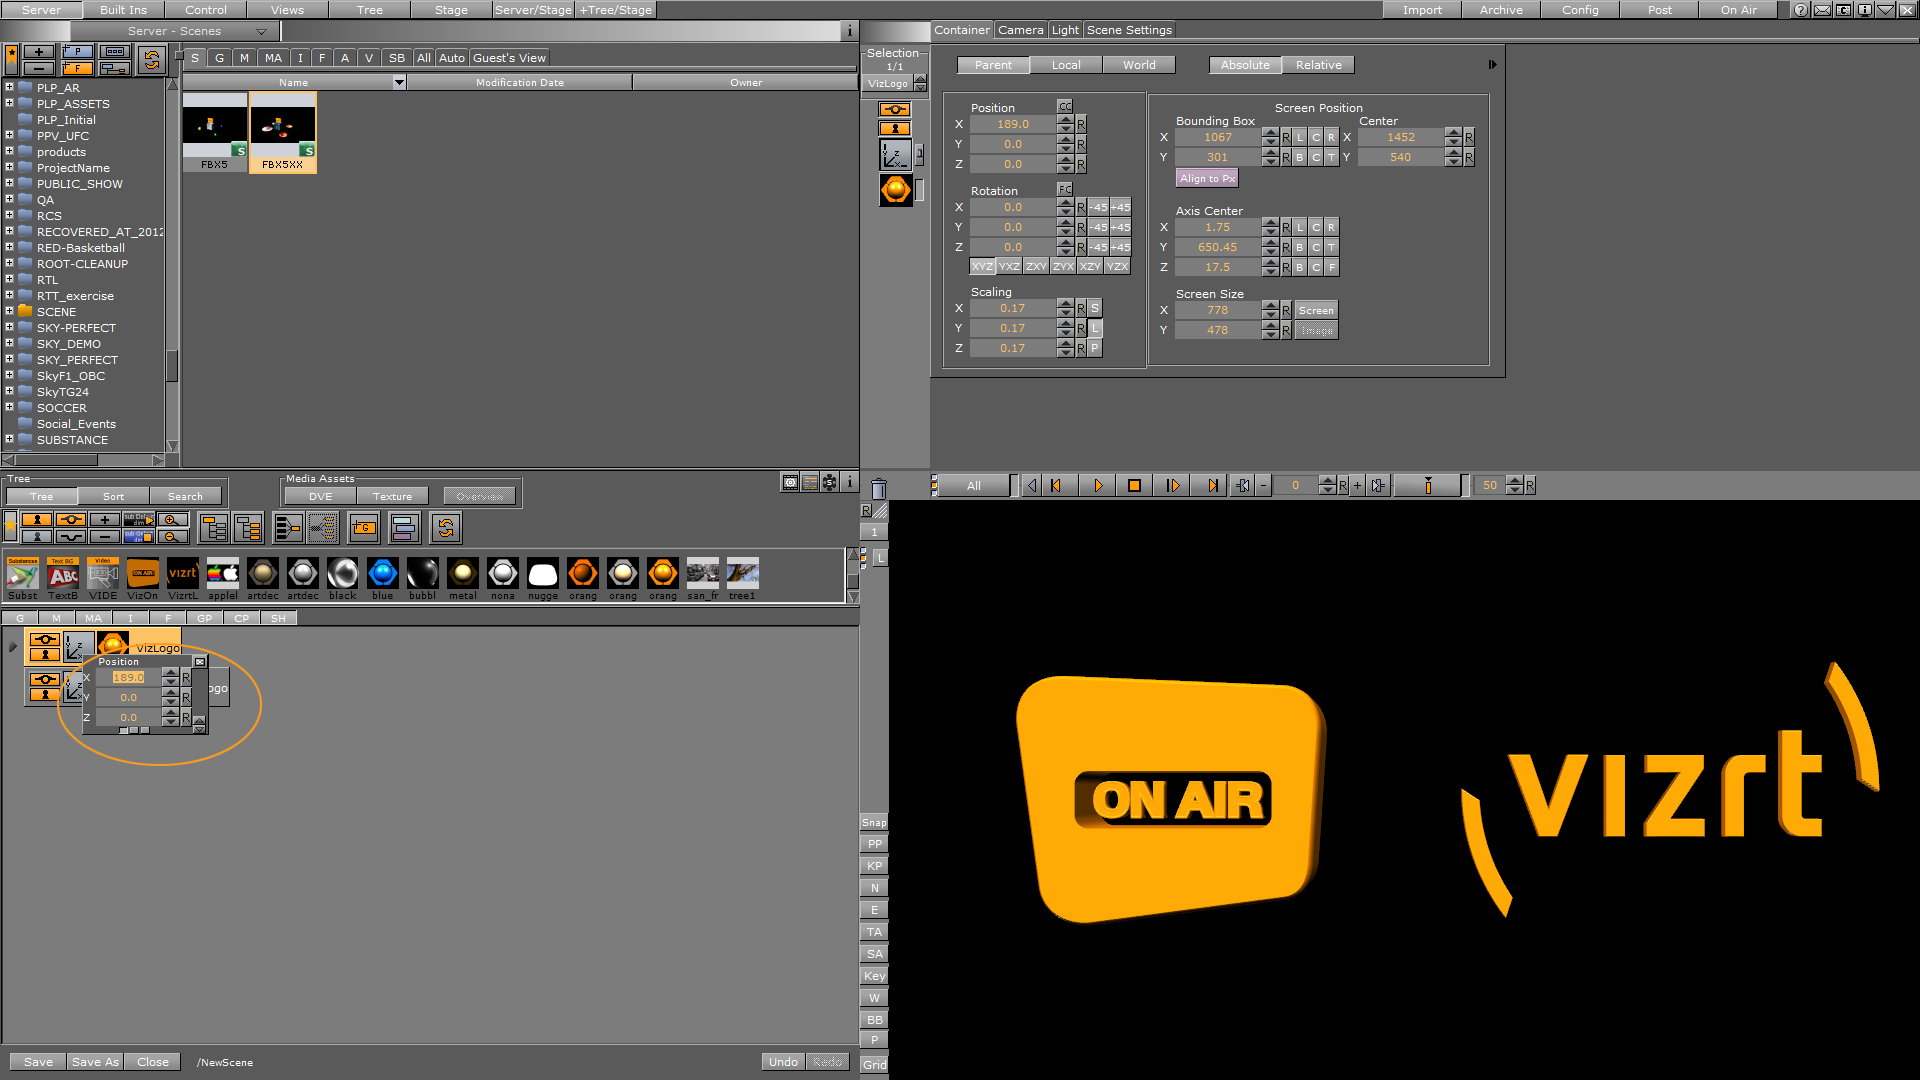
How to use the Quick Editor
-
Create or open a Viz scene with some objects where you can transform the material color and it's transformation values.
-
Click with your middle mouse button onto the geometry icon or the material icon. The Quick Editor pops up, overlaying half of the clicked object. In this example, the Quick Editor is for the VizLogo object:
-
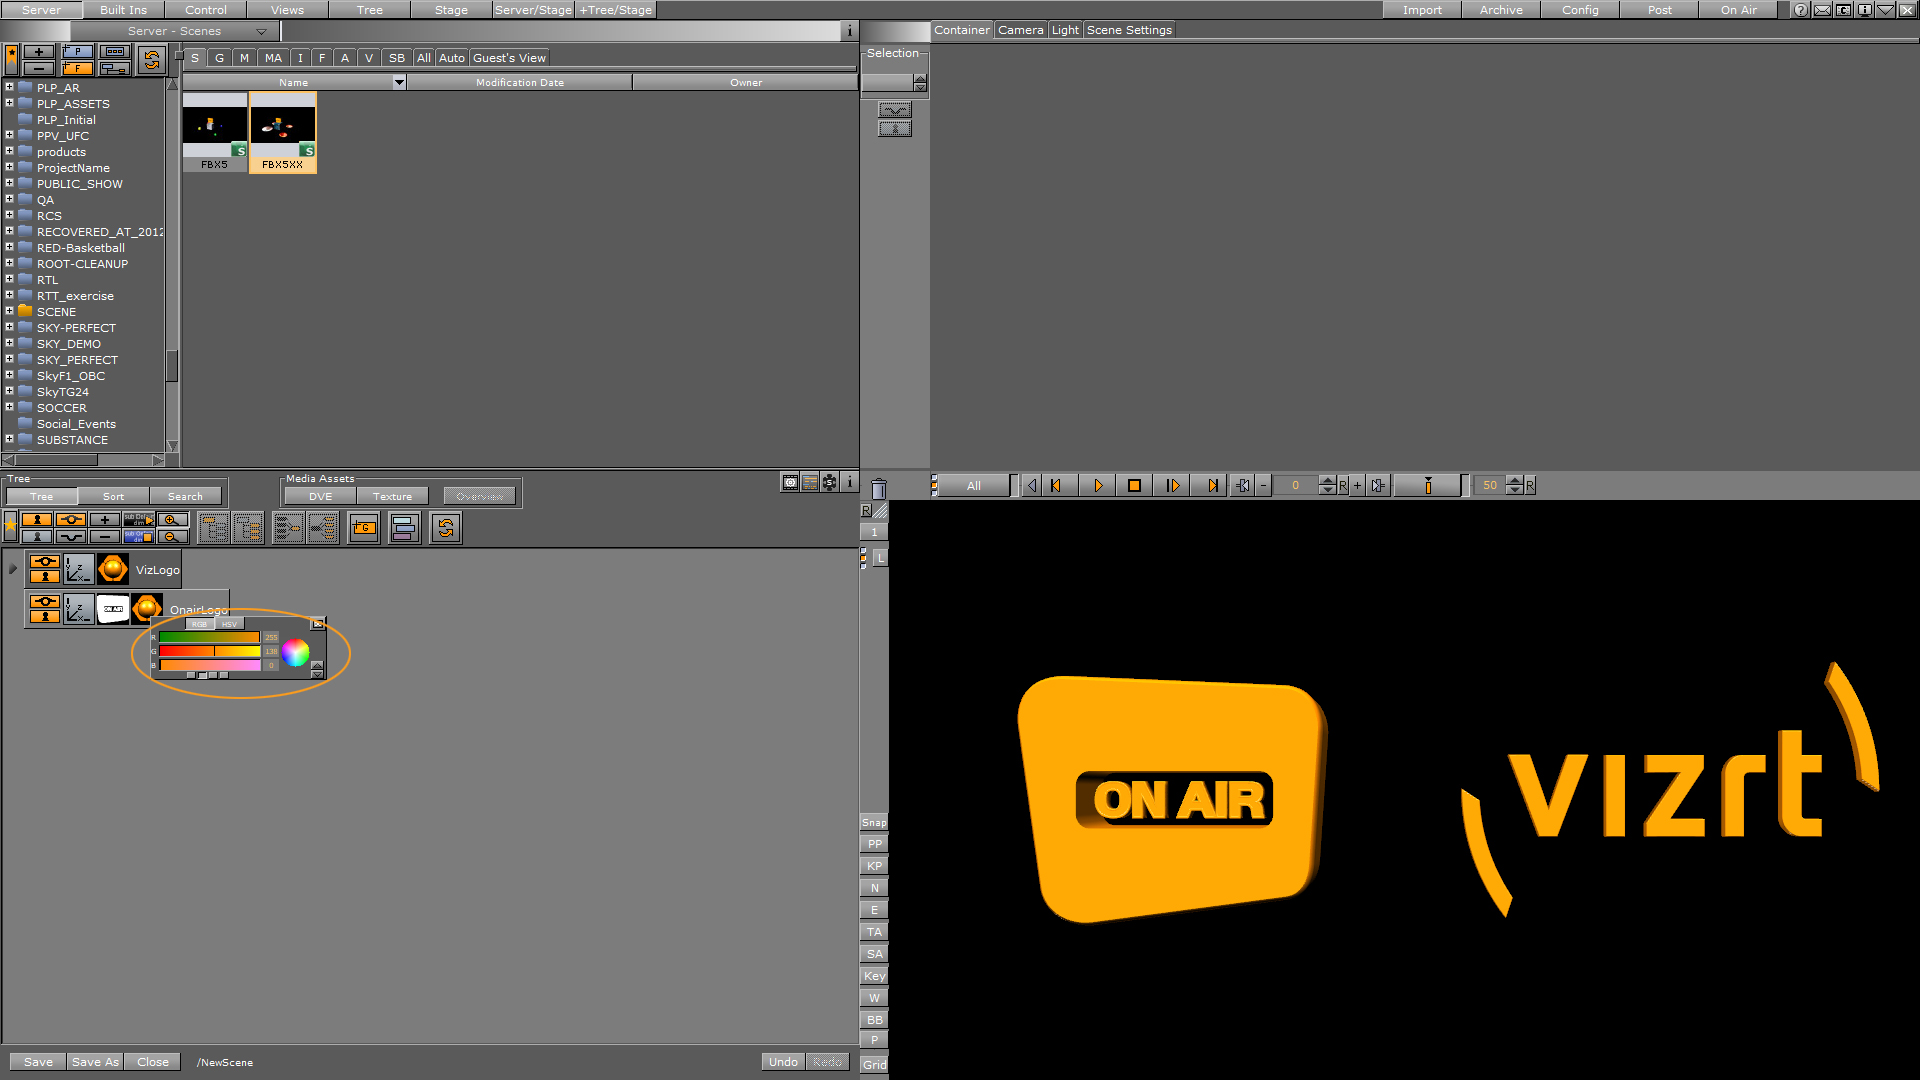
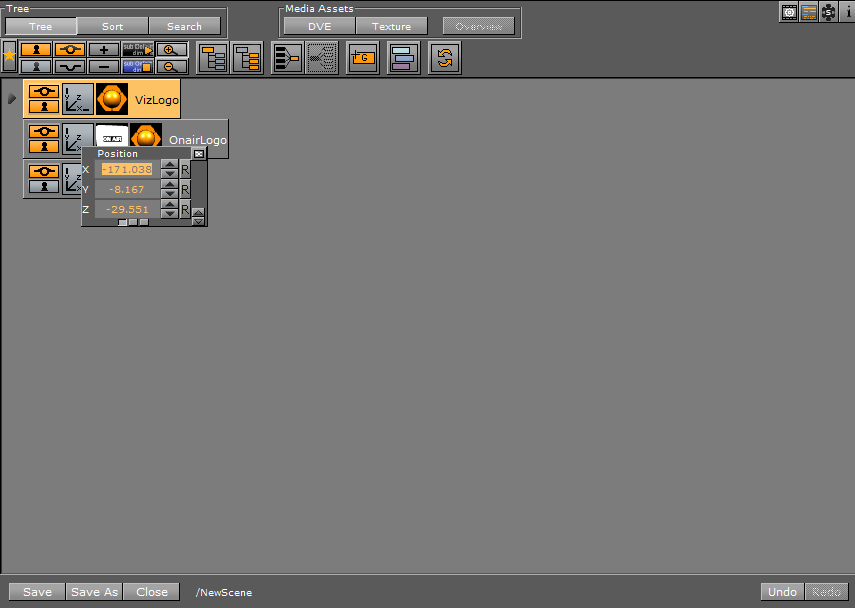
By clicking the middle mouse button on the transformation icon of another container, the selected container is still highlighted as active. The Quick Editor updates the transformation values of the container you clicked on, as seen with OnAirLogo in this example. You can also use Page Up and Page Down on your keyboard, or the small arrows on the left bottom of the Quick Editor, to switch between containers in the tree.
-
You can switch between the different transformation properties by clicking the small squares on the bottom of the Quick Editor, or by pressing CTRL+TAB.