Viz Artist
Version 3.10 | Published May 03, 2018 ©
Create a Basic Animation
This section details how to create a basic animation in a Scene.
Animation Task
Create a Scene with single a Cube Geometry. Animate the Cube to move right to left.
This use case contains the following procedures:
To Create the Basic Animation Scene
-
Create a new scene, and save it as Basic Animation.
-
Open the Basic Animation Scene.
-
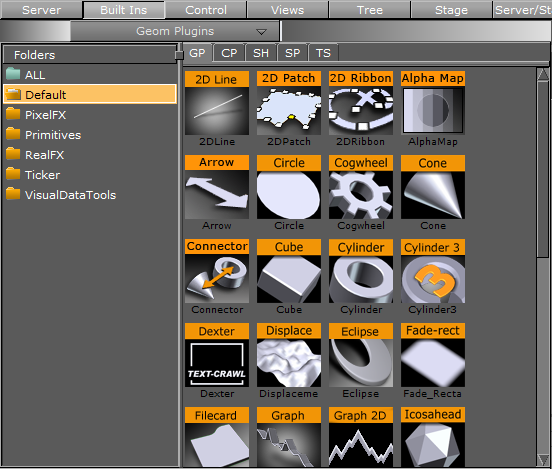
From the Main menu, click Built Ins.
-
Click the GP (Geometry plug-in) tab to show all available Geometry plug-ins.
-
In the Folders panel, click the Default folder.
-
Drag the Cube icon from the plug-in list into the Scene Tree.
-
Click Save.
-
The Scene Tree and Scene Editor should then look like this:

To Create a Basic Animation
-
Open the Basic Animation Scene.
-
Set the time-line, in the Scene Editor (1), to 0 (fields).
-
Create the first Key Frame:

-
Click on the Cube in the Scene Editor.
-
Click the Set Key Frame button (2) or press <Enter>. This sets the first Key Frame.
-
-
Create the second Key Frame:
-
In the Scene Editor, drag the Cube to the right, so that it shifts to a different position.
-
Click the Set Key Frame button or press <Enter>. This sets the second Key Frame.
Tip: Use the Transformation editor to move the Cube to precise position.
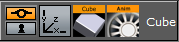
Note: On the Cube Container, in the scene tree, an Anim icon is automatically added, which shows that one or more properties on this Container has been animated.
-
-
Repeat from step 1 to create more movement, if required.
-
Click the Start Animation button (3) to see the created animation.
To Create Key Frames with the Transformation Editor
Use the Transformation editor to move the Cube to precise locations then set a Key Frame.
-
After the first Key Frame is set, click the
 (Transformation) icon on the Cube container in the scene tree.
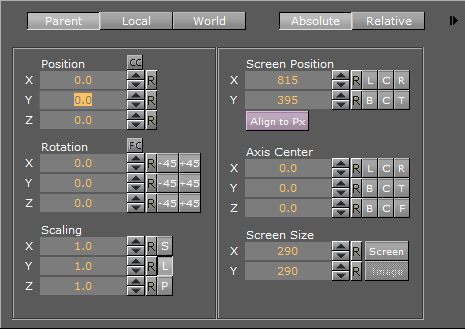
-
In the Transformation Editor, set Position X to 100.
-
Click the Set Key Frame button or press <Enter>. This sets the second Key Frame.
-
Move the Cube as required with the Position parameters to a new position. In the new position click the Set Key Frame button, or press <Enter>, to set a Key Frame.
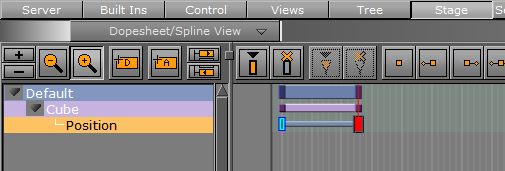
A representation of the animation can be seen in the Stage Tree Area.