
Viz Artist
Version 3.10 | Published May 03, 2018 ©
pxStack
![]()
Note: This plug-in is located in: Built Ins -> Container plug-ins -> pxColorWorks
This section contains information on the following topics:
To apply to the pxStack plug-in
-
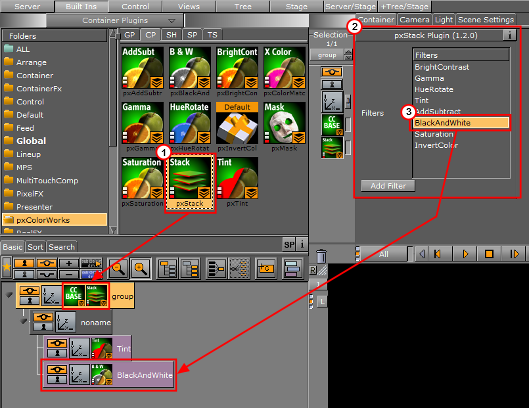
Add the pxStack plug-in to the required Container in the Scene Tree (1).
Note: When the pxStack plug-in is added to a Container, it automatically adds the pxCCBase plug-in to the same Container. Also, it automatically generates a child Container to host the color correction nodes you will define later.
-
Click the pxStack icon in the Container. The plug-inn editor (2) shows a list of color correction filters.
-
Click on a color correction filter.
-
Click Add Filter. The color correction filter is added as a new Container under the ‘noname’ Container in the Scene Tree (3). This termed as a ‘Color Correction Node’.
-
Repeat to add more color correction filters. Each color correction filter applied is added (stacked) as a new Color Correction Node under the ‘noname’ Container in the Scene Tree.
-
Click on a Color Correction Node to open its editor. Modify the effect properties as required.
-
Change the order of the stacked properties, as required.
IMPORTANT! Selected properties act in the sequence in which they are ordered in the scene tree.
Note: To disable or enable a Color Correction Node click the Locked/Unlock icon in the top left of the Container.
Note: To remove a color correction function, delete the plug-in.