
Viz Artist
Version 3.10 | Published May 03, 2018 ©
Working with the Scene Editor
Some transformation parameters of a Container or Containers in a Scene can be edited in the Scene Editor. Furthermore you can switch some properties of a container ON and OFF.
This section contains information of the following topics:
Scene Editor Functions
This section contains information of the following topics:
To Select/Deselect an Object
-
Left-click on an object, to select that object.
Note: This is done on a per pixel basis.
-
A bounding box shows which object has been selected (if the Bounding Box option is enabled, see Scene Editor Buttons).
-
The selected object’s Container is highlighted in the Scene Tree
-
Click on the Transformation editor in the Properties panel to show to the transformation properties.
-
-
Press Space or click in an empty space to deselect an object.
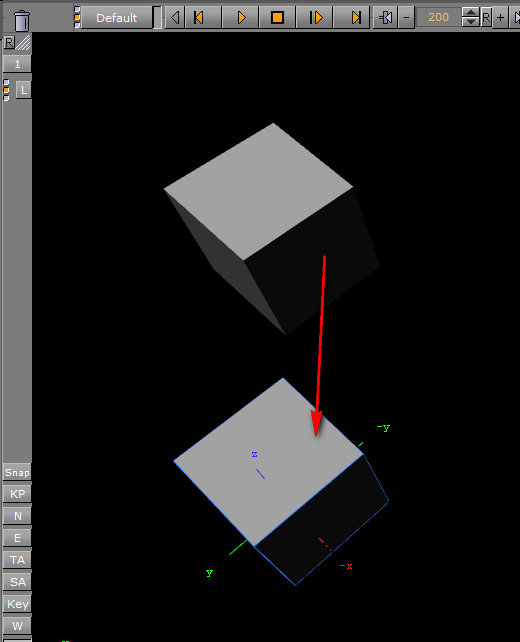
To Copy an Object
-
Hold <Ctrl> down and click and hold the left mouse button
-
Drag and drop the object to the new location.
To Move an Object
-
Left-click on an object, to select that object.
-
Keep the left button pressed and move the object within the Scene Editor.
-
Release the left button
To Move an Object on its Z Axis
-
Left-click on an object, to select that object.
-
Keep the left button pressed and press the right button. Hold both buttons down.
-
Move the mouse to the left or right to move selected object in its Z axis.
Multiple Objects Selected
When multiple objects are selected in the Scene Editor, the Transformation editor, in the Properties Panel, will show the editable properties for all selected objects.
All selected objects will be included in one bounding box (if the Bounding Box option is enabled, see Scene Editor Buttons). The selected object’s Containers are also highlighted in the Scene Tree.
Note: When more than one object is selected the Group coordinate system will show and a bounding box will cover all selected objects. When Local and World is selected a bounding box for each selected object will show.
To Select Multiple Objects
-
Hold the <Ctrl> key and click on each object to select, as required, or
-
Click in an empty space in the Scene Editor and drag around the required objects to select.
To Deselect Multiple Objects
-
Press the SPACE bar, or
-
Click in an empty space on the Scene Editor.
Note: Toggle the SPACE bar to select or deselect multiple objects.
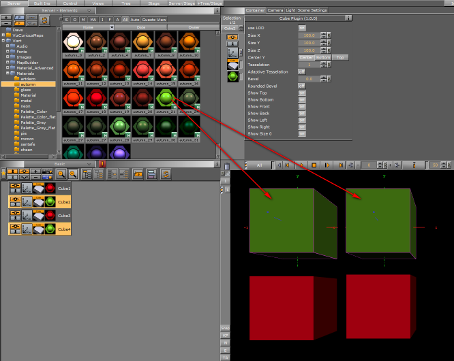
To Add Properties to Multi Selected Objects
-
Multi select the required objects.
-
From the Server Panel select the required item.
-
Drag the item to one of the selected objects.
-
All selected objects will take on the property.
To Move Multi Selected Objects
-
Select the required objects.
-
Left-click one of the objects to be moved and move the multi selected objects within the Scene Editor.
-
Release the left button.
To Move Multi Selected Objects on Their Z Axis
-
Select the required objects.
-
Left-click on one of the multi selected objects.
-
Keep the left button pressed and press the right button. Hold both buttons down.
-
Move the mouse to the left or right to move selected objects in its Z axis.
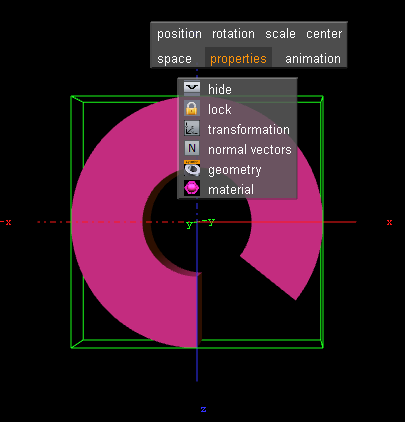
Scene Editor Context Menu
In the Scene Editor right-click and hold to open a context menu:
Note: The context menu selection is available on a single Container or multiple Containers.
-
Position: Switches into the position mode.
-
Rotation: Switches into the rotation mode.
-
Scale: Switches into scale mode.
-
Center: Switches into center editing mode.
-
Space: Switches between coordinate systems:
-
Parent/Group: Refers to changes that can be made to the Container or Containers in its Parent or Group coordinate system.
-
Local: Refers to changes that can be made to the container in its local coordinate system.
-
World: Refers to changes that can be made to containers in their world coordinate system.
Note: Multi selected objects: When more than one object is selected Group will show and a bounding box will cover all selected objects. When Local and World is selected a bounding box for each selected object will show.
-
-
Properties (only applicable if a Container is selected):
-
Hide/Show: Hide or show the Container in the Scene Editor.
-
Lock/Unlock: Lock and unlock the container. When locked the Container cannot be modified in the Scene Editor.
-
Transformation: Opens the transformation editor for the Container.
-
Normal vectors: Toggle the display of the normal vectors at the bottom of the properties you will find a list of all properties applied to the container with the possibility to switch them on and off.
-
Material: Select enlighted or colored.
-
Any other properties of the container can set to on and off (except materials).
-
-
Animation: Shows the animation path.
This section contains information of the following topics:
To Select an Option from the Context Menu
-
Right-click and hold.
-
Move the cursor to the required option.
-
Release to select.
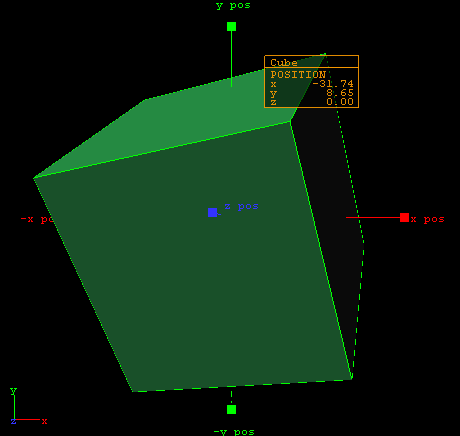
To Change an Object’s Position
-
Select an object.
-
Right-click the object and select position from the context menu.
-
Grab and drag a handle.
The container will follow the movement along the axes shown in the selected camera view. During this operation a status window is shown, giving you information about the position.
To Rotate an Object

-
Right-click to open the context menu.
-
Select rotation.
-
Drag the handles side ways to rotate on all the axes.
To Scale an Object

-
Right-click to open the context menu
-
Select scale.
-
Drag the handles to scale the object.
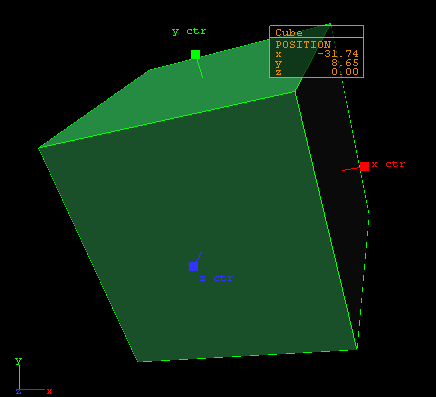
To Move the Axis Center of an Object
-
Right-click to open the context menu
-
Select center.
This will show the axis of the selected container with handles on their ends. -
Grab one of the handles and change the center position by dragging them around the Scene Editor.
See Also